Let’s put together a jigsaw puzzle!
Well, we have 24 of NERO‘s puzzle pieces in the bag, which means there are 24 to go. The second half of the NERO collectibles guide features The Hospital and The Desert.
No sense wasting any time; let’s jump right into it. If you don’t know the drill, part one of the guide has all the details.
Chapter Three: The Hospital

Piece 1: This chapter’s first piece is down the stairs at the beginning. It’s right next to the text “He needs his mom. He needs comforting.”

Piece 2: This is the first collectible in the game that NERO really makes you work for. It’s locked behind a door that can only be opened by solving a puzzle. This room’s off to the right after entering the hospital. The puzzle is completed by lining up the three holes in the bookshelf and throwing a light orb at the activation switch.

Piece 3: Now that we’re properly in the hospital, we see that there are a ton of optional rooms to go into, and even multiple floors. We’ll tackle everything on the ground floor first before moving upstairs. Keep an eye out for signs denoting rooms, as it’ll help you find the right place for collectibles.
The third piece is pretty simple. It’s in the left side of the restaurant. The restaurant is right by the words “Work needs me. We have bills to pay.”

Piece 4: Move past the open courtyard to find a receptionist’s desk. The fourth piece is behind it, by the phrase “There is nothing, nothing left to be done. What’s the point?”

Piece 5: Staying on the lower level, you’ll find a room marked “Pharmacy” which is near “I try to be collected, to not cry when he looks at me for strength.” Piece number five is in the pharmacy.

Piece 6: This one’s in the men’s bathroom, which is a bit past “I try to be collected, to not cry when he looks at me for strength.”

Piece 7: Now we’ve cleared out the ground floor and can move upstairs. I took the stairs by the restaurant, but there are many paths leading up. The next collectible is sort of near the text “Tell David not to fear, I will be there waiting for him in a better place.” But, it’s kind of off on its own without anything too describable nearby it.

Piece 8: Find the room marked “Women’s Ward” and move through it to find the eighth piece.

Piece 9: Here’s another that requires some work. This one’s also in the Women’s Ward, and it’s locked behind another door. Solve the puzzle to be granted access to the ninth piece.

Piece 10: Still on the upper floor, there’s a room called “Supervised Observation” that houses this piece.

Piece 11: Make your way around the upstairs to the Men’s Ward. Work your way through here to find a side room with the penultimate piece of the puzzle.

Piece 12: After opening the gates, go down the stairs to find the final piece resting in the room that also contains the chapter’s final puzzle.
Chapter Four: The Desert

Piece 1: At the beginning of the level, there’s an anchor made of rock to the right. The first piece is up against it.

Piece 2: Continuing down the path from the rock anchor, veer a bit to the left to find this piece in plain sight across from the giant glowing artifact.

Piece 3: Now get close to the artifact, as the third piece is right alongside it. It’s near the text “I never meant for any of this to happen. I’m so sorry.”

Piece 4: Moving forward, there are some monkey statues that are covered in moss. The next piece of the puzzle is right in front of the central one.

Piece 5: You’ll eventually come across the words “It’s all my fault. I should’ve seen it coming.” The fifth piece is a bit beyond that down a short path to the left.

Piece 6: You don’t have to go far to get to the next collectible. It’s just beyond the fifth one, and it’s in between the trees with glowing cracks in their branches.

Piece 7: This one has quite the picturesque view! It’s on the cliffside immediately behind “I could have done better. I should have done better.”

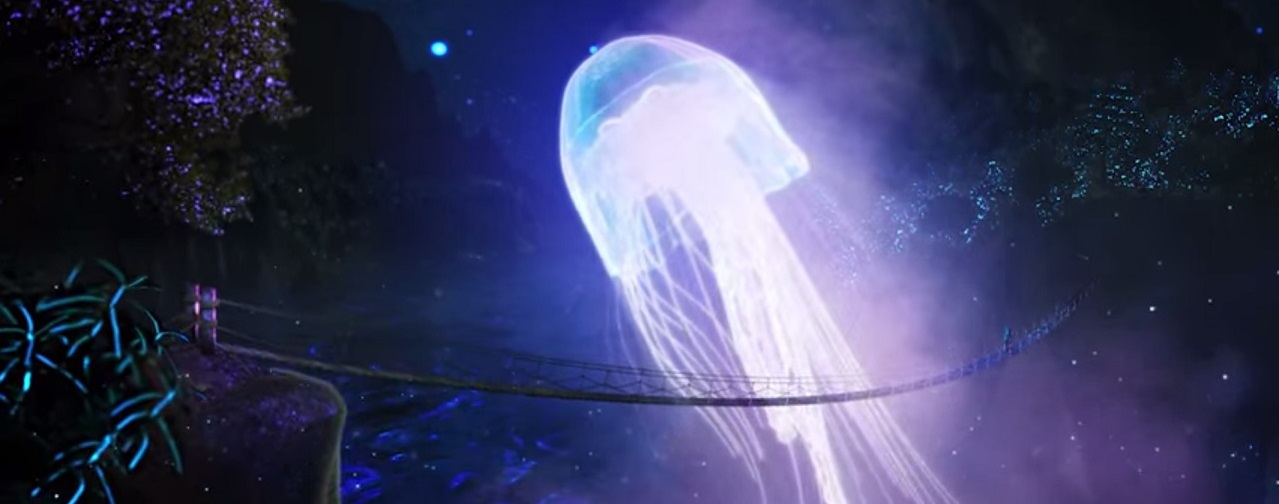
Piece 8: The eighth piece is hard to miss. After crossing the rope bridge, it’s just waiting right on the other side, ready to be collected.

Piece 9: After opening the gate, this one’s right on the other side by the words “It wasn’t meant to end like this.” (I redacted some text from the narrator on this screenshot that could be considered a spoiler. I did this on the last image too. Although, if you’ve made it this far, you probably don’t care much about spoilers.)

Piece 10: We’re getting awfully close to the end. The tenth piece is up the path and to the left of the previous one. It’s a little ways before “Why should the ending be more important than the moments leading up to it?”

Piece 11: Before going inside the lighthouse, this piece is just beyond the stone ramp leading up to the entrance.

Piece 12: Finally! The last piece! As you’re ascending the lighthouse’s spiral staircase, this one will be about halfway up out on a balcony. Pat yourself on the back for finding all 48 pieces and putting together all four puzzles.
In case you missed it, here’s part one of the NERO collectibles guide, which covers The Caves and The Desert.


