Let’s put together a jigsaw puzzle!
NERO is an experience in exploration that beckons for the player to scour every inch of its world. Scattered across the game’s four levels are 48 puzzle pieces, and they’re hidden in every nook and cranny imaginable. Parts of the story (along with ten Achievements) are tied to finding these collectibles.
If you need help picking some of them up, you’ve come to the right place. We’ll have a guide for each of the four levels, directing you to each and every one of the pieces. Because NERO is so open-ended at times, we’ll often use the nearest floating text as a frame of reference as to where the collectible can be found. Also, there’s a picture of where each piece is hidden.
Take note that there’s a chapter select feature in the event that you miss one or more pieces. However, it’s only available after finishing the game.
This is part one of the two-part guide. Part two, which covers The Hospital and The Desert can be found here.
Chapter One: The Caves

Piece 1: In a house off to the right at the very beginning. The text near the house reads “These brigands had dozens of hideouts scattered throughout the oceans.”

Piece 2: Off to the right of the first puzzle. It’s behind an orange plant and a tree with three branches coming out of the ground.

Piece 3: Shortly after the first puzzle. Right in front of the text “small waterfalls and underground rivers kept the caves humid for mushrooms to fluorish.”

Piece 4: In the room where you get the light ability. Down the right-hand path from “One of those contraptions was blocking the passage in a dark room filled with crystals.”

Piece 5: Shortly after the text saying there are two paths up ahead. It’s to the right of the multi-tiered waterfall.

Piece 6: Take the left-hand path. The sixth piece is directly behind the text that reads “A giant torso of an ancient god made of stone was crying water to the lower room.”

Piece 7: This one is in the room with the three monkeys puzzle which is necessary to progress. It’s off to the right side of the door.

Piece 8: You’ll soon come back out to another empty village. The eighth piece is in the house with the words “An opening in the rocks gave enough light and several ponds of fresh water served the brigands well.” You have to go around the side of the house, though.

Piece 9: There’s a ramp leading down to a puzzle with nine circles. The next piece is right on the other side of the ramp.

Piece 10: Just to the right of “Long and dark was the road David walked to meet his fellow brigands, but the sense of love they felt for each other helped.”

Piece 11: The eleventh piece is up on the balcony under the text “There was something magic about that place, something romantic about the songs the brigands sang in the evenings.”

Piece 12: The Caves’ last piece is in a puzzle room where the far wall has three circles with rotating dots on it. This piece is to the right of that behind a large stone.
Chapter Two: The Forest

Piece 1: This one is right at the beginning of the level, behind and to the left of the words “In a remote area of the world, existed a place filled with wonders and beauty.”

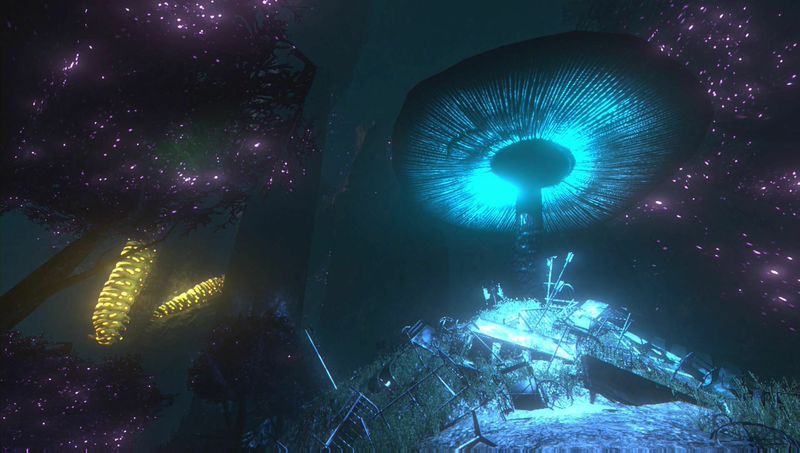
Piece 2: This piece is a bit in no man’s land. It’s far out in the field behind the text “Right in front of the tree, David had decided to found the village.” It’s nestled among three giant glowing mushrooms.

Piece 3: After opening the gate, you’ll see the words “They already gave their assessment, they won’t save him, so I will at least try to.” It’s in the nook behind this and between the buildings.

Piece 4: Shortly after the last piece, walk to the base of the waterfall to find this one. If you’re having trouble, it’s behind the words “It is taught that even today those glowing animals are still lighting those houses, giving the village a sense of false life.”

Piece 5: This one can be found while walking through the village. It’s behind the text “The villagers built an elaborate stone bridge in order to cross the small river ending at the waterfall.”

Piece 6: After a mandatory puzzle that opens a gate, there’s a clock puzzle a bit ahead and to the left. Along the left-hand side of the clock puzzle will be a little nook containing the next piece. Off in the distance is the text “That site had a strange attraction and for the villagers it was also connected to something even darker.”

Piece 7: After the words “That site had a strange attraction and for the villagers it was also connected to something even darker,” follow the path under an arch. Hang a left before the words “He’s sounds asleep, how long have you kept watch?,” and the next piece is resting in a field.

Piece 8: This piece is right behind a very large tombstone puzzle. The text in front of the puzzle reads “He asks for you, you know. He wants you to read him the giant jellyfish story this time.”

Piece 9: From the last piece, keep walking directly backward from the giant tombstone. This piece is at the entrance to a canyon which leads to another puzzle.

Piece 10: After the tree falls, the tenth piece is just to the left of the text “The treatment just needs more time.”

Piece 11: Eventually, you’ll find yourself in a cemetery. Take the right-hand path by the text “A statue representing a goddess was placed beneath the open mausoleum, it is said that the ghostly figures would gather there by night,” and the next piece is hiding in an open stone structure.

Piece 12: Progress just a bit further through the graveyard until you see the words “Strange to say and to see, the mausoleum was the only bright and lively part of the cemetery.” The Forest’s last piece is directly behind this text in another stone building.
Good job! That’s half of the game in the books. Here’s the guide to the second half — The Hospital and The Desert.


