
Dark Knights are not required to play Paladin
As per longstanding tradition, Patch 6.3 of Final Fantasy XIV introduces a new Trial in both Hard in Extreme difficulties. This boss fight can be accessed by progressing the Main Scenario until you reach the quest “Desires Untold.” Once completed, you can unlock the Extreme version of this encounter by talking to the Wandering Minstrel in Old Sharlayan.
Mount Ordeals will pit you against the last of the Four Archfiends: Rubicante. Compared to Barbariccia, this fight requires much less movement. While there is a central “puzzle” to solve that will repeat throughout the fight, skilled healers can make up for a surprising number of mistakes. Though this guide will cover the Hard Mode version of the encounter, expect to see these mechanics iterated on in the Extreme Difficulty. Let’s dive in!
How to defeat Rubicante
At the beginning of the fight, Rubicante will slowly cast Inferno before charging up the first iteration of his central mechanic. This inflicts mild to moderate damage, and Rubicante won’t deal more party-wide damage for quite some time. Regen healers can rely on healing over time to top off the party, though if you’d like to mitigate this attack or use defensive cooldowns, knock yourself out.
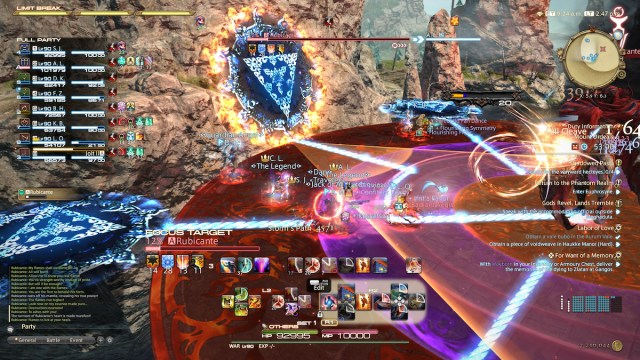
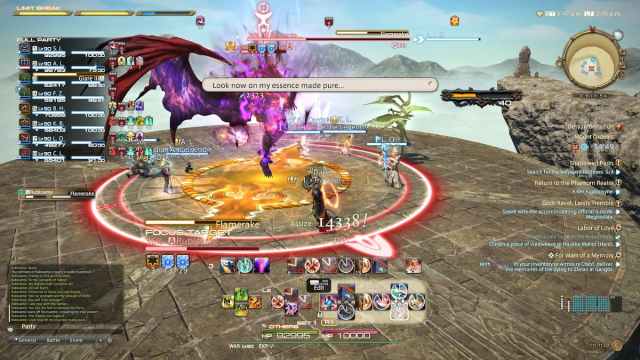
From here, several animations will play out. Three circles will drop on the arena, and eight symbols with triangles on them will appear along the arena’s edges. Take note of the ring-shaped purple circle, as that will become important later. For now, you’ll see Rubicante charge Ordeal of Purgation. A straight line will form between Rubicante and one of the symbols. Once Ordeal of Purgation finishes, you’ll be locked into place and a triangular AoE will fire out from the targeted symbol. This fires off from the tip of the triangle, so the safe zone is near the symbol, not away from it.
Ranged players can simply stay to the side of the symbol to safely keep out of range from the AoE. Melee players will have a limited safe zone to work with while keeping damage uptime. That said, there’s an easy visual for where melee players should stand. Look for a line adjacent to the targeted magic symbol and stand on it where the purple circle and the outer red circle meet (pictured above). This will keep you in range of the boss while you stay out of range from the AoE. This trick works for later iterations of this mechanic, which we’ll get to soon.
Dealing with Arch Inferno
Rubicante will cast Ordeal of Purgation again, this time with a line that turns perpendicularly before reaching its respective symbol. This can be resolved like last time, just stay out of range of the targeted symbol’s triangle AoE. From here, all the symbols will disappear and you’ll have some downtime before Rubicante casts Arch Inferno.
This will begin a series of circular AoEs that will rotate clockwise around the arena. As these continue, Rubicante will also launch several additional AoEs for you to dodge. All of these are predictable, so just keep moving and dodging in any safe zones you find. If you get stuck, remember which AoE appeared first and then move into a safe zone once it clears. You’ve dealt with Barbariccia, so you can handle this.
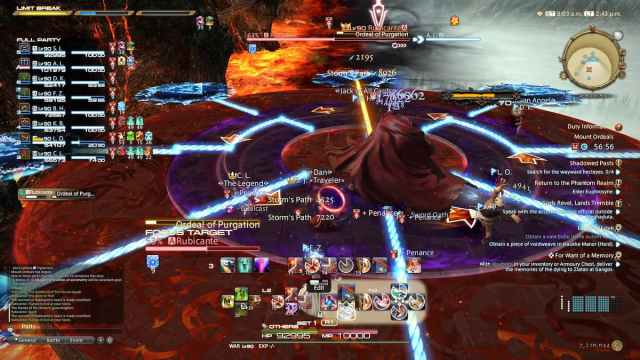
Ordeal of Purgation Round 2
After this volley ends, Rubicante will prepare Ordeal of Purgation once more. This time, you’ll see several arrows rotate around the purple circle. This will cause the lines in the purple circle to rotate, not the inner or outer red circle. To handle this, visualize the path the line emanating from Rubicante will follow once all the line segments in the purple circle rotate one “space.” Since this can be hard to grasp without practice, I have created a graphic using state-of-the-art computer software to explain what you should do.
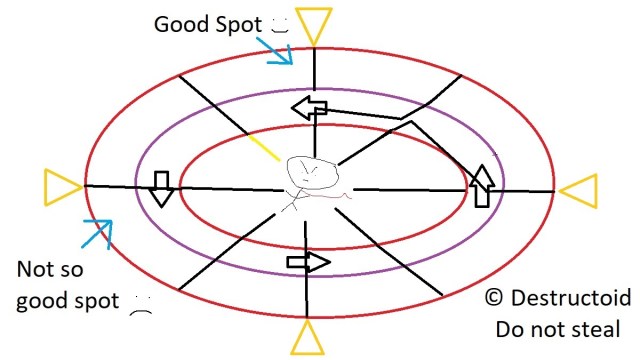
This iteration of Ordeal of Purgation will repeat throughout the encounter. If you or your party has trouble with this mechanic, consider using defensive cooldowns or applying shields. You can brute force this mechanic, even though it will put a lot of stress on your healers.
Phase 2
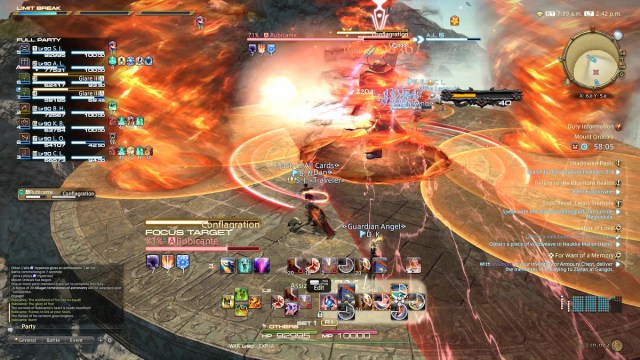
After a basic add phase and DPS check, Rubicante will enter his second phase. Spread for the proximity AoEs that will appear around everyone shortly after the transition, though note this will also inflict bleeding for 15 seconds. Rubicante will introduce a couple new mechanics here, but they’re not too spicy once you know what to look for.
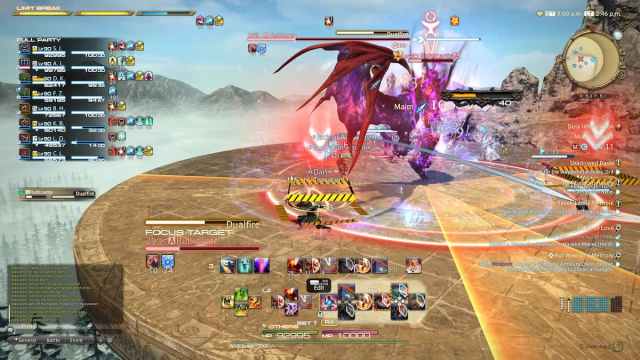
When Rubicante casts Flamerake, a symbol that looks like two clock hands will spin rapidly underneath him (pictured above). Once it slows down and finishes, a wide line AoE will go off in the direction the hands face. Stay close to the boss so you can quickly move to a safe zone once you know where the attack will hit. That said, move immediately into the space the AoE hits after it goes off. Two AoEs will fire off that target the rest of the arena, so that will be your only safezone.
From here, the mechanics riff on spells you’ve seen in fights leading up to this. Soulscald will target six party members with a line AoE, so spread to prevent any overlapping damage. Shadows of Rubicante will proceed to attack in straight lines based on everyone’s positioning from Soulscald, so find a safe zone wherever you can. Rubicante will then charge Dualfire and target both tanks with wide cone AoEs. Tanks should position themselves so they don’t overlap each other and give the rest of the party enough room to hide. It helps to mitigate the damage for tanks here, especially if either suffers from a vulnerability stack.
That’s the fight!
Rubicante will fire off an AoE that targets half the arena while the party gathers to absorb a soak AoE. After this, Rubicante will repeat mechanics until he dies. Keep up the pressure until the Elemental Fiend runs out of HP.
There’s no apparent DPS check, so play it as safe as you need to. Even if you mess up Ordeal of Purgation or Flamerake, you should still survive even with relatively average gear. Whether you choose to continue the main story or move on to the Extreme difficulty of the fight, have fun and enjoy the game!


