Don’t let the game’s name fool you — In Enshrouded, the shroud is your greatest enemy. It’s a plague that’s conquering the world, but we can use it against itself. We’ve previously talked about how you can acquire Shroud Liquid for your alchemy projects, and now we’re going to talk about what is the Shroud Core, what you can do with it, and how to acquire it.
What is Shroud Core in Enshrouded?
A Shroud Core is, at least at the start of the game, one of the most important and rare items you can find. It’s the key material that the game requires to upgrade your flame altar, aka the “heart” of your base. Even though it’ll become more readily available later in the game via other mechanisms, the first Shroud Core players are meant to obtain requires beating the first boss. To do so, you must first take the first quest in the game, the one that tasks players with finding the sleeping survivor.
There are two known ways of getting to him. The first one (marked orange on the map) involves getting a grappling hook and going through the bridge. The second one, the one I took (marked green on the map), has players braving through an area that’s completely covered by the shroud blight. It might sound scary but worry not. It’s early game Shroud, so it’s there mostly just to spook you. Once you get to the area where the sleeping survivor is being held, you’ll have to either sneak past or fight two capable opponents. They can put your dodging and parrying skills to the test, but they’re nothing you won’t be able to go through in two attempts, max.
That area also has bees, which can be either a nuisance or a great help against your enemies, should you bait them into meeting the swarm.
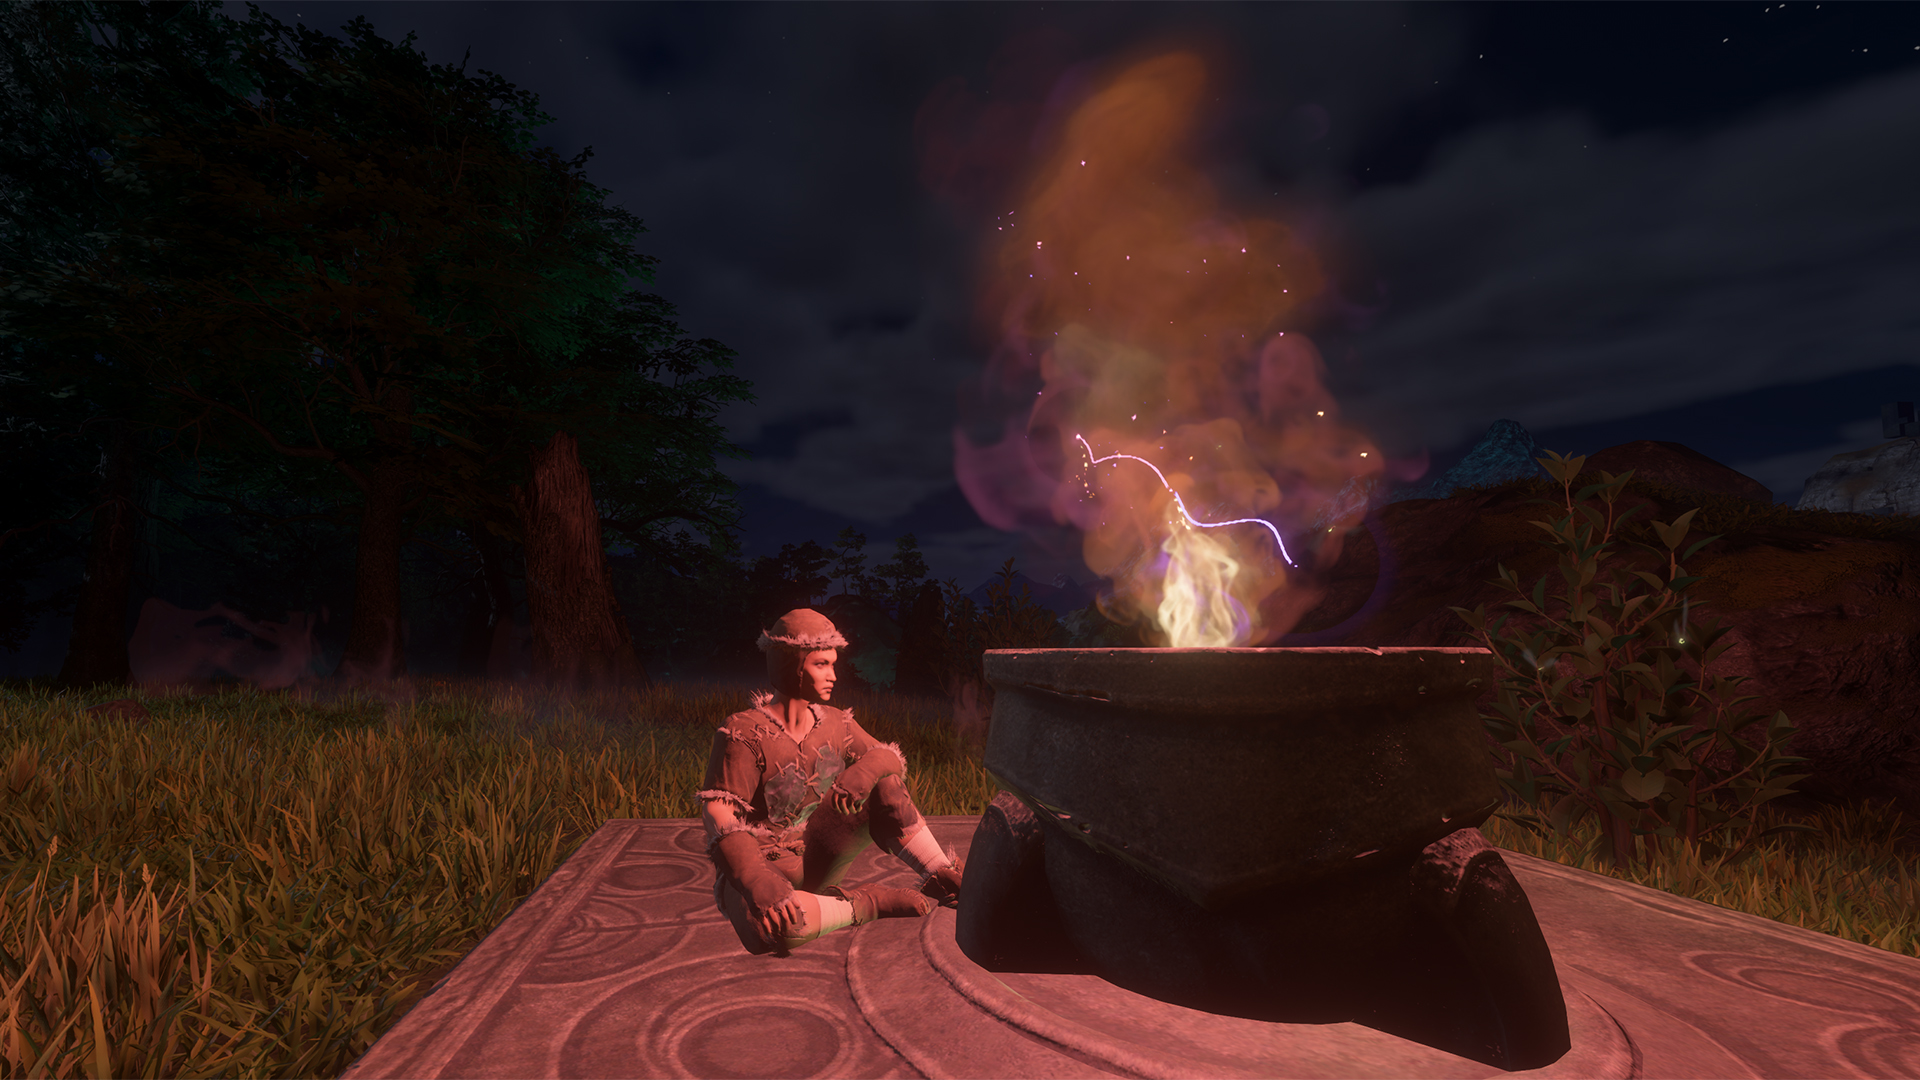
Once you wake up the survivor, the Blacksmith, things get a bit more complicated. After you’re done with that quest, go back to the flame altar (via walking or fast travel) and summon the blacksmith there by using a summoning branch (that you can craft with one twig). Talk to him, and he will task you with Clearing the Elixir Well.

The Elixir Well is likely the first place in the game that will provide a challenge combat-wise, but it’s completely doable even if you’re ill-equipped.
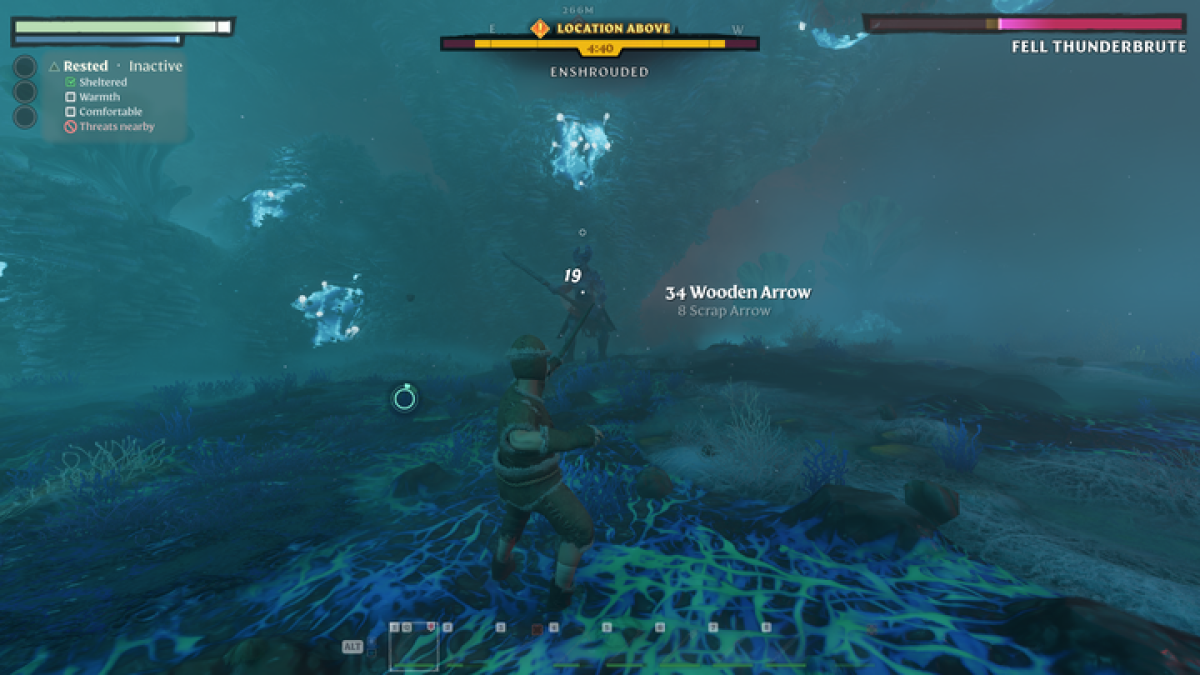
You’ll have to enter the enshrouded area just like you did if you followed my recommended route, but now take a turn to the right. You’ll find a big blue well that you’ll have to descend into. There are various lvl 3 enemies guarding it. They can put a dent on you, so I recommend you run past them and down the well, but not before coming in contact with the checkpoint that will allow you to restart from there should things go awry. Once you reach the bottom part of the well, you’ll be greeted by the first boss, the Fell Thunderbrute.
He is strong to the point of taking down an unarmored player such as me in two hits, but his attacks are also very easy to avoid. He’s slow, he telegraphs his moves, and his patterns are easy to recognize. Don’t be afraid of sticking close to him and to just roll around his moves. Hit him when he’s winding up and you should get rid of him in no time. Killing him, however, doesn’t mark the end of the quest. What you really need to do is kill this thing:
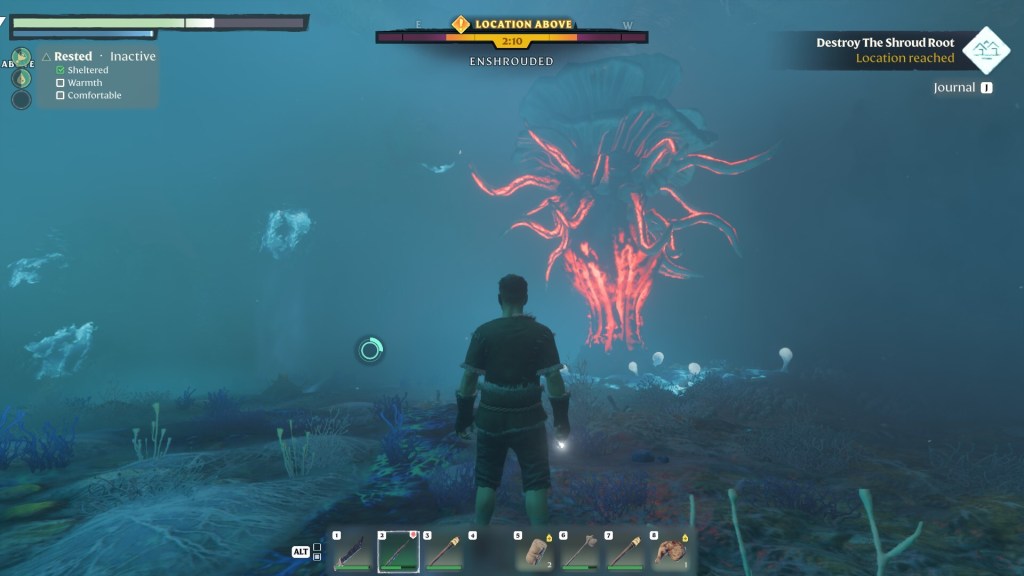
That’s the Shroud Root, the entity spreading the Shroud, so that’s what we’re here to destroy. It doesn’t attack the player, nor does it take too much to go down. Destroy it and feel free to fast travel back to base with this thing in your possession.

With that, you can finally perform the first upgrade to your flame altar.
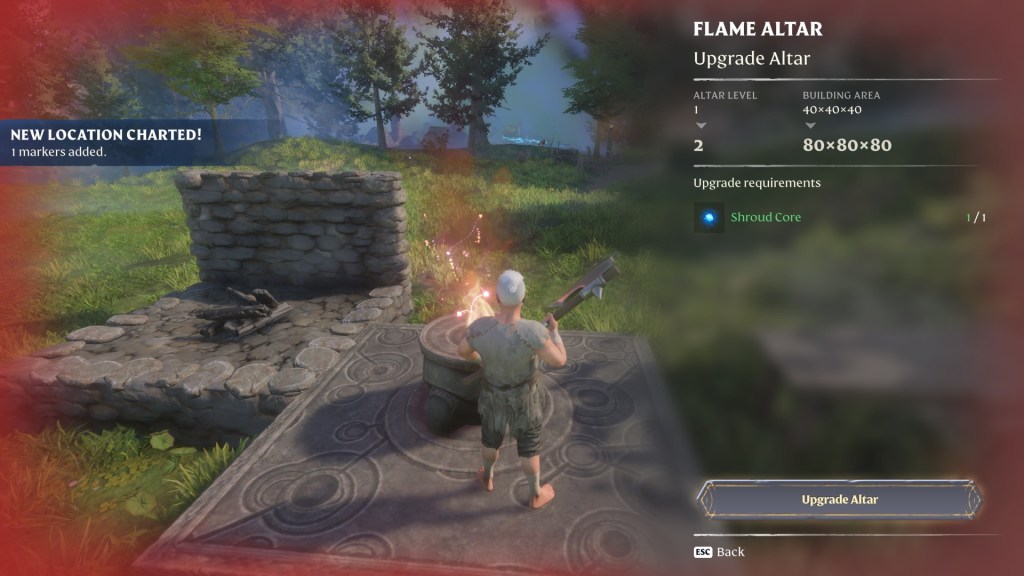
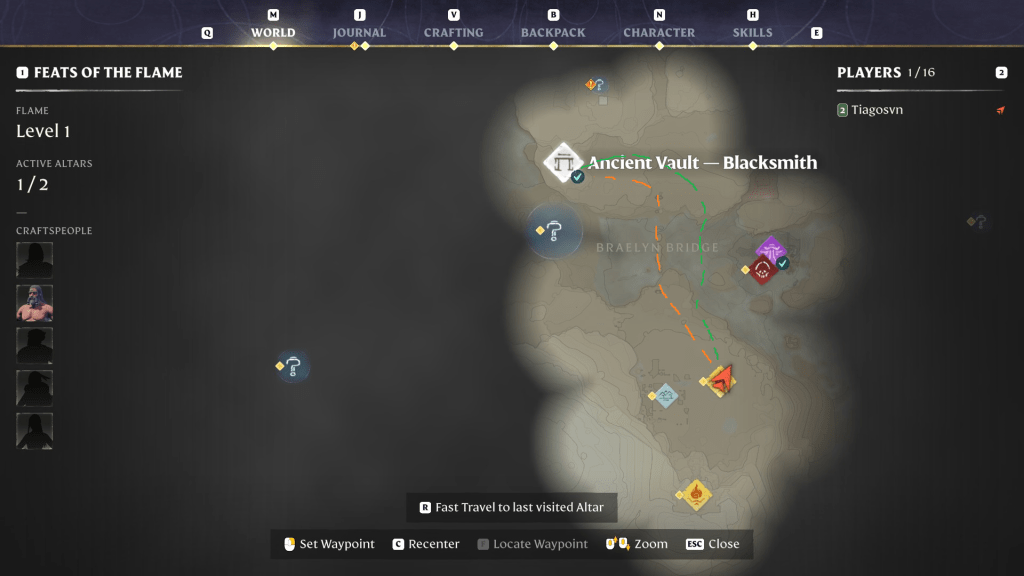
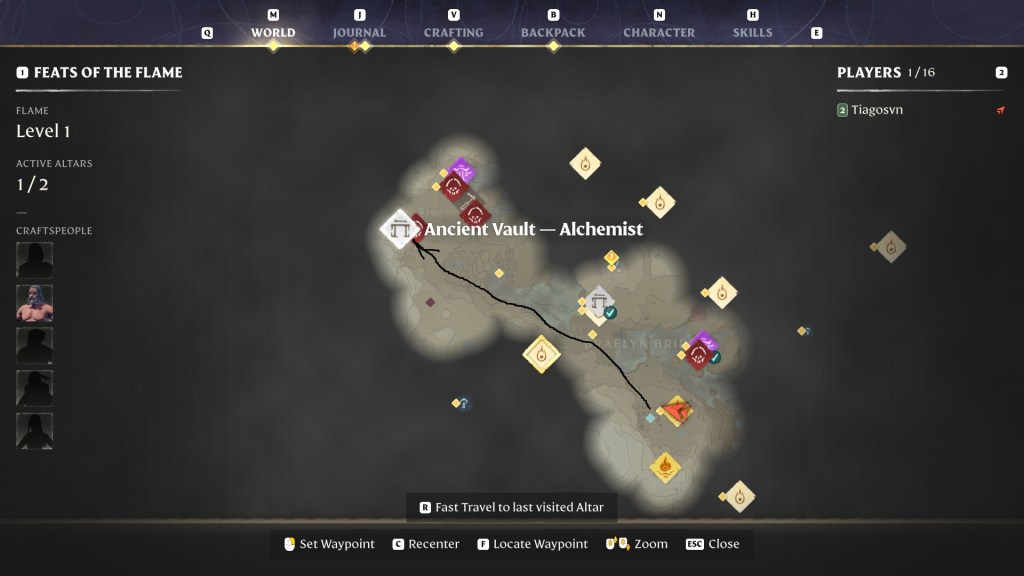
But that’s just the start of it. Further Altar upgrades will require more cores, as well as other things. Now that we’ve gotten the first core, the best way to get more cores is to craft them. To do that, we will need to free another NPC, this time an Alchemist. Getting to this man is a tougher task, especially at the beginning of the game, as it involves diving deep into the Shroud and moving past stronger enemies. Below is the map of the alchemist’s location that features my recommended route, as well as the many places where I died trying to rescue this man.
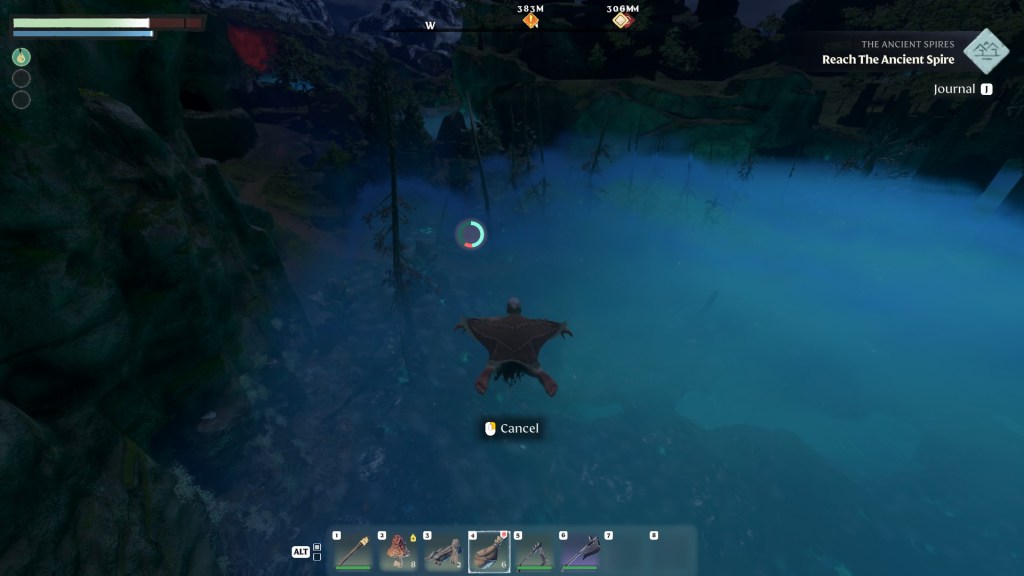
As for the route, don’t feel forced to take the one I show above. There are many other ways to get there, but I find that one pretty easy to follow. It requires something, though. To be able to ignore the game’s geographical barriers as well as fall damage and many enemies, you should first build a glider. You can read our in-depth guide on how to make a glider here. For the simpler version, the glider is a beginner item whose components are very easy to acquire.
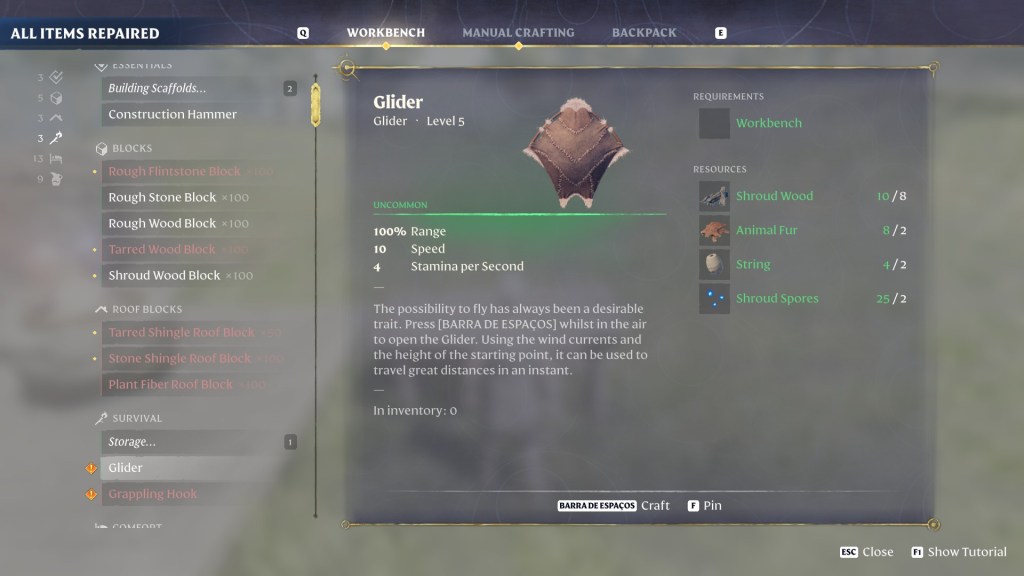
The only thing I still didn’t have tons of when trying to make a glider was the Shroud Wood, which you get by cutting down trees in areas covered by the Shroud. It’s an easy task, though you should worry about nearby enemies. Once you have all that, it’s time to fly.
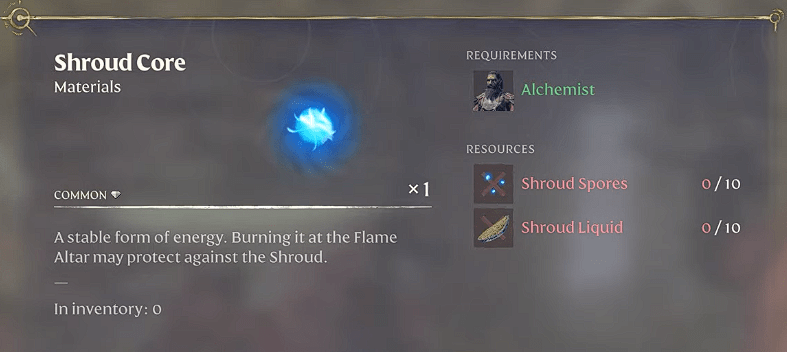
The process of rescuing the Alchemist is the same as rescuing the Blacksmith, though you’ll have to contend with stronger enemies. Once you rescue him, fast-travel back to your base, and use another summoning staff to get him to your position. After this, you’ll be able to craft your own Shroud Cores if you own enough Shroud Liquid and Shroud Spores.
You can now enjoy Enshrouded on PC, PlayStation 5, and Xbox Series X|S.


