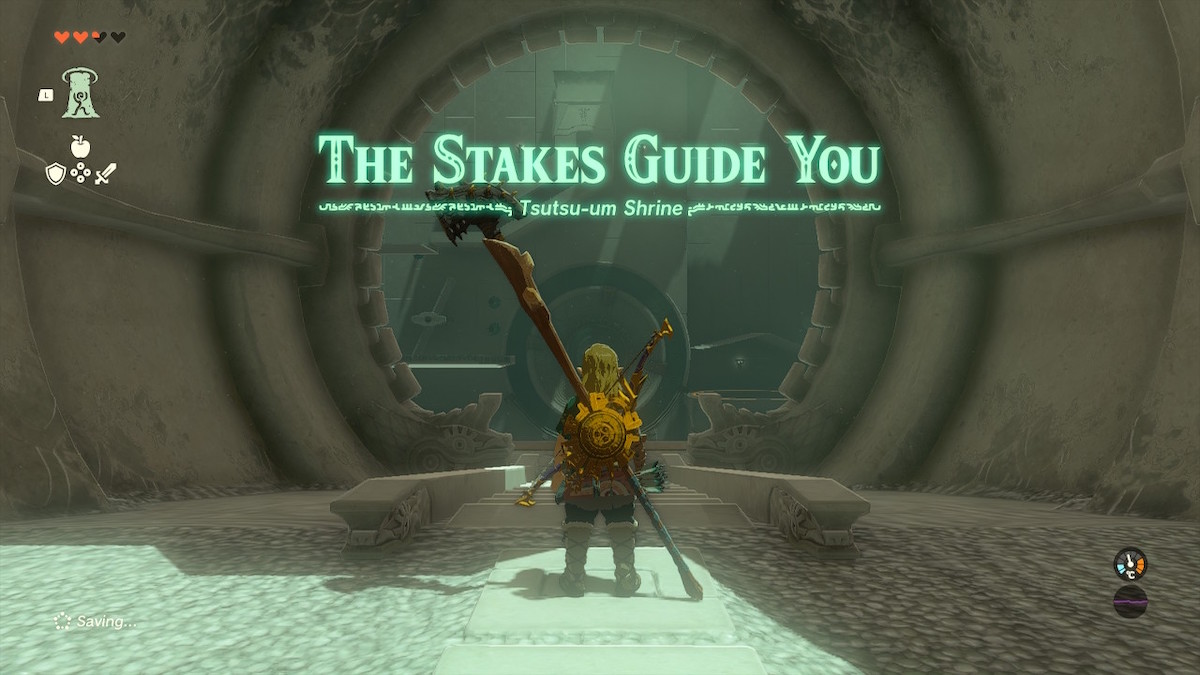
All stakes and no vampires
Tsutsu-um Shrine is one of the more difficult shrines to figure out in Tears of the Kingdom. If you don’t have experience using the green stakes that are required throughout this shrine, it can be downright confusing. However, fret not. We’ll walk you through each part of Tsutsu-um Shrine, but first, let’s take a look at how to find it.
How to find Tsutsu-um Shrine in Tears of the Kingdom
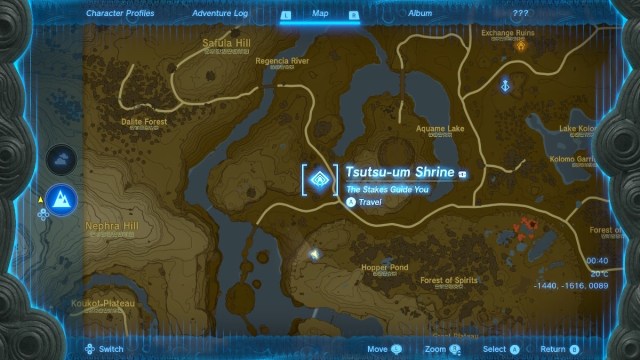
Tsutsu-um Shrine is located in the Hyrule Field area of the map. To get to the shrine, simply head southwest from the Hyrule Field Skyview Tower to find it just on the other side of Aquame Lake. Alternatively, if you’ve discovered Riogok Shrine, you can fast-travel there and take a short walk north. To see the exact location of Tsutsu-um Shrine on the map, check the screenshot above.
How to complete Tsutsu-um Shrine
When you enter Tsutsu-um Shrine, you’ll find a plate with a green stake attached to it on the floor. This is where the rule for Tsutsu-um is easiest to learn. The stakes can be placed inside the concrete walls, including the pillar that’s moving up and down to the left of the entrance. To attach the plate to the pillar, pick it up with Ultrahand and stick the stake into one of the pillar walls. When the stake is in the wall, cancel the skill instead of attaching it. It’s not like other items that have the “Attach” action.
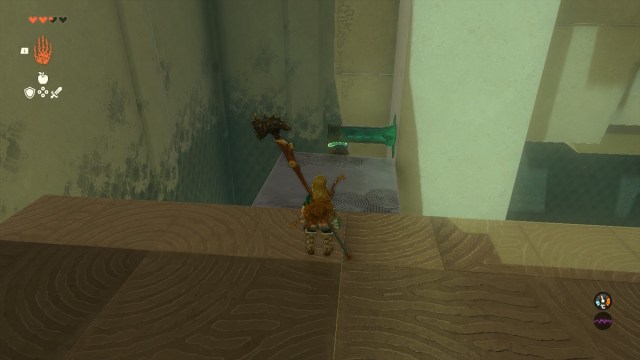
You can then jump on the plate and hop off when it raises you up to the next level. You can also attach stakes to each other, like in the picture above.
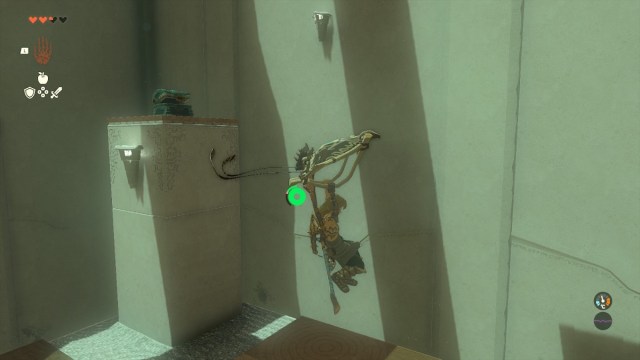
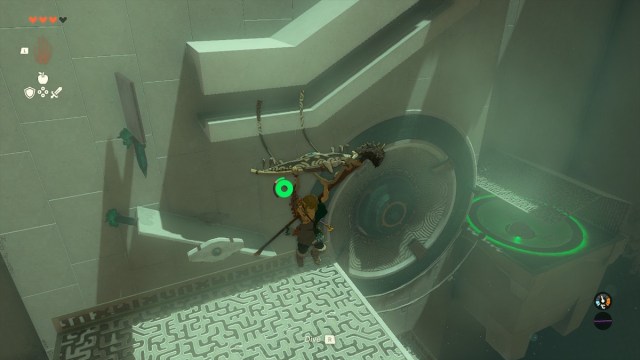
When you reach the first platform, you might notice another large pillar. On top of this is a chest. To get the chest, head to the stream of air and use your glider to shoot up into the sky. While gliding, you’ll need to turn around and head to the chest by landing on top of the pillar seen in the picture above. You’ll be rewarded with some arrows for your trouble.
Next, grab the plate you used to get to the first platform and take it towards the wall with the spinning wheel. You’re going to need the original plate for the next step, but you can’t take it with you. Therefore, you’ll need to attach it to the edge of the larger spinning double plate. Make sure it’s on one of the ends so it spins high enough to grab it from the next stage.
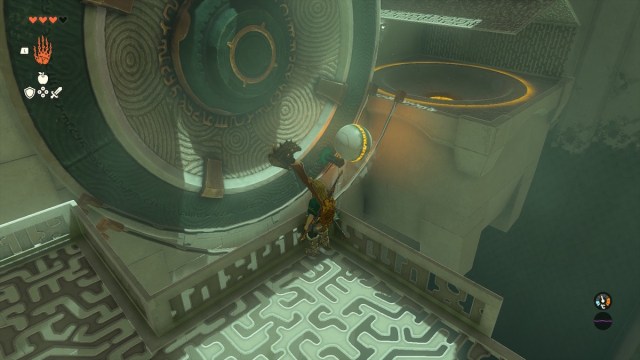
After it’s attached, use the air stream to travel up to the balcony directly above where you just were. Once there, you’ll be able to pick up your plate again. When you have it attach it to the top stake so it blocks the way the ball comes out. You might need to adjust the position of the wall stake back slightly. The idea is for the ball to get stopped by your impromptu wall so it drops down to the spinning double plate below.
Once you have that set, place one of the two stakes from the wall in a position so they stop the large plate from spinning. You should have the large plate at an angle so the ball rolls from it to the rails below. If you have it too steep, the ball will miss and respawn. Check the screenshot above for the correct placement of the stopping plate and the stake to angle the spinning double plate.
When you’ve successfully navigated the ball to the curved rail below, you can drop back down to the lower platform. To get the ball into the hole switch, you’ll need to push it up the rail. To do this, take the final remaining stake from the wall near the spinning wheel and attach it to the wheel itself. Once again, you’ll need to place the stake in the wall with Ultrahand and then cancel the skill. If successful, it should be able to push the ball up as the wheel moves. See the screenshot above for the correct placement.
Once the ball has activated the switch, the shrine exit will open to the right of where you came in. You can safely glide across the gap to get back to the start.
That’s it! You’ve completed Tsutsu-um Shrine!


