You’re my Sapphire Star
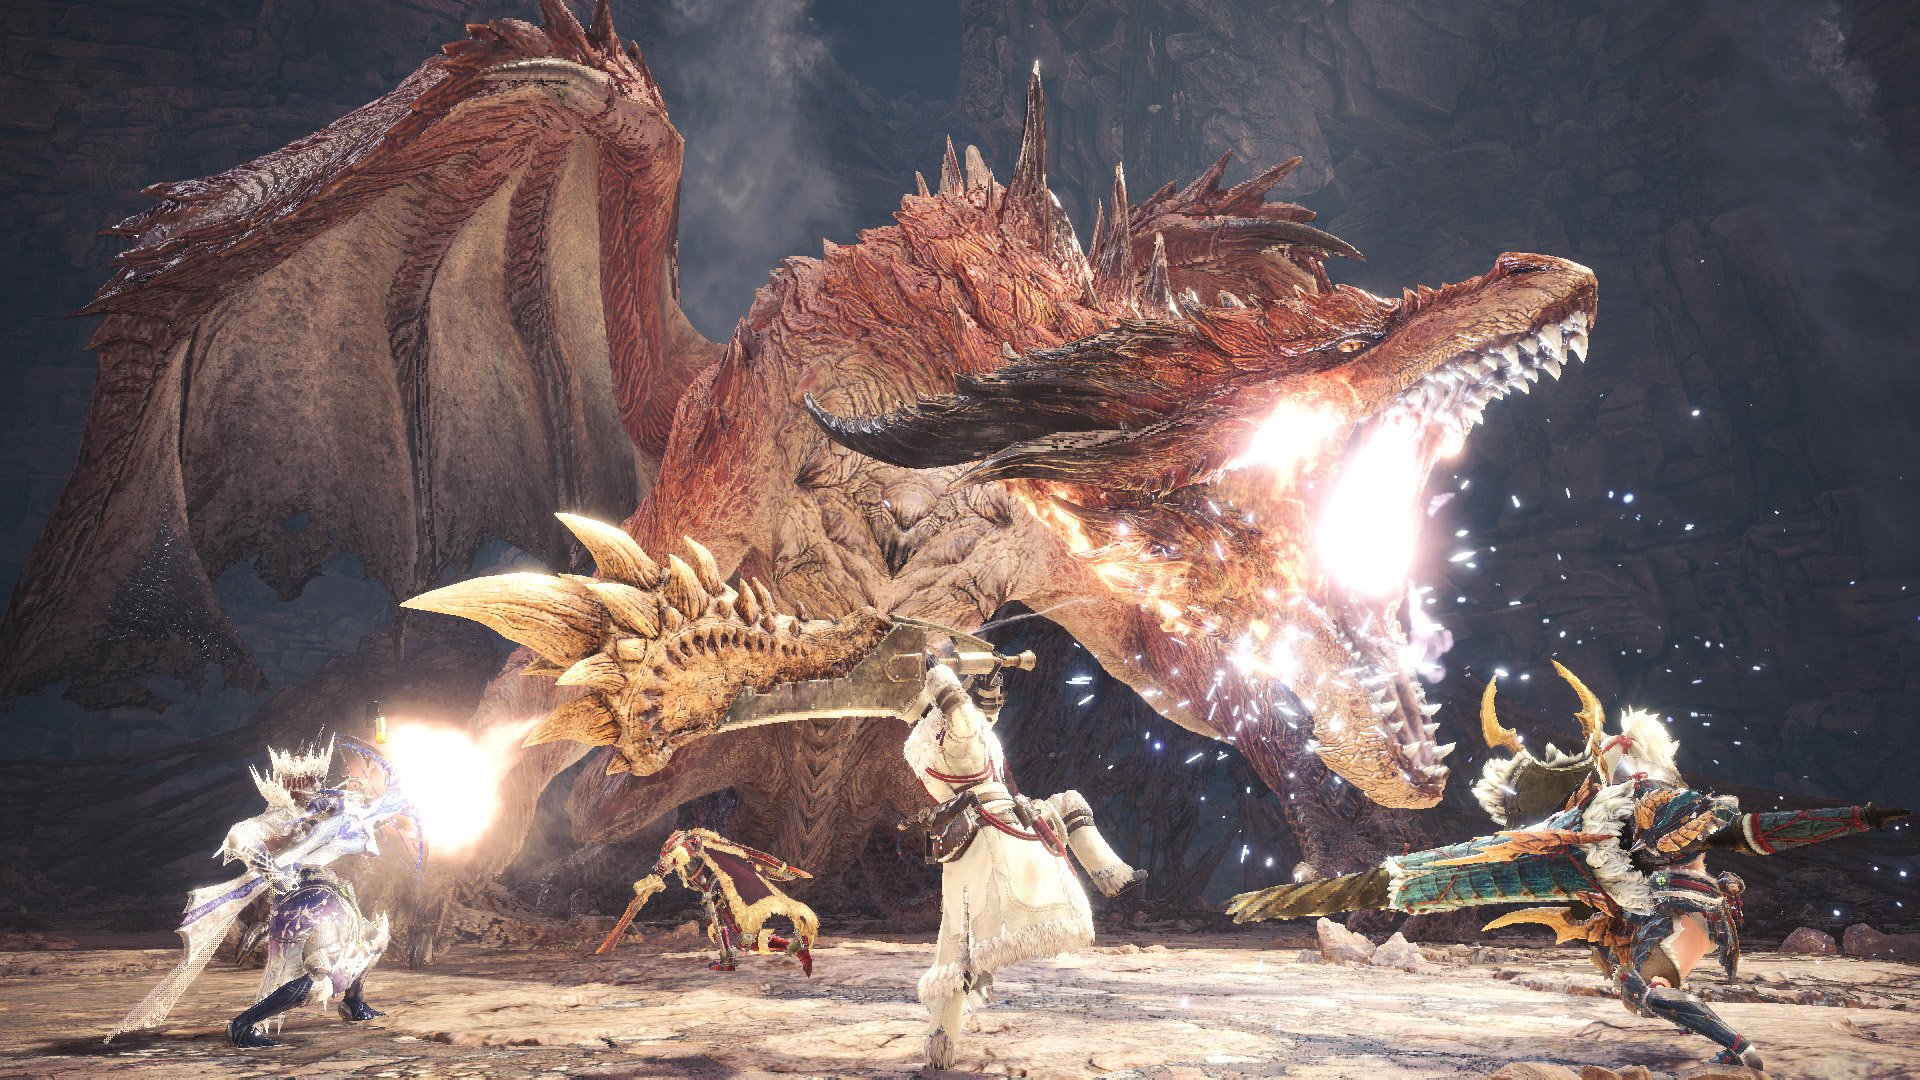
Monster Hunter World: Iceborne‘s newest siege monster, Safi’jiiva, has been out for about a week now. I’ve been farming him this whole time and delving into shared information from others, so this guide has almost everything you need to know for a successful hunt.
The best part? Hunting Safi’jiiva over and over to farm parts is quite the engaging experience, unlike last year’s Kulve Taroth, which has a slower pace at times.
The ultimate goal of the siege is to slay Safi’jiiva within 20 minutes. When he takes enough damage, he’ll drain the energy in the current room to heal himself. When the energy of that room is depleted, he’ll retreat to the next room. All told, there are three rooms to chase Safi’jiiva through before you finally corner him and slay him.
But just like Kulve Taroth’s pursuit level, the entire process is difficult to do in 20 minutes until you level up the siege by completing objectives like breaking body parts and descending levels. A higher siege level means everything is easier and faster, and ultimately the time limit becomes doable.

Before you hunt
Some of the best skills to consider actively for Safi’jiiva are Partbreaker and Weakness Exploit. The mission is similar to Kulve Taroth, in which you earn points for quest rewards by breaking as many different parts as you can, so naturally Partbreaker will net you those objectives faster. Weakness Exploit can be considered because throughout the entirety of the hunt, you’ll be using your clutch claw to perform tenderizing attacks to weaken his hit zones. Safi’jiiva’s body is incredibly resistant to damage otherwise, so you might as well make the most of something you’ll be doing a lot of.
After those two skills, any build you’re comfortable with will work. Just know that if you happen to have Heat Guard or Blight Resistance, you’ll have an easier time with the flame patches Safi’jiiva will leave during phase three of the fight, but they’re not necessarily important skills to build for. They’re just nice bonuses if your first thought of building for Weakness Exploit and sharpness was Teostra armor, since it comes with Heat Guard.
Something else to keep in mind that’s not a skill per se is the Elderseal effect on dragon element weapons. Elderseal drains Safi’jiiva of the precious energy he’s using from the rooms to heal himself, forcing him to draw out energy more often and speeding you through the rooms faster. Safi’jiiva is flexible in that he takes mostly equal elemental damage, but dragon is especially good due to its inherent Elderseal effect.
Speaking of elements, being an enormous monster causes Safi’jiiva to take extra damage from status, namely poison and blast. Just like Xeno’jiiva, Safi’jiiva takes 100 damage per poison tick, until he takes 1000 damage. Blast procs also do twice as much damage, at 600 per explosion. This is one of the few monster hunts where people agree that the Rathian set bonus of extra poison damage is very effective.
Another note is the damage type of your weapon. If your weapon does cutting damage like the great sword, Safi’jiiva’s forearms take the most cutting damage. For blunt weapons like the hammer, if the head is too risky for you to hit, the hind legs actually take extra bludgeoning damage. Shot damage from gunners will have to aim for Safi’jiiva’s wings for optimal damage, but his wings specifically – not the membrane of his wings – which is surprisingly difficult to hit since it’s much higher up than your average hit zone.
Lastly in prep is the canteen. I highly recommend having the ingredients and eating for the Felyne Open Road Platter, which gives you Felyne Safeguard. This skill is effectively Felyne Insurance on demand, saving you a single cart. Felyne Insurance also stacks with the Safeguard, effectively saving you on two carts. Having the extra attack or defense is largely negligible in this protracted hunt, but giving you five effective lives to play on can save you, especially in situations of a team wipe.

The first phase
There are three hazards you should use to your advantage in the first room: two overhanging rock formations to knock down, and a portion of decaying ground overgrown with vines.
If you can force Safi’jiiva near these hazards, then you’ll complete an objective, deal a sizable chunk of damage, and drain plenty of energy, all at once. Keep in mind you don’t need to worry about having all of Safi’jiiva’s body under the rocks for it to do a lot of damage. Even hitting just the tail will deal full damage and cause a knockdown. Since kiting Safi’jiiva is bit unpredictable at this stage, if you think the rocks will clip his hitbox, go for it.
As far as the first stage goes, Safi’jiiva’s aggression is easy enough to manage that it’ll ease you into the primary loop: soften a body part, hit that body part, watch for attack telegraphs. I will say as someone who usually uses cutting blademaster weapons, since you’ll be focusing on his forearms, it’s safer to avoid his forearm claw swipe by evading towards and underneath his body, rather than away. I’ve been hit by that particular claw attack enough times to know that hitbox inside out.
One nasty move you’ll need to watch out for is Safi’jiiva’s tracking beam. When you notice Safi’jiiva opening its mouth at you, you’ll quickly realize he’s actually tracking you for a quick beam attack that’s very accurate. Unless you run in one direction for a second and juke him by running in opposite direction. It’s actually quite satisfying fooling a dragon like that.
The second phase
It’s during phase two that Safi’jiiva will reacquaint you with the enmity mechanic from the Behemoth hunt. Whoever is doing the most damage to Safi’jiiva will earn his enmity, and he’ll begin focusing on that target. His most dangerous move during this state is a wild headlong rush because the hitbox on his head stays active for a long time. Earning enmity is obviously a dangerous thing, but keeping up the damage and the enmity causes Safi’jiiva to use more of his energy faster. If you have enmity and don’t do enough damage to keep it up, then Safi’jiiva will lose interest and instead go berserk with more wide-area attacks, making things more difficult overall.
Weapons that have a shield like the lance thrive in this dangerous role, as they can guard attacks and counterattack to keep enmity, but someone will have to heal them with either Lifepowder, Dust of Life, or Wide Area skilled potion, because enmity leaves very little time for a shield user to drop their shield and heal themselves. Personally, as a dual blades user, whenever I gain enmity accidentally, I focus on continually damaging the forearms while I stay mobile and evasive.
Eventually, Safi’jiiva will perform the attack that got the Monster Hunter community excited for this hunt: the Sapphire of the Emperor. Safi’jiiva will superheat the entire room for several seconds while hovering in the air, before releasing a tiny jewel of fire which explodes with the ferocity of Behemoth’s Ecliptic Meteor. During phase two, there are several craggy rocks you can take cover behind and you’ll know you’re perfectly covered if the flame effects stop passing over your character model.
Phase two also has a few ledges and inclines to jump and slide off of for aerial attacks and mounting. Weapons like hammers and dual blades can make serious use of these features for extra burst damage.

The final phase
Depending on how Safi’jiiva has taxed your resources, now might be a good time to consider farcasting back to camp and restocking on potions, especially since base camp supplies you with an EZ Farcaster at the start.
Phase three lacks most of the ledges from phase two and the permanent rock formations for cover from another Sapphire attack. Instead, there are rock formations that break after a Sapphire of the Emperor, and more form when you damage Safi’jiiva enough to cause new rocks to fall. Phase three can have as many as four Sapphires or more, and some will be faster than others.
After the first Sapphire, three geysers will tear open on the perimeter and can do 1000 damage if it erupts under Safi’jiiva. He will still select a target of enmity, so it’s best for that target to kite him over to a geyser, which can be triggered with a slinger shot.
Phase three will also introduce Safi’jiiva’s supercritical state, a sort of extra enraged form which marks an increase in power and aggression, in exchange for dramatically softening his hide, making him much easier to hurt across the whole body. One of the hardest objectives in the siege, break Safi’jiiva’s chest, is only possible during a supercritical state. However, even if you don’t break the chest with a weapon that can even reach, the chest is by far the weakest hit zone on Safi’jiiva during supercritical, to the point where you may even cause him to fall over from the damage.
One of my most-hated moves during phase three is something I call the body splash. It’s basically the move Arch-Tempered Xeno’jiiva had, pressing his whole body into the ground, creating a cascading explosion, radiating outward. This attack in particular is why I slot in Evade Distance 3, since there are only three realistic defensive moves: block the entire explosion with a shield, run away from it and Safi’jiiva, or roll forward through the brief gap in between the explosions.
You’ll also probably fall victim to Safi’jiiva’s pin attack if you like attacking from the front. Simply put, this move with put you at death’s door and almost always guarantee carting you since it always leaves you at 1 HP while burning on fire. Everyone has to be on the draw to use a wide-ranging healing item right as the victim hits the ground, because a team that doesn’t do this is practically giving away a cart. Luckily at this point, most pub hunters generally whip out the lifepowder when they see this happening.
And that’s about all the big bits when it comes to slaying Safi’jiiva. The armor set and weapons are some of the most potent equipment I’ve ever played with. Being able to create new mix set bonuses thanks to rolling unique armor bonus on the weapons feels very empowering. I already have some 2-2-2 sets with Val Hazak Super Vitality and a 3-3 set including Teostra Technique, plus the Safi’jiiva Dragonvein bonus is a very fun high-risk, high-reward power.
Just take even a few of these tips with you during the siege and you’ll be sure to have a grand old time farming him up until January 5, 2020.


