Wax On… etc
Among the various weapons added to the Street Fighter 6 arsenal, perhaps one of the most interesting is the return of the universal Parry, (known in SF6 as “Drive Parry“). This defense technique was a key part of the excellent Street Fighter III, where it formed the spine of high-level play, and is the basis of the legendary Evo Moment 37.
In Street Fighter 6, Drive Parry somewhat more user-friendly tool, and is not quite the scalpel-precise, expert-player gimmick it was in Street Fighter III. Regardless, it is a very useful skill to have in your arsenal, and while it is not something that beginner players should sweat too much about in the early days of learning SF6, players will still want to explore the Parry system as they evolve their play style.
What is Drive Parry?
Drive Parry, (hereon referred to as simply “Parry”), is an all-in-one defense mechanism that can be used by every character on the roster. Activated by pressing (and holding) MP + MK simultaneously, Parry will block all incoming attacks, including highs, lows, aerial attacks, specials, and supers. The only attack is will not stop are grabs and throws. As long as the player is holding MP + MK, then the character will continue blocking the opponent’s attack, right up to the moment they release the buttons, or are thrown.
As such, it is a way to defend against attacks when you are unsure of what is coming, how best to block the moves, or when you’re concerned about being pushed into the corner. Parry even stops Drive Impact attacks, so it’s a solid go-to when you’re unsure of how to deal with your opponent’s offense.
Obviously, Parrying isn’t free, and swiftly drains Drive Meter as the buttons are held. While this lost meter is replenished as incoming attacks are parried, the technique chews up meter at great speed, which could leave the player seriously lacking in resources, especially if the Parry itself is wasted.
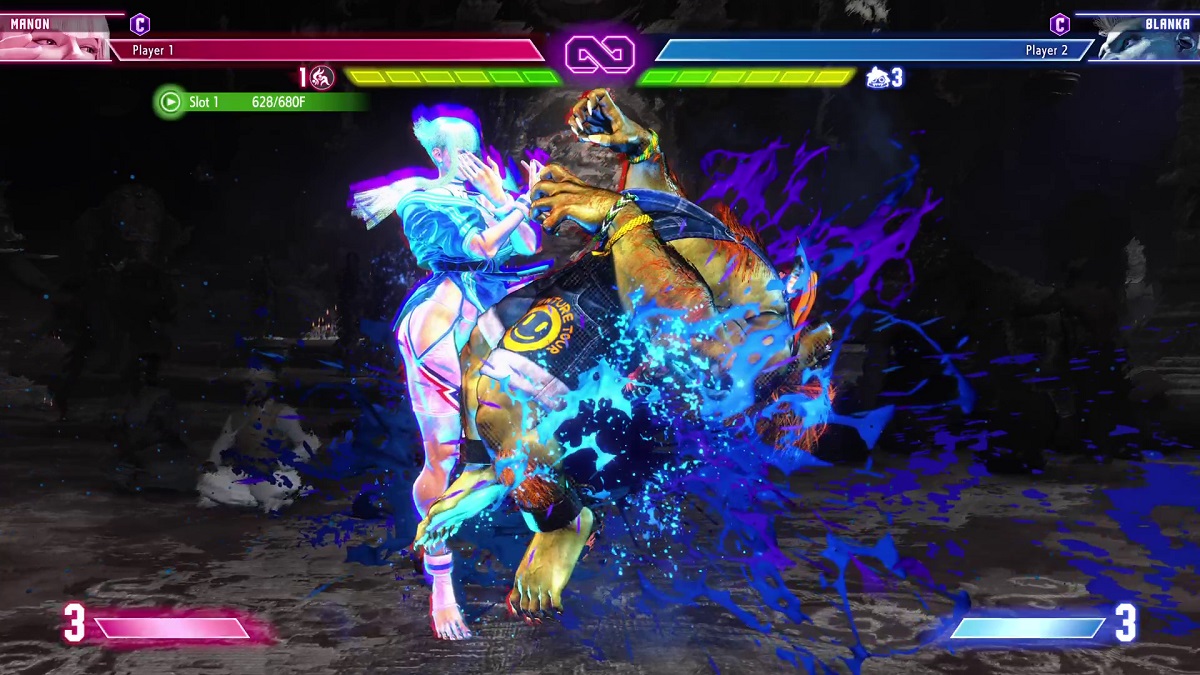
In the video below, you can see Manon effectively parry various attacks from Blanka. Though you will notice she is still vulnerable to throws. Pay attention to how Parrying affects Manon’s Drive Meter, and the huge loss she suffers when she is thrown out of the Parry stance.
https://www.youtube.com/watch?v=DxUS70Gojjg
Why Parry instead of Blocking?
Good question. Blocking is a rocksteady defense, and should be utilized at all times when in doubt. Where you might want to switch to parrying if you’re afraid that attacks will come from high/low/overhead mixups, and you’re unsure how to effectively Block against the string. Additionally, Parrying has less pushback, so is very useful for blocking projectiles while trying to approach your opponent.
Additionally, as Parrying is activated with buttons, it frees up the player’s “stick hand”, allowing for free preparation of a counterattack. For example, hold Parry while leaving your hand free for the Dragon Punch motion, then leave Parry to go straight into the move. And even if your Parry is pointless, you can still block while recovering (though you’re open to throws). Essentially, think of Parrying as an expensive, but all-in-one defense system.
It should be noted that the standard Parry function has the same recovery as Blocking, so there is no frame advantage with one technique over the other.
What is Perfect Parry?
Perfect Parry is a mechanic that treats the Street Fighter 6 Parry system similarly to the Street Fighter III Parry system. Essentially, if you tap parry (MP +MK) at the exact moment an opponent’s strike impacts, then you will hit a Perfect Parry. You will know this has been achieved as a special effect plays and the action pauses for just a beat. During this pause, you can launch a counteroffensive, as the Perfect Parry affords you a small advantage to instantly land a reversal.
Perfect Parry is difficult, especially when you factor in online lag, or screen/input lag. Essentially, the player has a two-frame window to land Perfect Parry. But, should it be a success, then it’s a great way to quickly turn the fight around… and it also looks cool af.
Below, you can see Manon land a Perfect Parry against Blanka, moving slickly into a counterattack (And by that I mean a dropped combo. Her fault, not mine).
https://www.youtube.com/watch?v=GWwpWITu9so
A very, very important note. All counterattacks performed from a Perfect Parry have huge damage scaling, starting at roughly 50%. As such, when you land a Perfect Parry, do not spend all of your resources on the biggest and most powerful combo you know. You’d be better off landing a decent, mid-size combo that puts you back in control and offers better positioning. Save the bigger, flashier strings for non-scaling situations.
Remember, Parrying is not something to sweat when starting out. While an excellent tool to learn as you progress, focus on good old-fashioned Blocking while you’re learning the game. Parrying will come to you eventually, and really help you expand your horizons, but don’t make things needlessly complicated. Learn to Block first, consistently and effectively. Parrying will wait.


