Brains over brawn
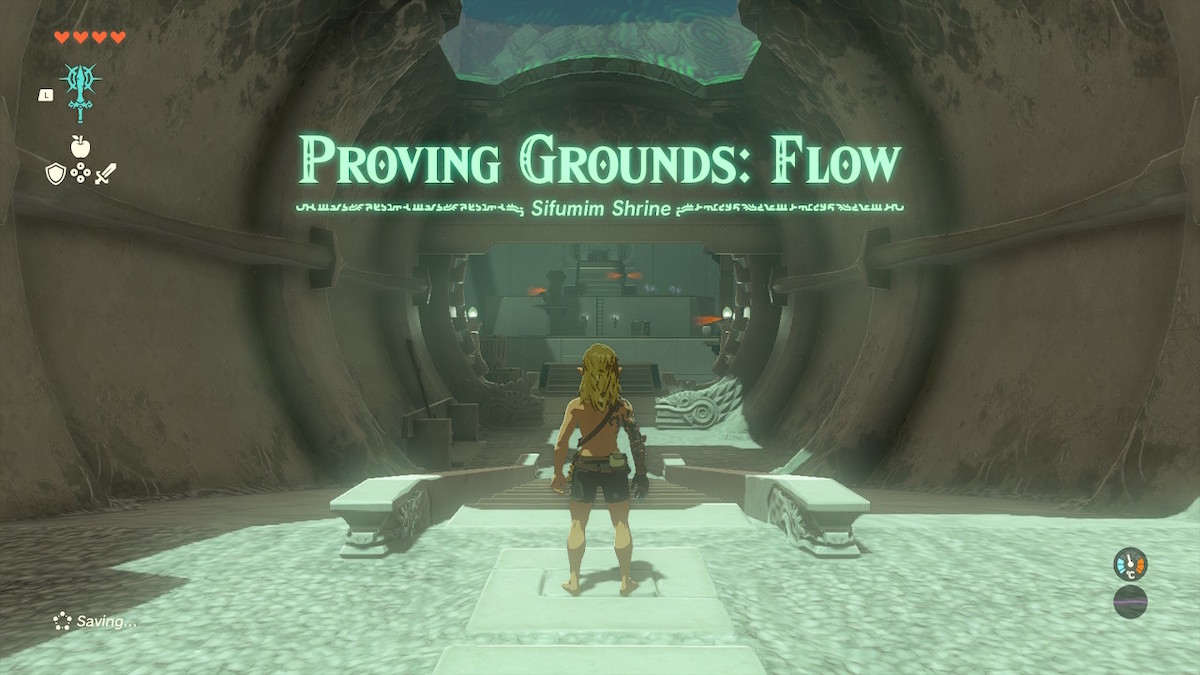
Sifumim Shrine is one of the more challenging shrines in The Legend of Zelda: Tears of the Kingdom. It’s a combat challenge that requires you to utilize all of the new abilities in the sequel to Breath of the Wild.
At the entrance to this shrine, all of your weapons, equipment, and food will be removed. Leaving Link in his fetching underwear and nothing else. But fear not, we’ll guide you through Sifumim Shrine right here. Starting with how to find it.
How to find Sifumim Shrine in Tears of the Kingdom
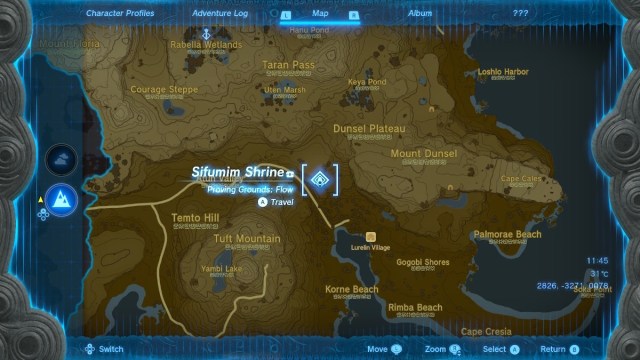
Sifumim Shrine is located in the East Necluda region of Hyrule. The shrine is northwest of Lurelin Village and southeast of the Rabella Wetlands tower that reveals this portion of the map, if you haven’t unlocked it already, it may be wise to complete that tower on the way to the shrine. Check the map above for the exact location.
How to complete Sifumim Shrine

As mentioned above, upon entering Sifumim Shrine, you’ll have all of your items taken from you. There are a few basic weapons on a stand to the left of the entrance. Pick them up, but if everything goes to plan, you shouldn’t need to use them. To complete the shrine, you’ll need to beat all of the individual constructs that combine into one boss health bar at the top of the screen. There are three levels to the shrine, with the first two containing water with strong currents. Be careful when entering the water, it’s incredibly difficult for Link to swim against the current, and it’s very easy to run out of stamina while swimming.
As soon as you get to the water on the first level, a construct will float past on a platform. All but one of the constructs you need to defeat are on these platforms floating around the shrine in a circle. If any of the constructs see you, they will raise the alarm, causing all of the enemies to begin shooting electric arrows at you if they’re within range.
For that reason, start the shrine by hiding behind the boxes on the right of the steps.
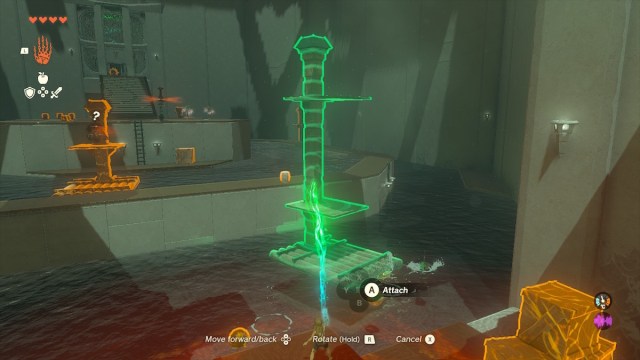
To defeat nearly all of the constructs in the shrine, you need to use the Ultrahand ability. Once the first construct comes around the bend, use Ultrahand to pull the platform out from under it. Do it quickly, and the construct won’t be able to alert all of the others in the shrine to your presence. Simply get close enough to the platform with Ultrahand active, grab the platform, and pull it sideways quickly. The construct will drop into the water, where it will die in a couple of seconds. Thankfully they haven’t grasped swimming yet.
Once the construct is dead, it will drop a variety of items. Pick all of them up, the most important ones being the bow and arrows. Every construct drops largely the same items. The food, which can be eaten or attached to arrows, bows, and arrows that are dropped, are the most important things to grab. Once you’ve got some supplies, follow the water current around the bend to the ladder and go up to the next platform.
The second platform is where you should be killing all but one of the remaining constructs. Follow the circular platform around, removing the platforms from under the constructs to drown them all. Be careful not to get hit by their attacks, they can easily one-hit kill players with a lower number of hearts.

The last construct isn’t on a platform, which means you’ll need to fight it directly. If it isn’t alerted, you can climb up the ladder and sneak around the back of it to the spot with three explosive barrels. Use Ultrahand to attach the three barrels together, making a super bomb. Then, quietly lift the barrels over the construct and drop them on it to deal a good amount of damage.
If you aim the barrels to drop just behind the construct, you can knock it off the ledge. It won’t fall in the water, but it will make fighting it much safer as it won’t be able to attack you back when you’re on the highest platform. Simply shoot arrows at it from safety until it is dead. Once you’ve defeated the final construct, the shrine will be complete.
If you need to practice shooting arrows at targets, do it right outside of the shrine then head in. We have a full guide on farming arrows here.
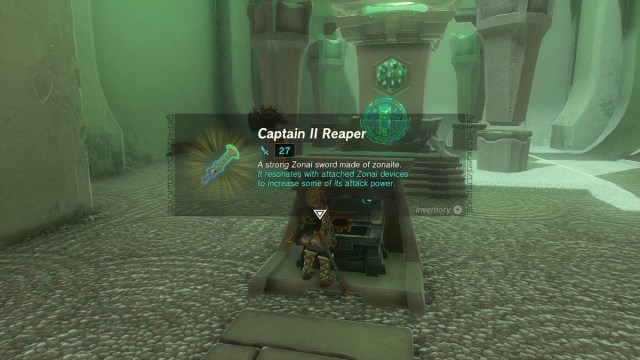
As you’re heading to the end of the shrine, don’t forget to open the reward chest, which contains a very useful Captain II Reaper sword.
Congratulations! You’ve now completed one of the harder shrines in Tears of the Kingdom.


