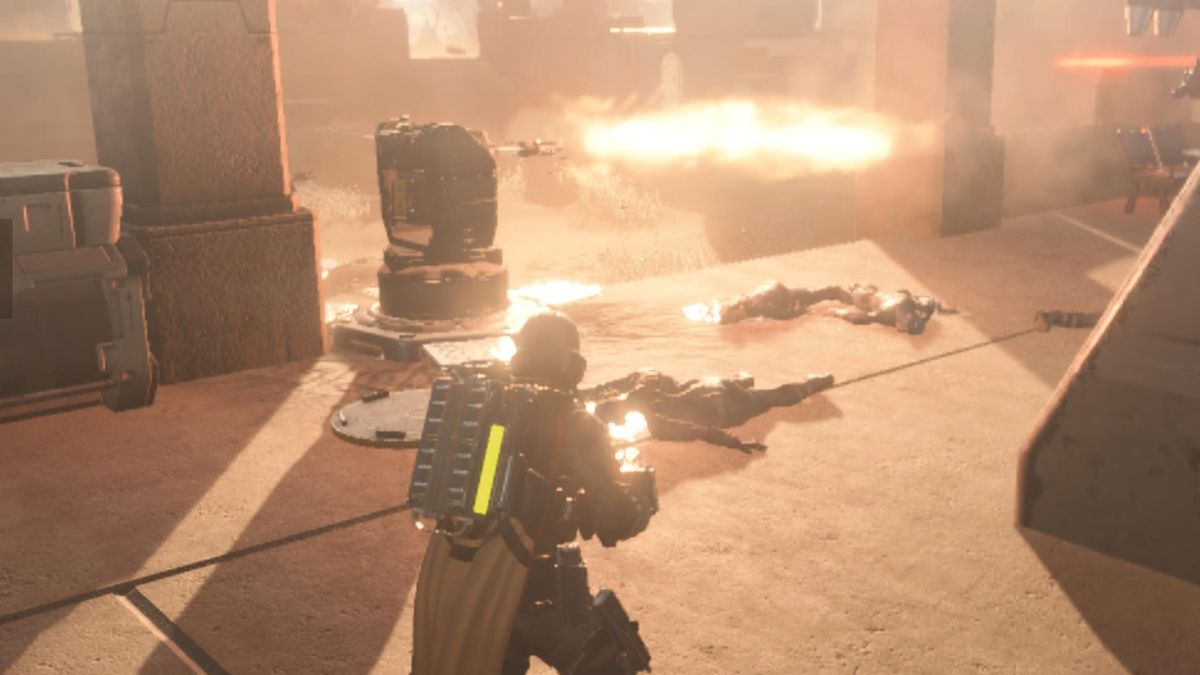
The Gatling Sentry is a powerful Stratagem in Helldivers 2 that can quickly make short work of any enemies, but only if you know how to use it.
There are dozens of Stratagems to unlock and master in Helldivers 2, each of which will help you create new builds for every type of mission. However, sometimes you’re forced to use specific Stratagems, whether that’s because a mission or planet calls for them or you have a Personal Order to complete. The Gatling Sentry is, mercifully, a Stratagem that’s easy to use and complete missions with.
How to use the Gattling Sentry in Helldivers 2
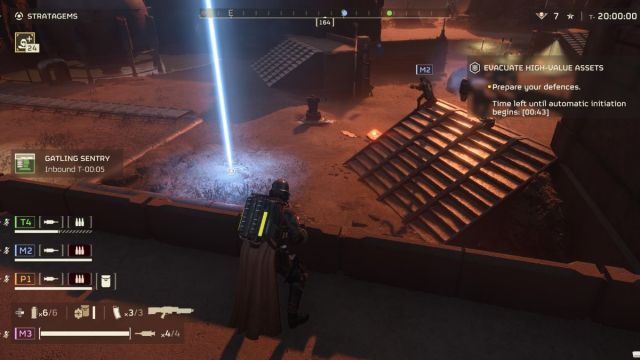
The best way to use the Gatling Sentry Stratagem in Helldivers 2 is as a line of defense for you and your teammates. Once requested, the Gatling Sentry drops onto the battlefield and begins firing at enemies within its fairly large range after a couple of seconds.
The way to use it that will earn you the most kills is in defensive missions where you must fight back against waves of enemies that are actively attacking you. This includes Retrieve Essential Personnel, Evacuate High-Value, Assets, and Blitz: Search and Destroy missions. In each, you’ll be battling against an onslaught of foes, so you can be sure that the Gatling Sentry will always have a target and get the most kills for you because you don’t need to go anywhere to find them.
If you’re trying to complete a Personal Order to acquire a certain number of kills with the Gatling Sentry, stick to the defensive missions as much as possible. These will garner you the most kills, whereas other missions will net you far fewer.
I also find that using the Gatling Sentry while waiting for the Pelican at the end of other missions is a great way to rack up kills. In most missions, enemies will swarm you once you’ve requested extraction, and this Stratagem makes short work of them, especially if you and your team position yourselves so you can add to the firepower raining down upon whatever is attacking.
Finally, you could opt to use the Gatling Sentry Stratagem as an offensive measure in Helldivers 2. By this, I mean deploy it into an unsuspecting group of enemies, such as a Terminid nest. The enemies don’t usually recognize the bright light calling down their deaths as a threat until it’s too late. Once the Stratagem has been deployed, it’ll shoot as many enemies as possible before being destroyed or running out of ammo, but you can help it by adding your shots as a distraction.
How to get the Gatling Sentry in Helldivers 2
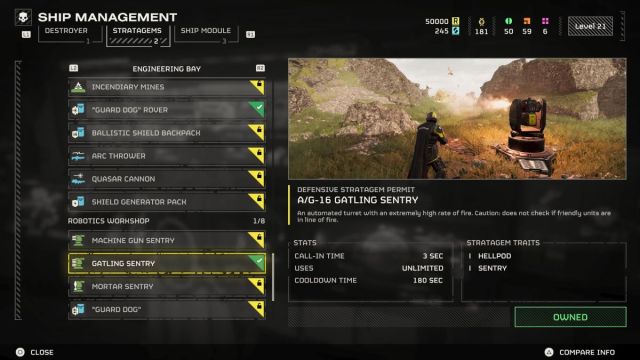
to get the Gatling Sentry Stratagem in Helldivers 2, you must purchase it from the Stratagem tab in the Ship Management menu. It doesn’t cost much and should be one of the first turret-based Stratagems you unlock because it’s so effective across a range of mission types.
Best loadout for the Gatling Sentry in Helldivers 2
The best loadout for any mission in Helldivers 2 is the one you’re most comfortable with. However, some Stratagems synergize with each other better than others. For the Gatling Sentry, the loadout I try to bring with me is as follows:
- Gatling Sentry
- Stalwart
- Anti-Personnel Minefield
- Guard Dog Rover
With the Gatling Sentry deployed, you can focus on using the Stalwart to kill as many enemies as possible. It’s a mobile machine gun that’ll allow you to stay safe if enemies get too close, but the Guard Dog Rover can add another layer of defense in that instance. Lastly, the Anti-Personnel Minefield creates a net of explosives that enemies will rush through once the Gatling Sentry attacks them. The ensuing fireworks are stunning.
For your basic weapons, you should always opt for what you find you play best. It’s up to you to choose your firearms, grenade, and Booster because you know what you get the most kills with. Using the above Stratagems, though, you’ll be an unstoppable killing machine with very little effort.