There are many random side quests in Infinity Nikki, some forming a longer series together. For example, you can complete the Risky Photography series of side quests by taking photos of certain enemies in specific locations.
There are a total of 15 Risky Photography quests to complete, split across three different NPCs:
- Syfdent
- Alfred
- Mamoda
To unlock a new NPC and their Risky Photography quests, you must complete all of the previous NPCs’ quests.
How to complete Rishy Photography quests
To complete any Risky Photography quests, you need to snap a picture of the enemy that the NPC asks for. The enemy required is usually close to where the NPC is standing, and the photo doesn’t need to be remotely artistic to count. The only requirement is that the photo be captured through the camera, and the enemy needs to have a golden box around it, just like the targets in Forced Perspective quests.
Nikki can be present in the photo or not, that’s entirely up to you. Don’t be afraid to take some damage to get the shot, although obviously try to track how much health you have left. Once you’ve got the photo, head back to the quest NPC and hand it over to complete the quest and get the rewards.
For completing each Risky Photography quest, you’ll be rewarded with the following:
- 10 Diamonds
- 3 Upgrade Packs
Syfdent’s Risky Photography quests in Infinity Nikki
Syfdent has seven Risky Photography quests to complete. Once you’ve completed all of his quests, you can unlock Alfred’s selection.
Risky Photography: Sad Sack
This is the first Risky Photography quest you can pick up and complete, and it will unlock further quests in the series. To complete it, head to the Dream Warehouse and locate Syfdent at the bottom of the hill. He’ll ask for a photo of a Sad Sack.
Several Sad Sack enemies can be found in the surrounding area, so search around and be ready to open up Momo’s Camera if you find one. Quickly snap the shot, then return to Syfdent to hand it over.
Risky Photography: Greedy Pouch
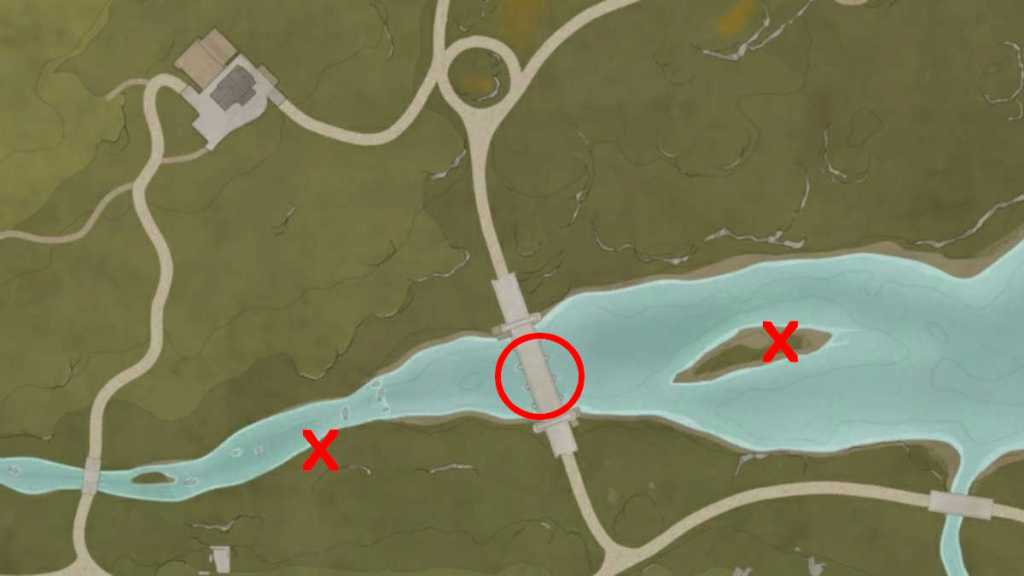
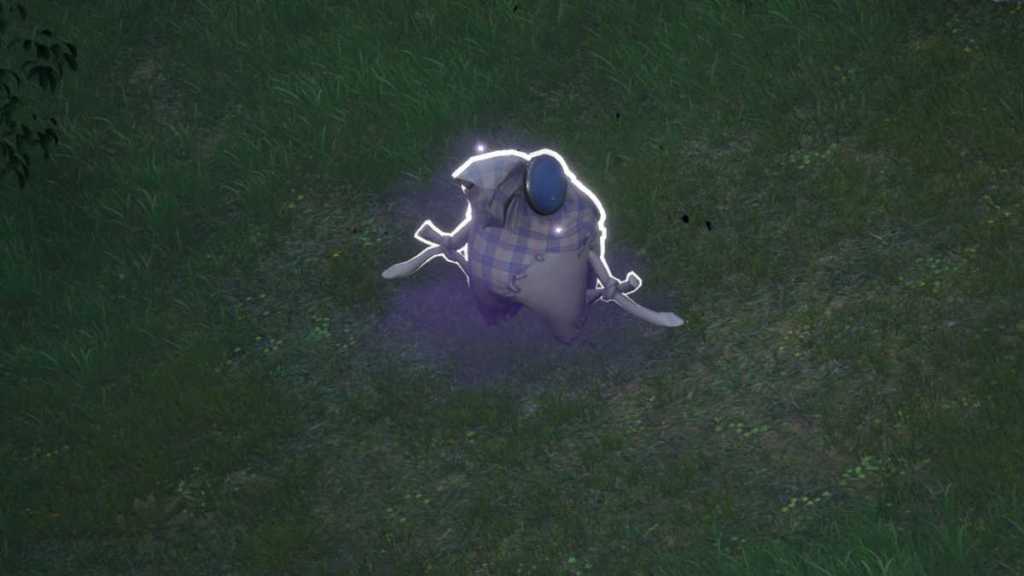
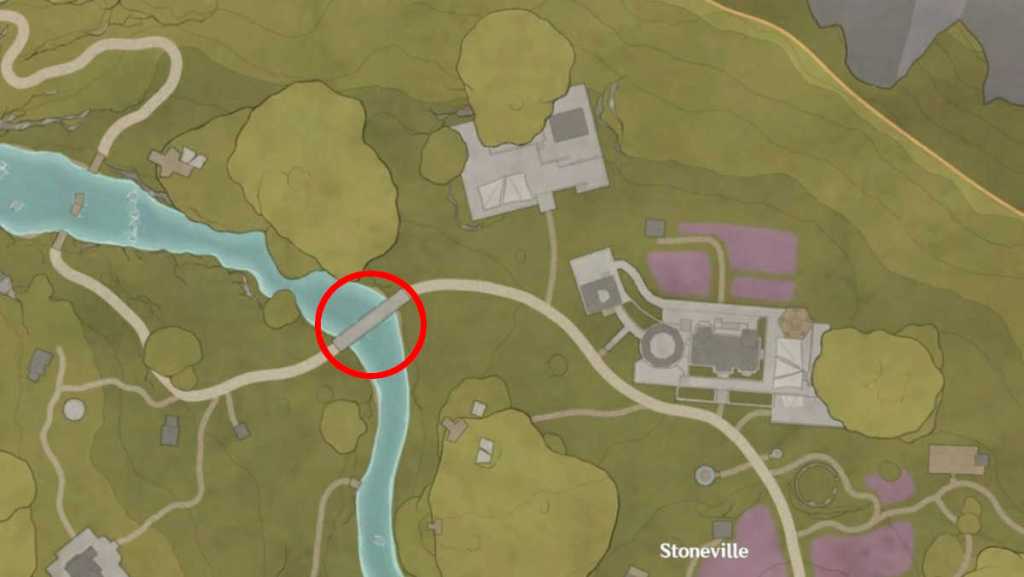
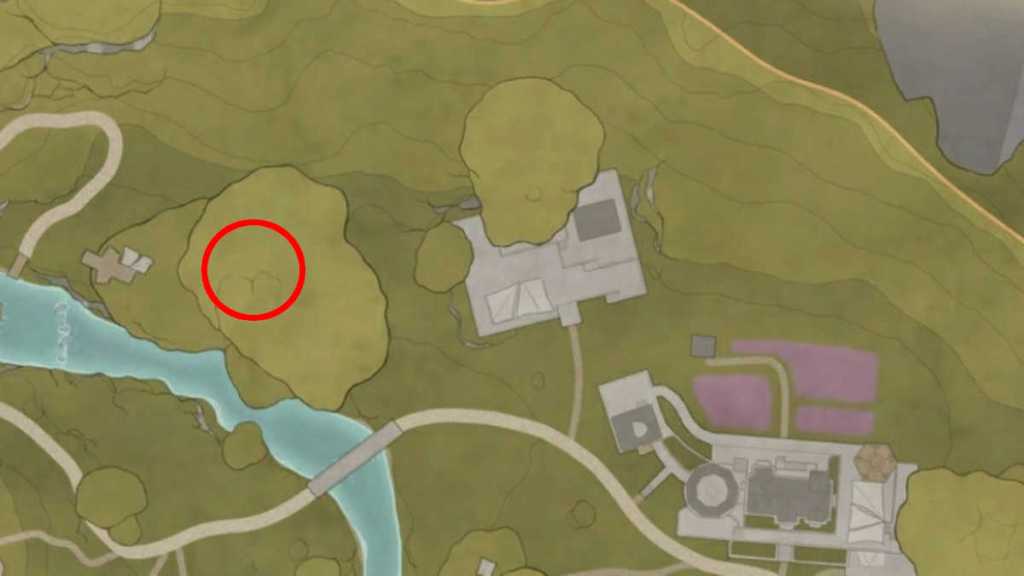
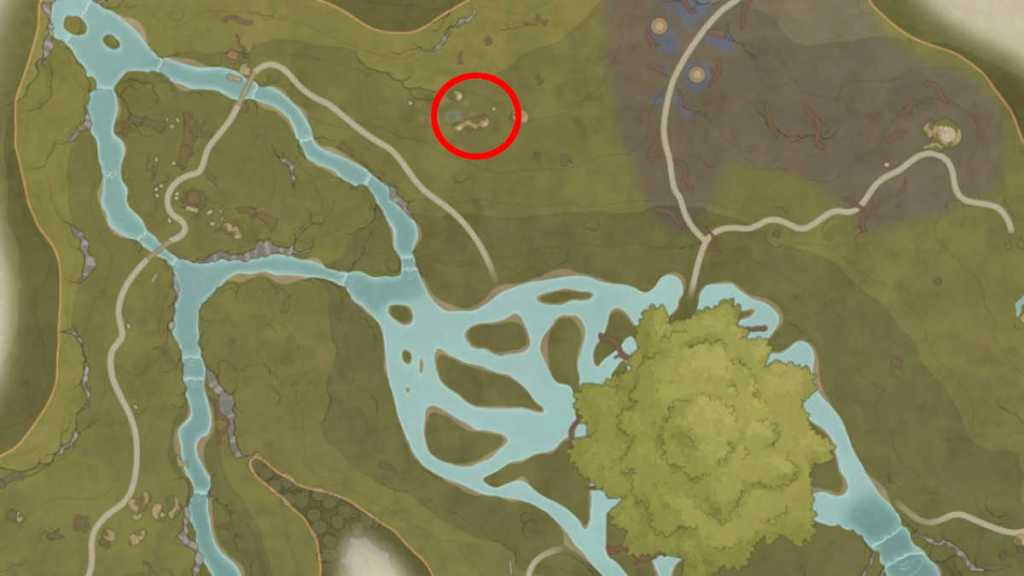
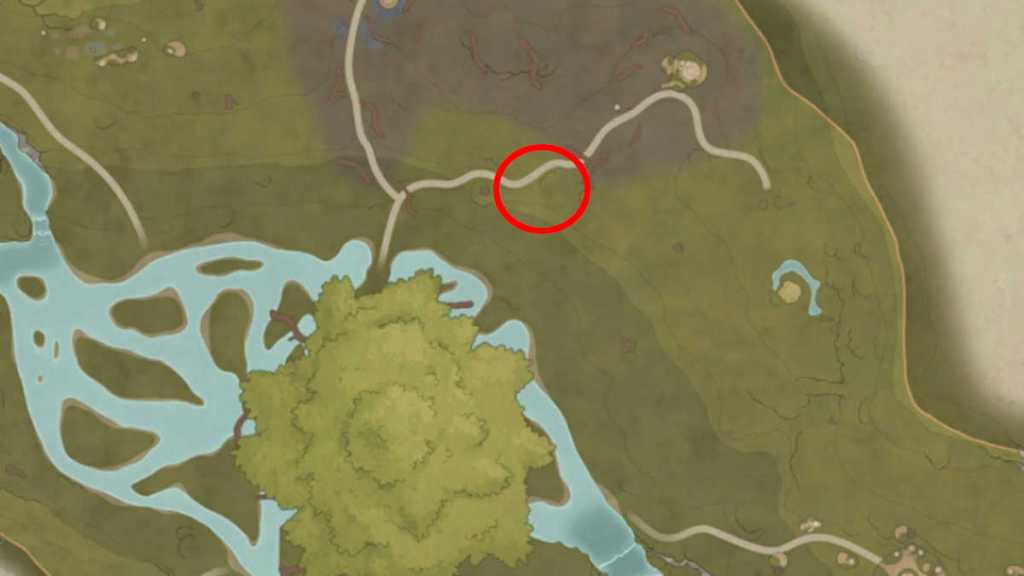
For this quest, Syfdent is located on the bridge southeast of the Meadow Activity Support Area. Upon talking to him, he’ll ask for a photo of a Greedy Pouch.
Greedy Pouches aren’t common, but they do spawn in specific locations, and a couple of them are relatively close to the bridge. The first can be found on the small island in the middle of the river to the east of the bridge, while the second can be found on the southern shore of the river to the west of the bridge. I’ve marked both locations on the map above.
When you’ve got the photo, remember to kill the Greedy Pouch to get a hefty sum of Bling. Then take the photo and hand it over to Syfdent, and you can move on to the next encounter.
Risky Photography: Jelly Pouches
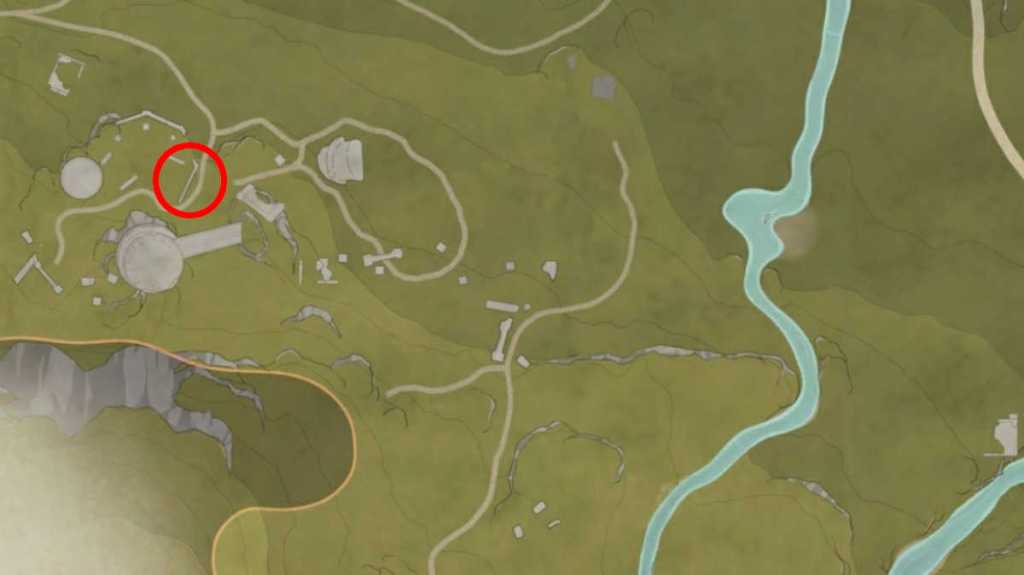
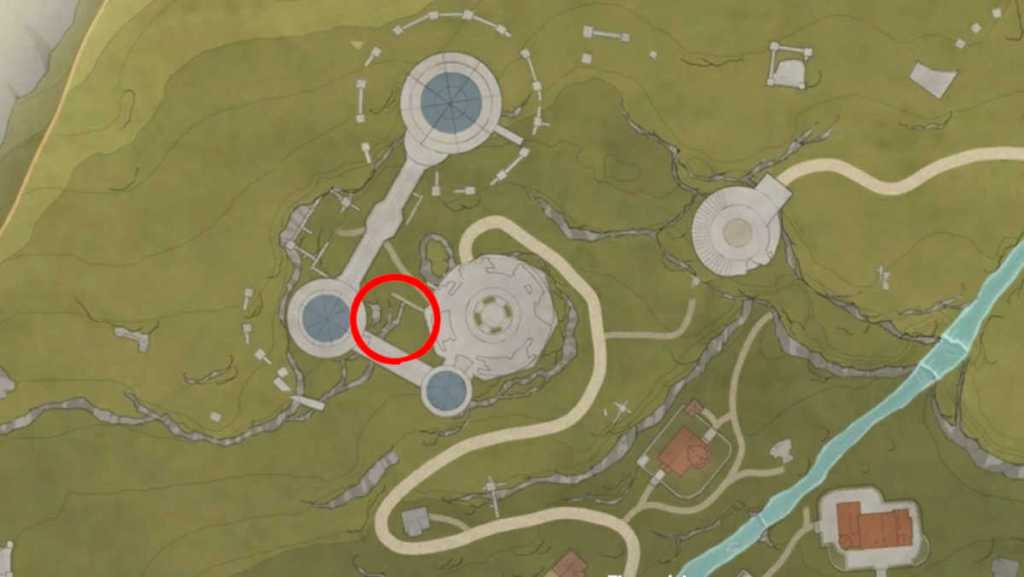
To find Syfdent and start this Risky Photography quest, head to the Relic Hill Warp Spire and then head northwest to the nearby ruins. He’ll ask for a photo of three Jelly Pouches, which can be found in the ruins themselves.
It can be hard to get this shot without taking too much damage, but you can use the pillars of the ruins to shield yourself from the incoming attacks. Once you’ve got the shot, hand it over to Syfdent.
Risky Photography: Octopack
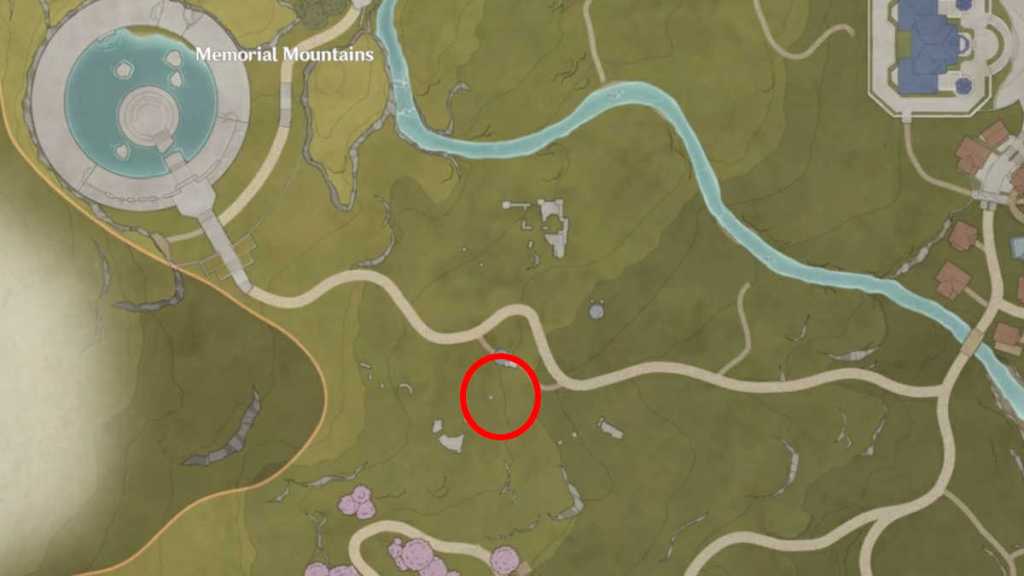
Syfdent will be to the south of the secret gazebo in the Memorial Mountains for this quest, and he wants a photo of an Octopack shooting Essence Orbs.
This one can be difficult to complete without getting hurt, as you have to wait for the Octopack to attack so that you can get the shot you need. If you can, take some healing items with you, and use the surrounding trees and landscape to shield yourself.
Risky Photography: Sankious
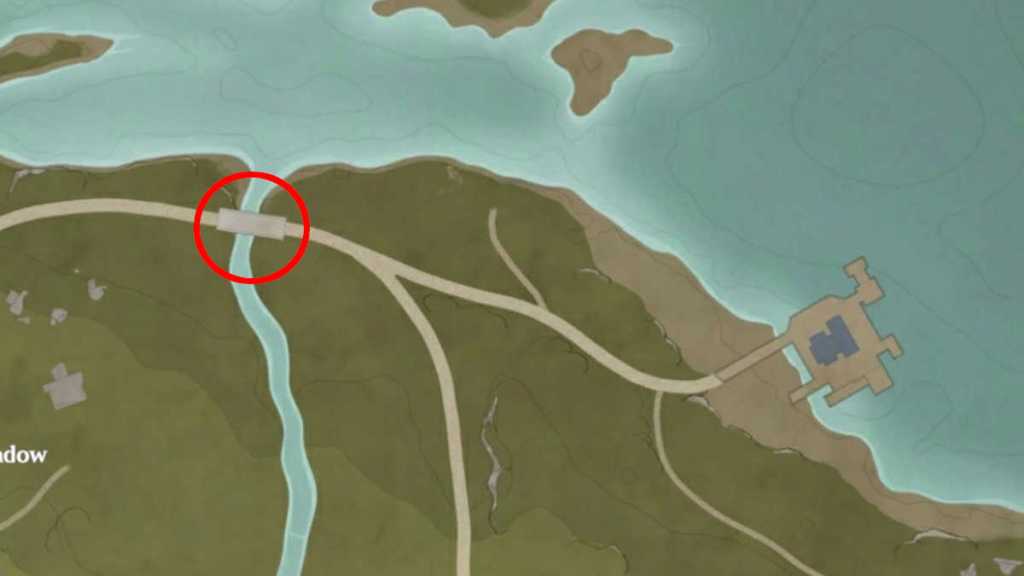
For this quest, Syfdent is located on the small bridge northwest of the Meadow Wharf Warp Spire. After talking to him and finding out he wants a photo of a Sankious mid-leap, head down to the shore and find a Sankious Esseling.
To get it to start jumping, just approach until it notices you. Jumping is the Sankious’ normal movement style, so it will begin hopping towards you to attack. Quickly snap a photo and then head back to Syfdent.
Risky Photography: Sssack
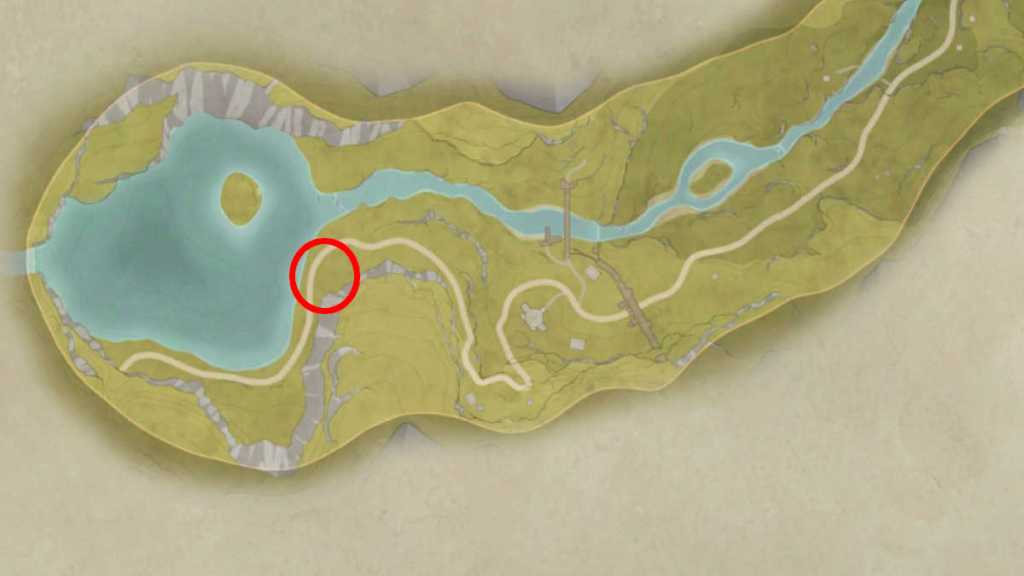
To find Syfdent for this quest, head to the Abandoned Fanatic Wisher Camp Warp Spire and then make your way to the shore of the lake to the west. This time, he wants a photo of a “Sssack losing its target under the night sky.”
You’ll need to either head back to this location at nighttime or use the Run, Pear Pal! feature to skip to the correct time. Then, make your way into the Abandoned Camp and find one of the Sssacks, alerting it to your presence. To make it lose track of you so you can get the photo, hide behind some crates nearby and quickly get the shot.
Risky Photography: Bouldy

Syfent is easy to find for this quest, and you’ll find him standing outside the Florawish Stylists Guild. He wants a photo of Bouldy, and if you’ve progressed far enough to unlock the Realm of the Dark, this quest will be easy to complete.
Use a Warp Spire to enter the Realm of the Dark and challenge Bouldy on any level. Getting a photo here can be tricky because if Bouldy hits you with an attack at any time, it will remove you from Photo Mode. However, keep trying and get the shot, then exit the Realm of the Dark and give it to Syfdent to complete his final quest.
Alfred’s Risky Photography quests in Infinity Nikki
When you’ve completed all of Syfdent’s Risky Photography quests, Alfred will appear with four new quests to complete. These are all located in the Stoneville and Abandoned District areas of the map, and there are four in total.
Risky Photography: Bitey Bag
The first of Alfred’s quests can be picked up by talking to him on the bridge southwest of the Dye Workshop in Stoneville. He wants a photo of an unsuspecting Bitey Bag in the rain.
This can be tricky, and once you’ve tracked down a Bitey Bag in the area, you’ll need to use the Run, Pear Pal feature to skip through time and find rain. Once you’ve found it, remember not to alert the Bitey Bag of your presence and get the photo from a distance, using the zoom function of Momo’s Camera to avoid detection.
Risky Photography: Hard Sack
For this quest, Alfred is located on the Stonetree to the left of the Dye Workshop in Stoneville. After talking to him, you’ll need to find some Hard Sacks nearby, then get a photo of one looking at you.
You don’t need to approach the Hard Sack at all for this photo. Just wait for it to turn in your direction. You can get into a fight with one to speed the process along but remember to keep an eye on your health.
Risky Photography: Radical Octopack
You’ll need to travel to the Besides the Golden Fields Warp Spire and head up onto the Stonetree in the south to find Alfred for this quest. Once you’ve talked to him, he’ll ask for a photo of a Radical Octopack shooting Essence Orbs at dusk.
Use the Run, Pear Pal feature to skip time if you need to, then approach the Radical Octopack, alerting it to your presence. Enter Photo Mode, then wait for it to shoot orbs at you. When the orbs are visible, snap the shot and return to Alfred to complete the quest.
Risky Photography: Caged Greed
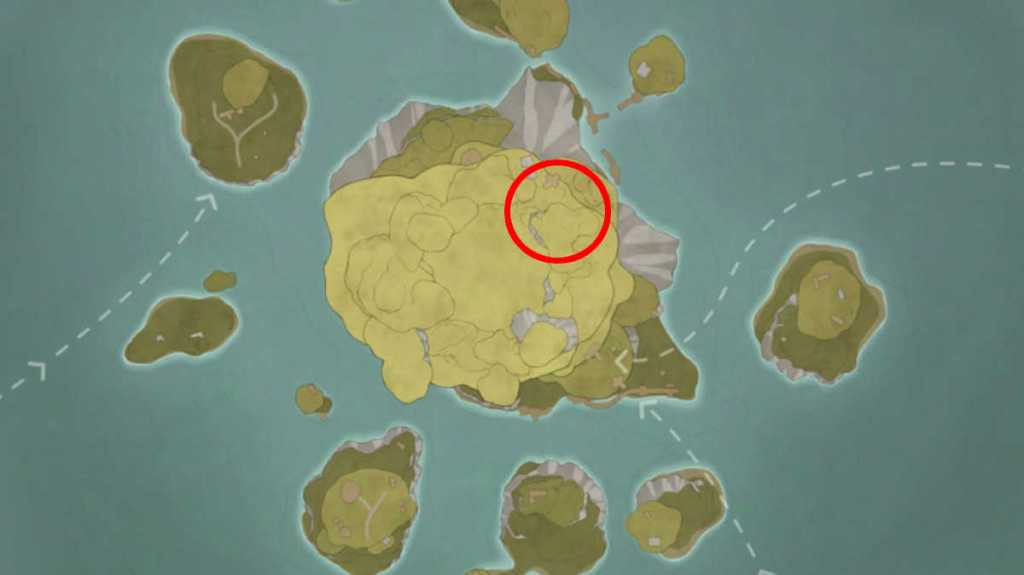
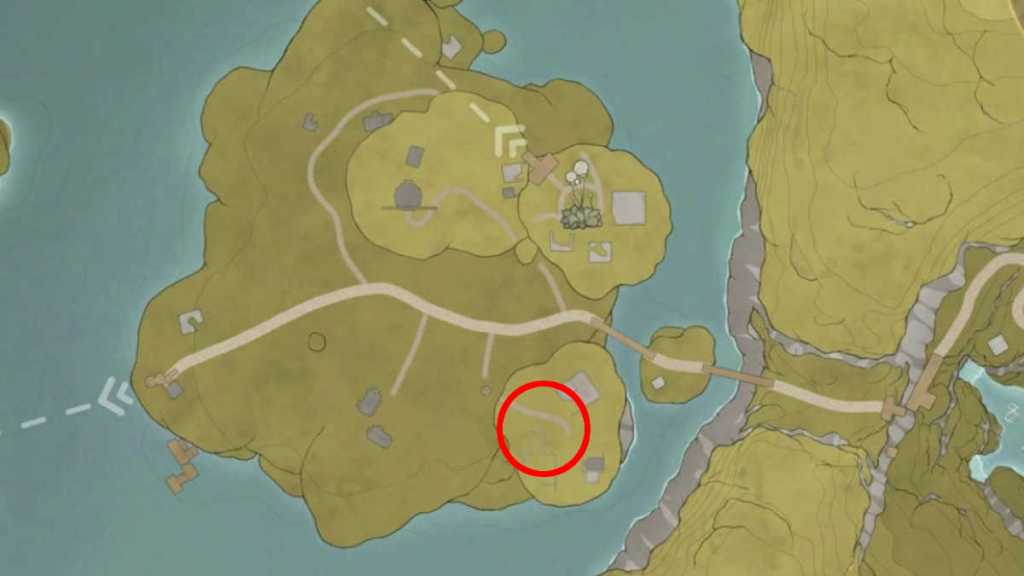
To complete this Risky Photography quest, find Alfred on the northernmost island in the Abandoned District, close to the Stonecrown Peak Warp Spire. He wants a photo of a Caged Greed spinning while chasing an enemy, which is easier said than done.
To get the photo you need, approach a Caged Greed and allow it to target you, then run away. Once you’ve reached a decent distance, turn around and enter Photo Mode, wait for the enemy to spin, and get the shot.
Mamoda’s Risky Photography quests in Infinity Nikki
Having completed both Syfdent and Alfred’s quests, you can now complete Mamoda’s Risky Photography quests in the Wishing Woods. There are four in total.
Risky Photography: Trick-O-Bag
Mamoda can be found at the farm close to the Timis’s Beauty Lap Warp Spire in the Wishing Woods. He has eyesight issues but really wants a photo of a sleeping Trick-O-Bag.
Locate a Trick-O-Bag nearby, and then keep a safe distance. The last thing you want to do is alert it to your presence by running, jumping, or attacking, or else you won’t be able to get the shot. Using the in-game zoom feature, zoom in as far as you can and get a photo of the Esseling sleeping, then take it back to show Mamoda.
Risky Photography: Paired Trap Sharks
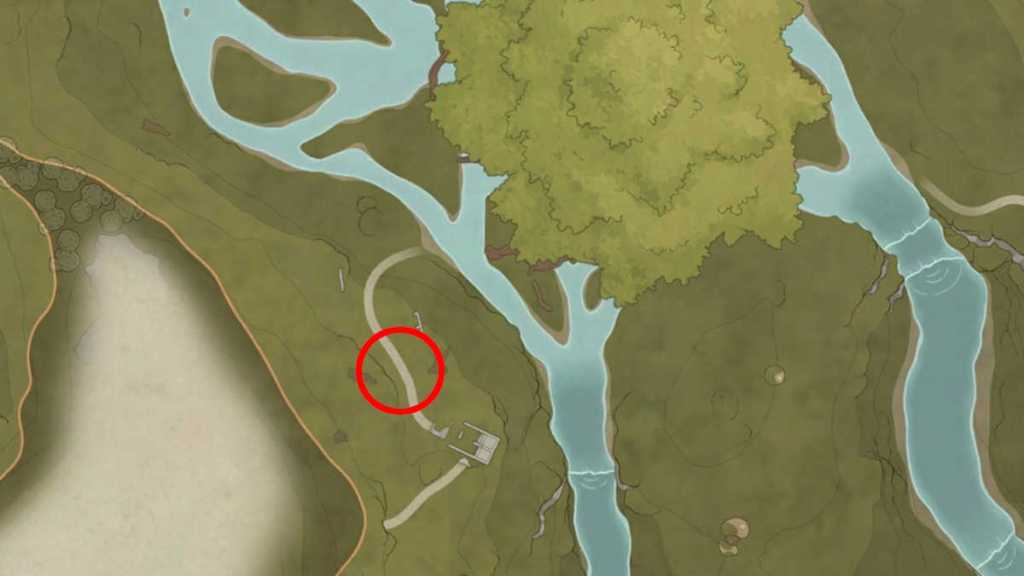
Staying in the Wishing Woods, head to the northeast of the Grand Tree, to the Desperation Orb Warehouse Warp Spire. You’ll find Mamoda nearby, and he wants a pair of two Trap Sharks.
The location will be marked on your map, so head there and try to keep your distance from the Esseling duo. Use the zoom feature to get a good shot, and then head back to Mamoda.
Risky Photography: Stunned Harsh Sssack
Make your way to the Swordsmith Ruins Warp Spire to the southwest of the Grand Tree in the Wishing Woods and talk to Mamoda. This time, he wants a photo of a stunned Harsh Sssack, so you’ll need to use the tools at your disposal to get this shot.
Head to the quest marker, and you’ll find some Harsh Sssacks close to a Windaze Bloom, a flower that looks like a windmill and can be attacked. Engage the Harsh Sssacks in combat, and then drag them close to the flower before throwing an attack at the flower itself. As long as the Harsh Sssacks are close enough, they’ll be stunned.
You only have a short time to get the photo before they come out of their stunned haze, so work quickly.
Risky Photography: Chigda
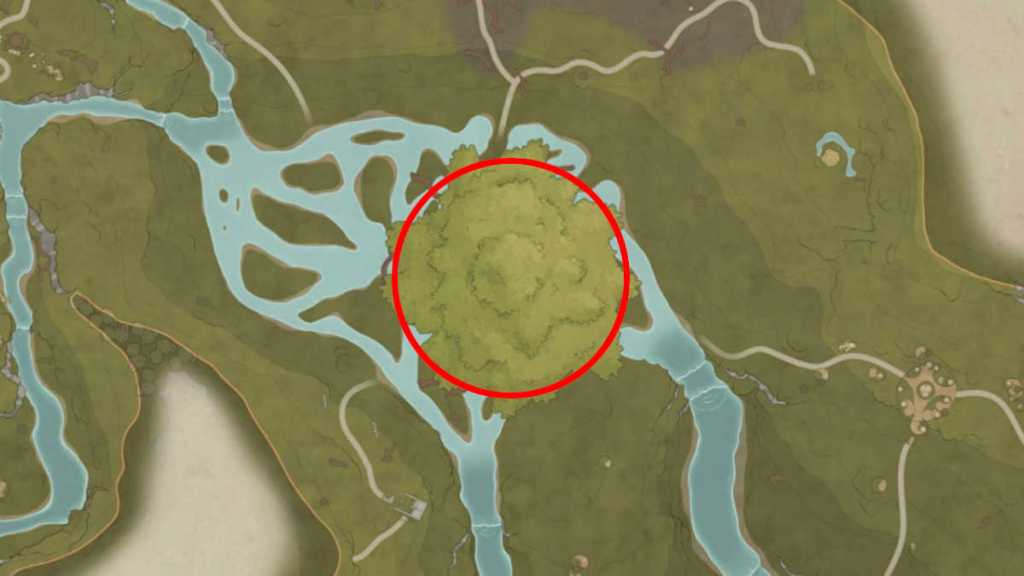
To complete this final quest, find Mamoda at the Grand Miliwish Tree. He wants a photo of Chigda summoning vines.
Like Syfdent’s photo of Bouldy, getting a photo of Chigda can be done through a Realm. This time, you must enter the Realm of Breakthrough and challenge Chigda. Wait for him to stab his roots into the ground, then get a photo.
Remember, if you get hit by an attack, you’ll be forcibly removed from Photo Mode, so this might take a few tries to get right.


