
Threadville blends that sunny countryside whimsy with puppet people and horror, a perfect blend of cute and creepy. Like any good horror game, it’s filled with challenges and puzzles as you’re stalked by puppet horrors. Here’s my Threadville Act 1 walkthrough guide to help you get started if you’re stuck somewhere.
Table of contents
Complete Threadville Act 1 Guide
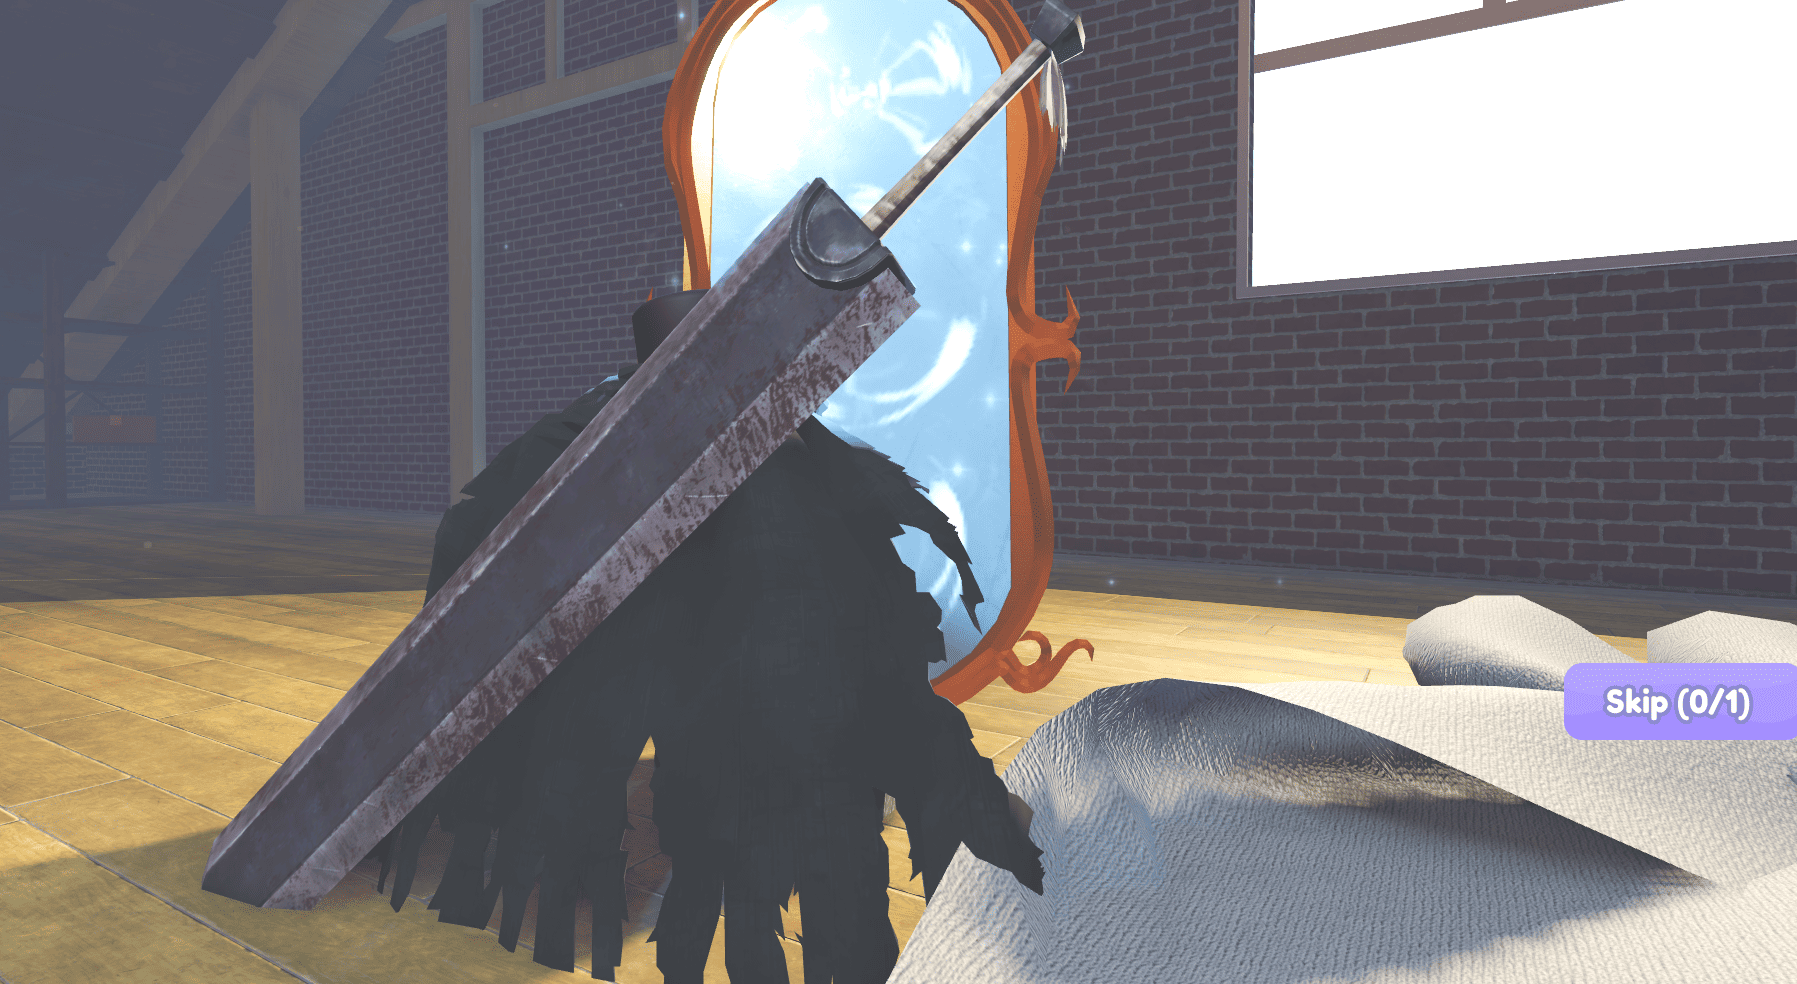
You start Threadville from the main lobby where you can join the Act 1 circles with 4 to 10 players in co-op. You can also play alone and be fine, it’s just more fun with friends. As soon as you join an Act 1 lobby and get started you’ll go through a cutscene. Your character is in their grandma’s attic and you need to interact with boxes until you find a sewing machine. Then, approach a mirror where you’ll get teleported to the whimsical and spooky world of Threadville where everyone’s a puppet.
Labyrinth, Honey, and Bees
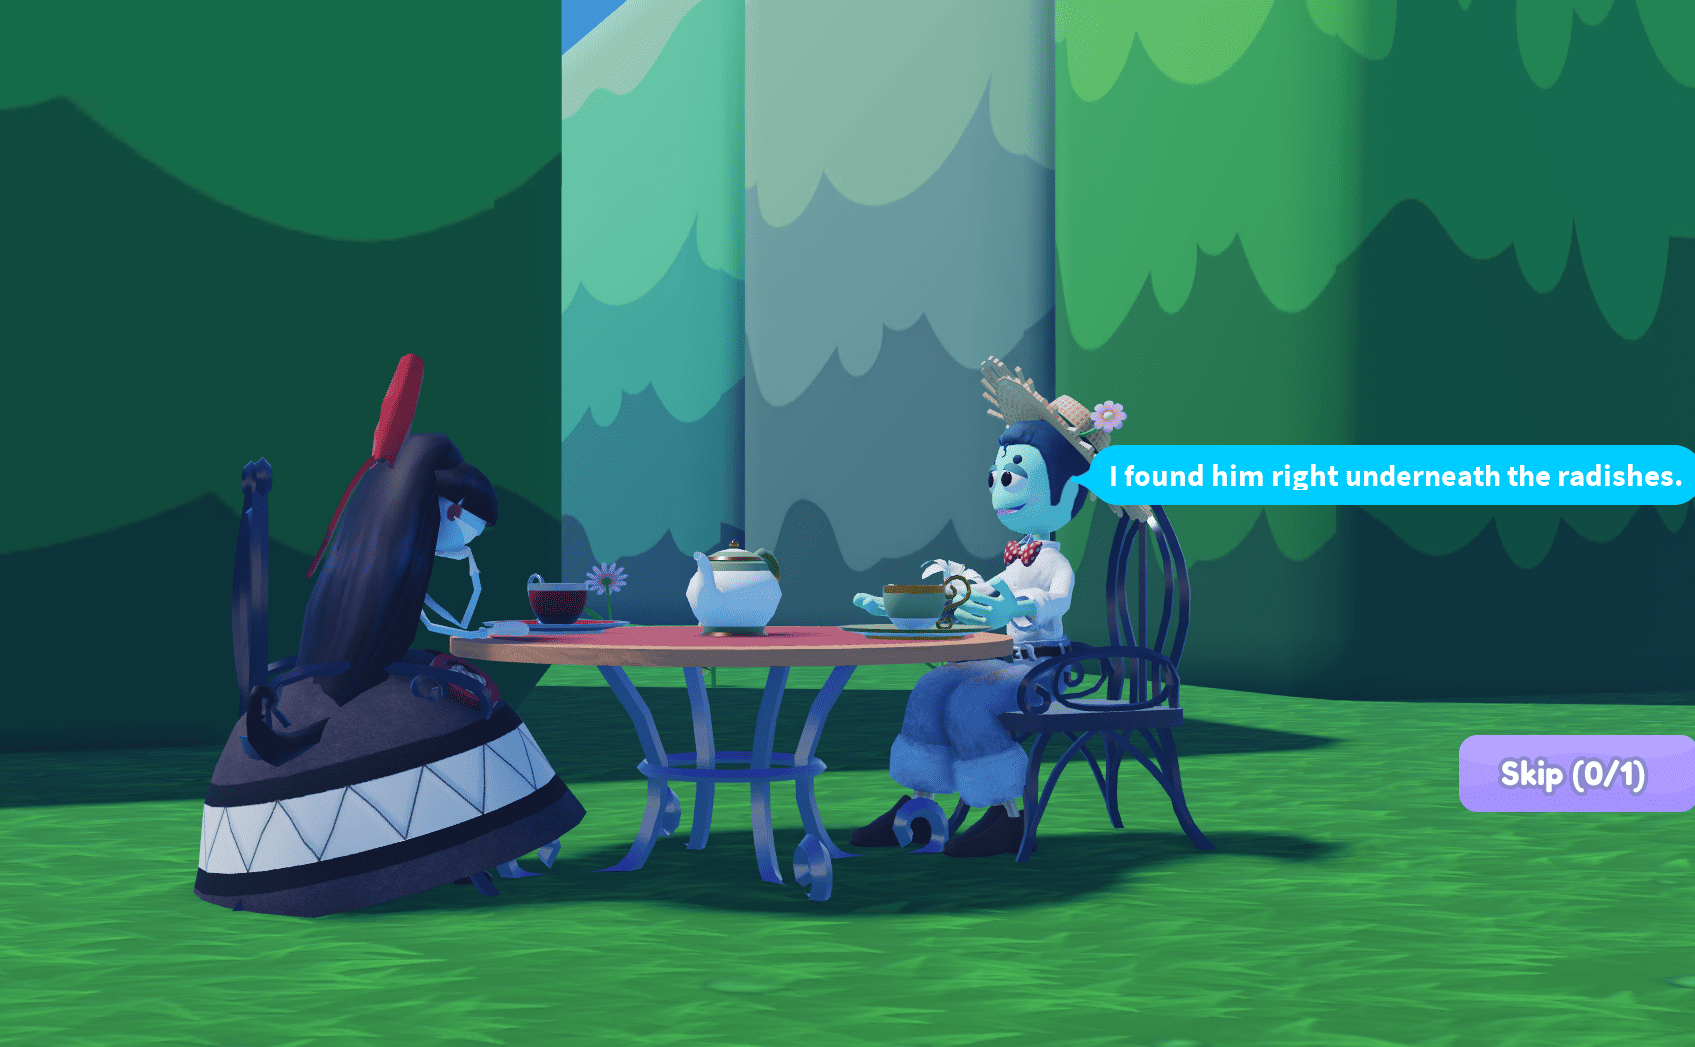
Make your way through the cutscene to meet your first Threadville characters – the jolly Oliver and the goth queen Veena. You need to offer some honey to the guard dog Rocky to exit the labyrinth and head to Threadville. Here’s how:
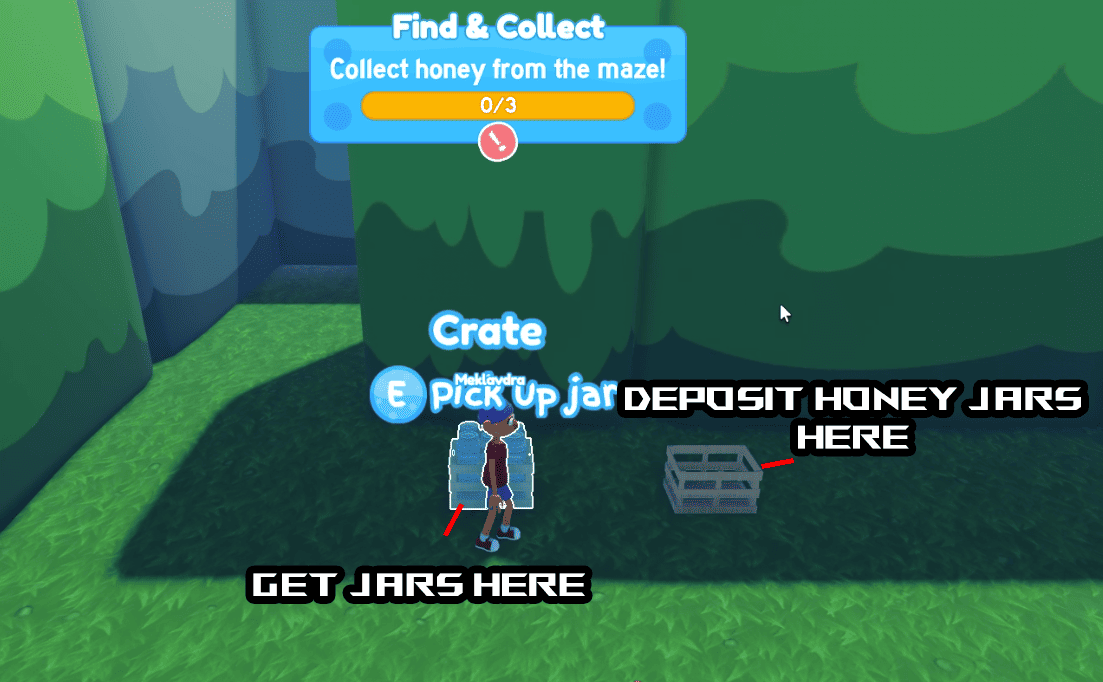
- First, pick up a jar from the left basket.
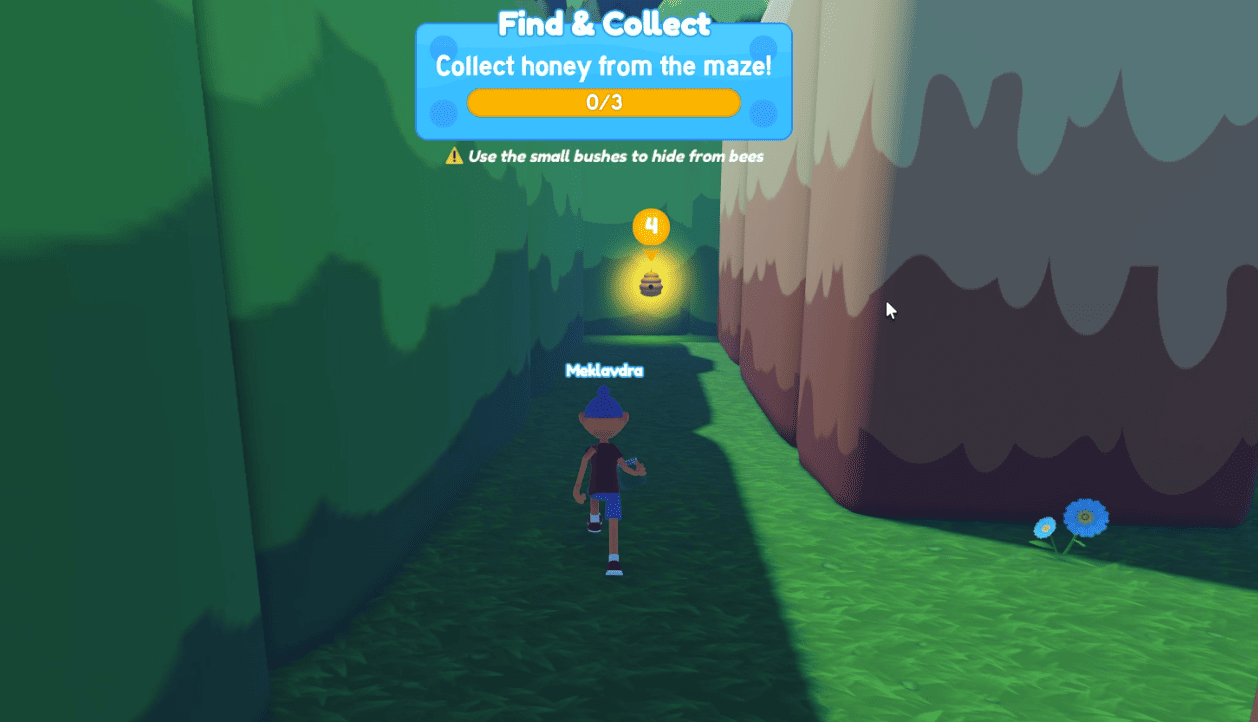
- Make your way to the honey icons on your HUD through the labyrinth while avoiding the bees. From the starting location there is one forward and right, forward and left, and behind you.
- You can sprint with Shift which uses Stamina at the bottom and hide in the bushes you find with E.
- Once you find honey, equip your jar with it’s corresponding button (In this case 1).
- Interact with it with E.
- Bring it back to Oliver and Veena in the center and place it in the right basket with E.
- Pick up another jar and rinse and repeat twice more.
- There are various honey locations and you can pick and choose as you explore and avoid the bees.
Once you have all three honey jars you’ll go to Rocky and pass through onto the main town.
Help the Threadville Residents


After some brief dialogue you’ll be able to free roam Threadville and help Charlotte, Veena, and Oliver with mini quests. I highly recommend you do and win all three before night falls because you get useful items from each one that will help you in the “horror” segment later. Note that you can retry all three:
- Charlotte: You’ll play tether ball where the game is a quick-time event where you have to hit M1 when the ball is on your side and the white circle reaches the dim circle. Keep hitting it until the ball spins all the way around the pole from your side. If you win, Charlotte will drop a Camera nearby for you to pick up which can be used to blind monsters that chase you later.
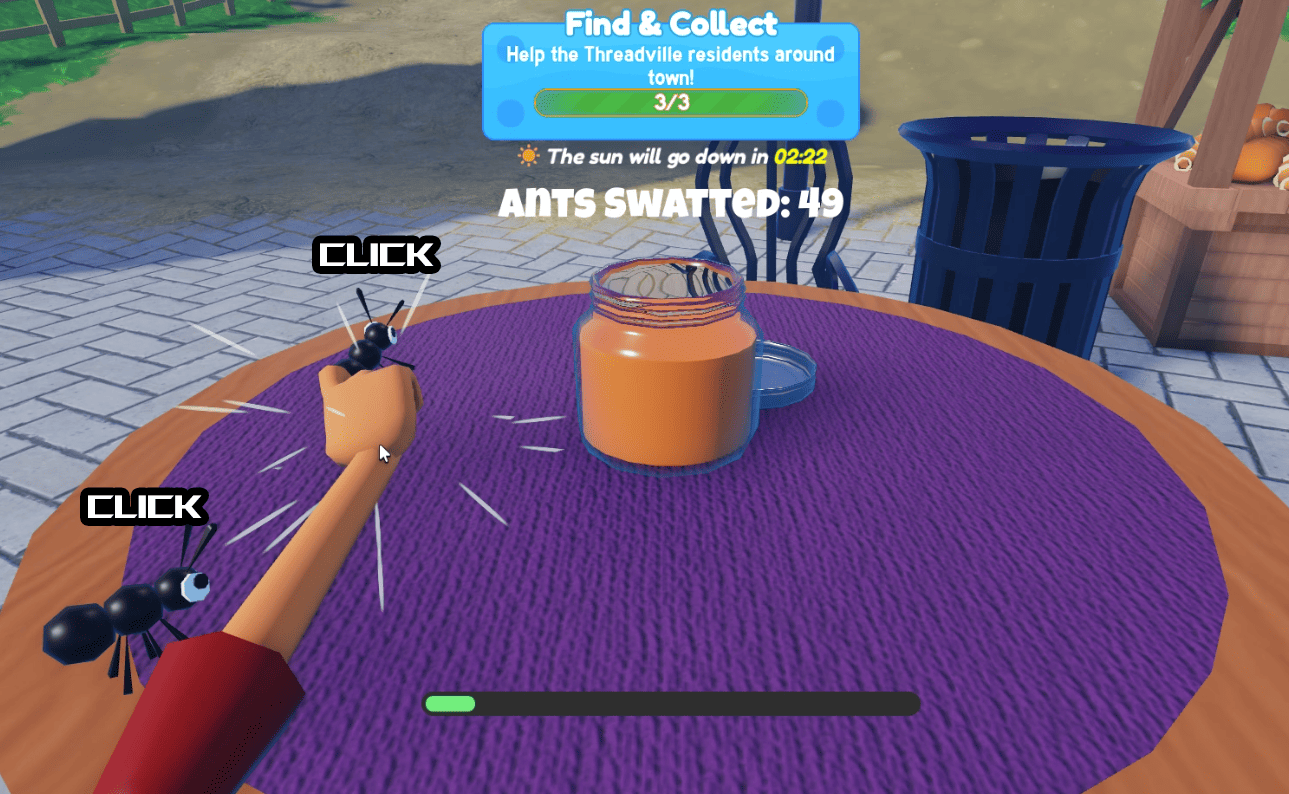
- Veena: This is a simple point-n-click quest where you have to click on all ants before they reach the honey. If you win, she’ll drop Tea which you can pick up and activate later to boost your movement speed.
- Oliver: This is a simple two-match memory game where you have to match 2 of the same vegetables. I recommend you start from the top-left and go in order finding veggies until you find matches. You have limited turns and if you win he’ll drop a Carrot for you to pick up which you can use later to boost your stamina.
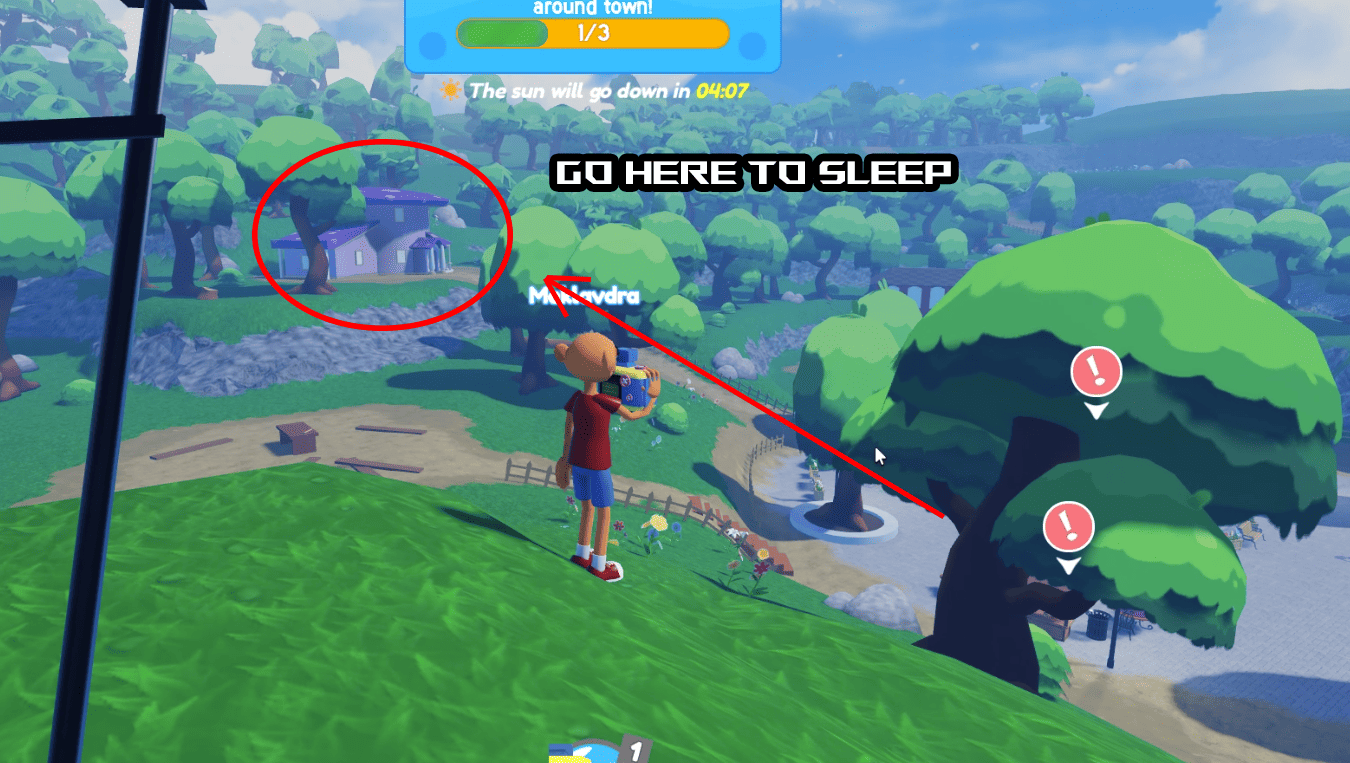
Once you’re done with all three feel free to pick up some Coins around town if you have time left and then head into Patty’s purple home. It’s right above the town square. You’ll have a quick cutscene and go back to sleep only to be awakened by something strange.
Power Box Fuse Puzzle Guide in Threadville
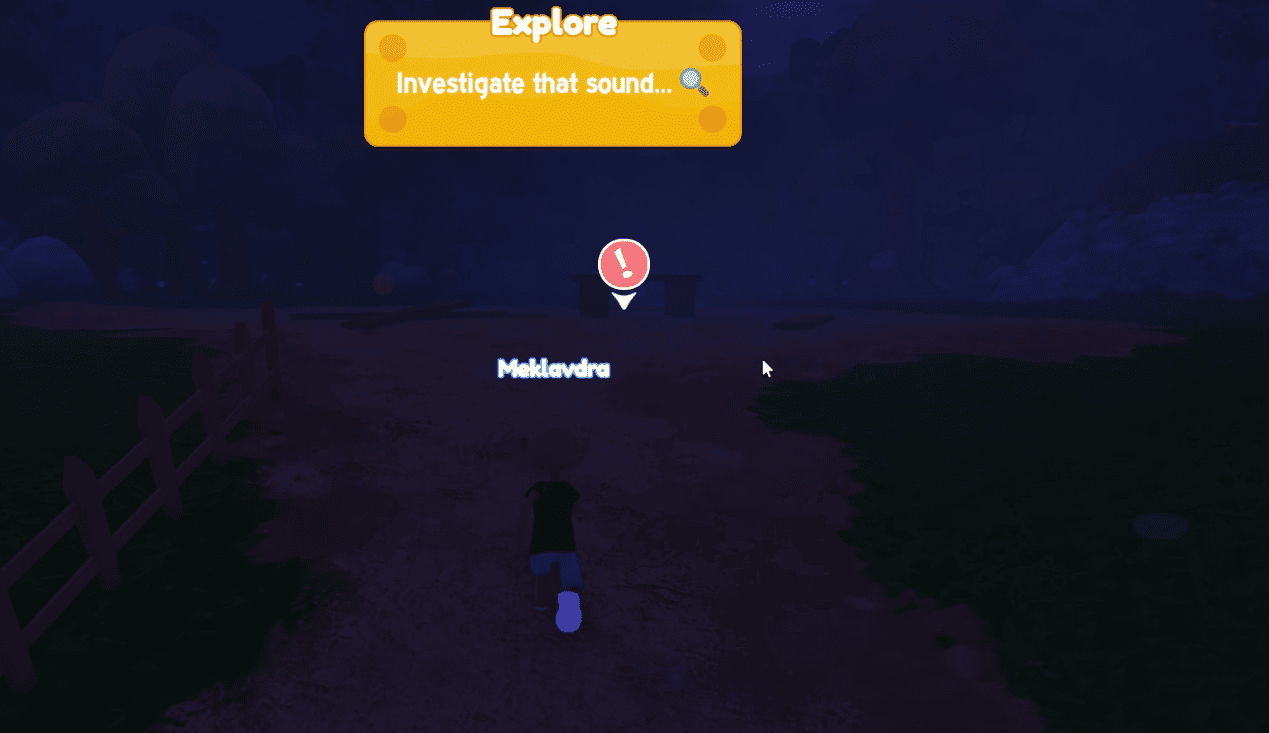


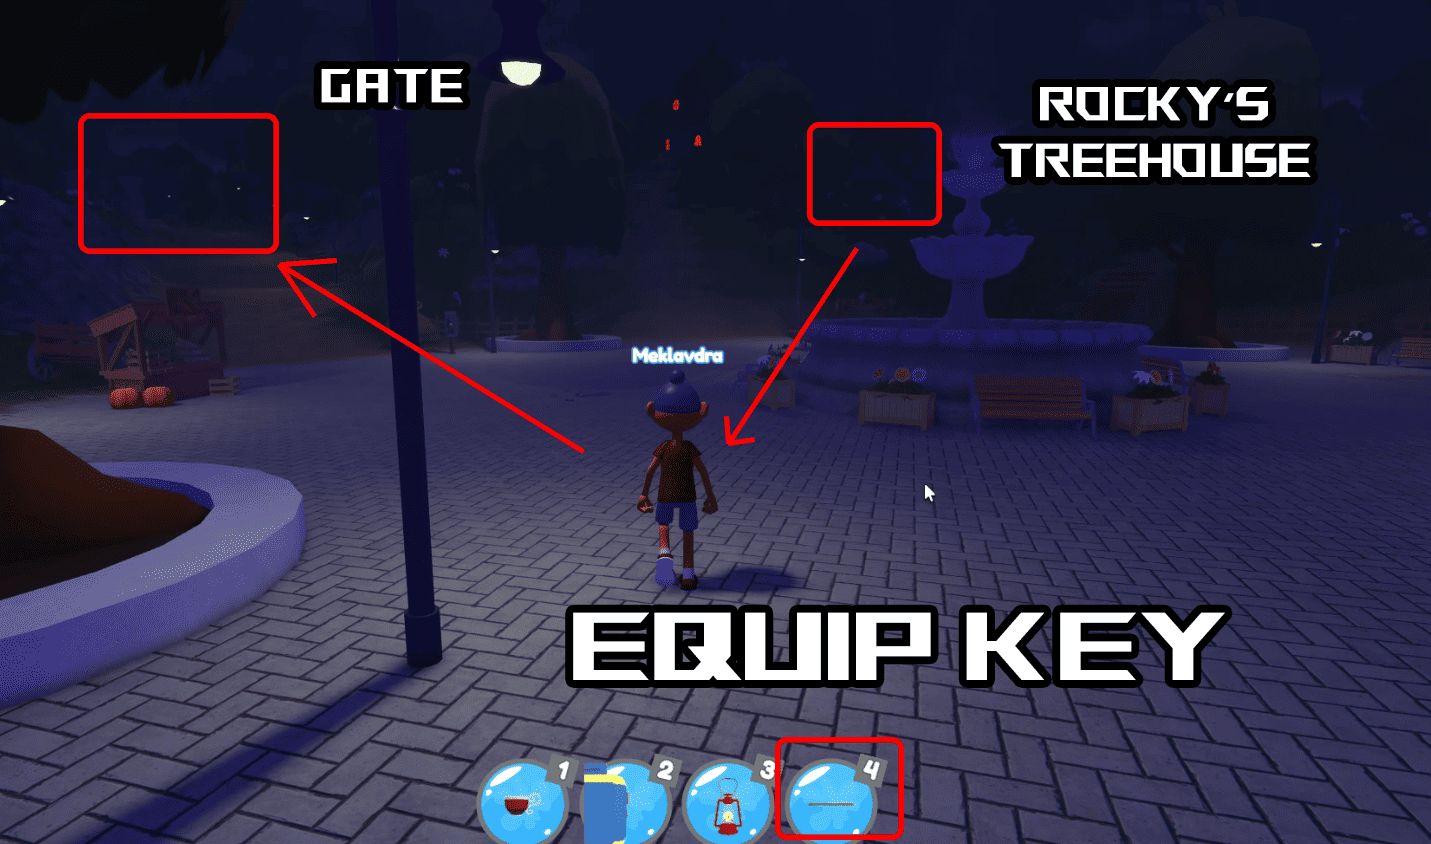
Once you’re awake and outside head to the exclamation point and you’ll find a tape recorder. Rocky will then bust out of his shed in monster form and you’ll start your first major horror encounter. Here’s what you have to do:
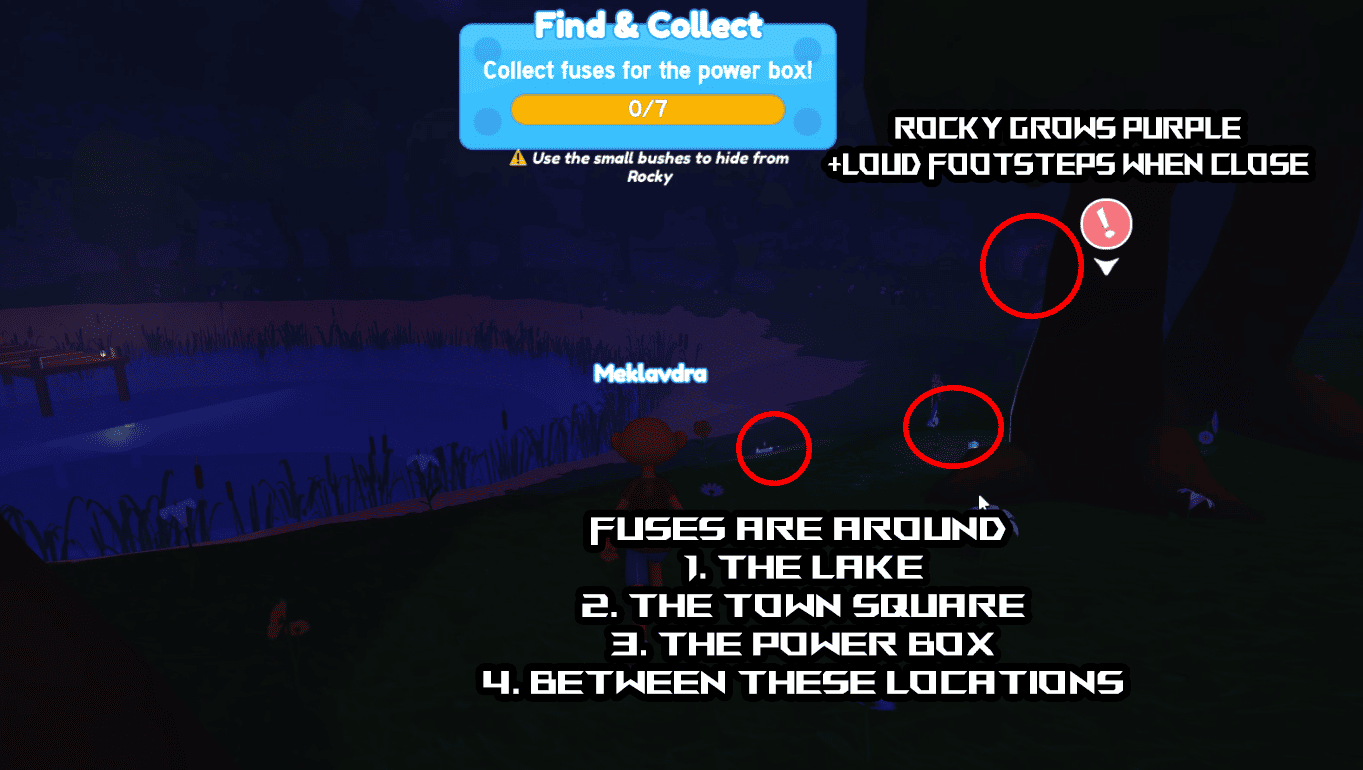
- Evade Rocky: Turn on sound since you’ll hear Rocky’s footsteps louder and louder as he approaches and you can spot him by his purple aura so stay away from him while picking up fuses. Use bushes to hide if he gets close. If Rocky catches you at any point, you’ll have to start Act 1 all over.
- Useful Items: The Camera can blind Rocky briefly stunning him. The Tea increases your movement speed and the Carrot increases your Stamina. The Tea and Carrot are single-use items.
- Fuses and Power Box: There are shiny fuses on the ground scattered around the nearby lake area, as well as the town square and next to the Power Box. The Power Box is marked on your HUD. Pick up fuses to keep them in your inventory and take them to the Power Box. To use it, equip the Fuse and press E near the Power Box. You might have to make a two-way trip since you won’t be able to fit all 7 fuses in your inventory if you have Carrots, Tea, and the Camera. Be careful of Rocky and loud footsteps when he’s nearby.
Once you connect all fuses the market quest will start. You can also use the Lantern for light.
Hopscotch Puzzle Guide in Threadville
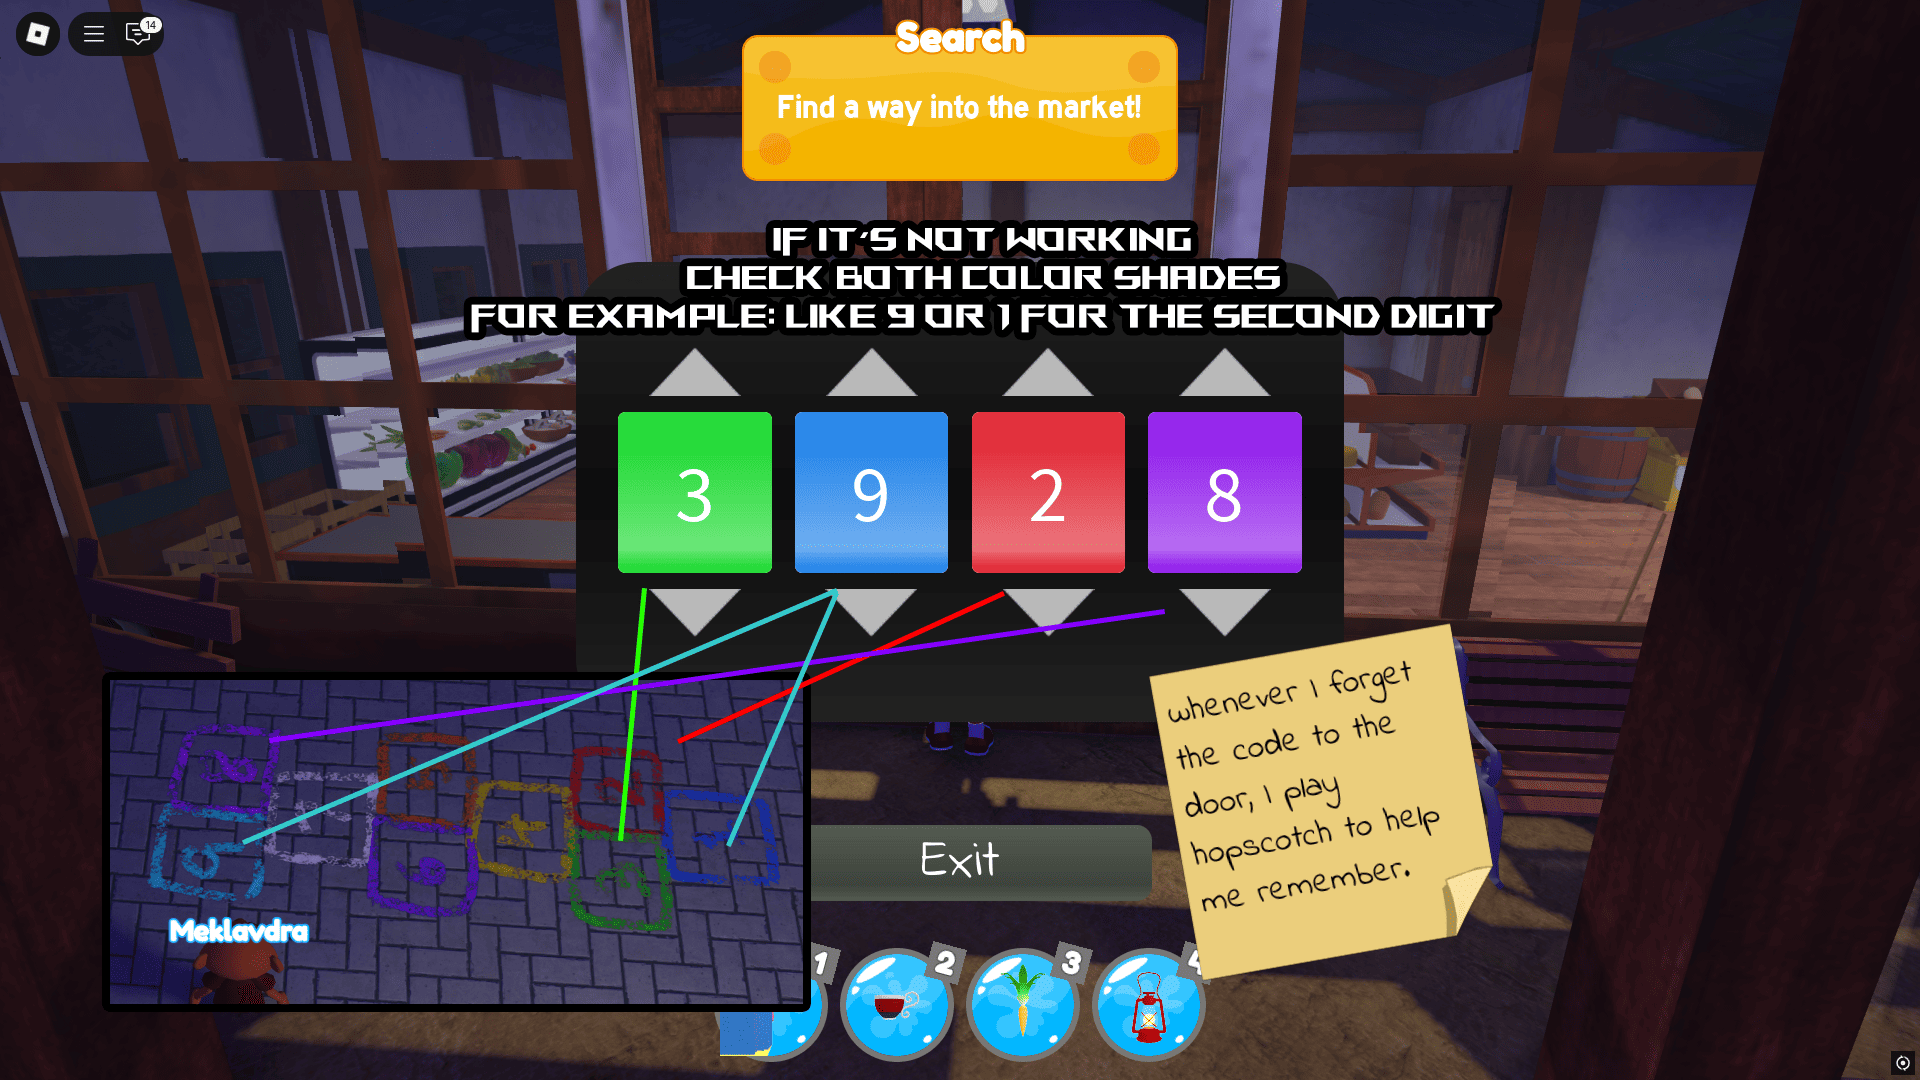
The market or hopscotch puzzle requires you to unlock the market door with a four-digit code. The solution is the chalk-colored hopscotch numbers in the tower square because you need to match the color-coded four digits on the market door with the colors from the hopscotch table. Check out the picture above for an example, but note that the colors and numbers are randomized for each player so don’t use mine.
If you’re with friends, one friend can tell you the colors and numbers from hopscotch via voice or chat. If you’re solo, I highly recommend just going to the town square, standing close to the hop-scotch drawing and taking a screenshot. Go to the market door, open the screenshot, and match the colors on the door with the numbers in the hop-scotch table. Once you match all numbers with colors correctly, the door unlocks. Inside you can talk to the Worm and then you’ll have to collect some apples.
Apple Puzzle Guide in Threadville
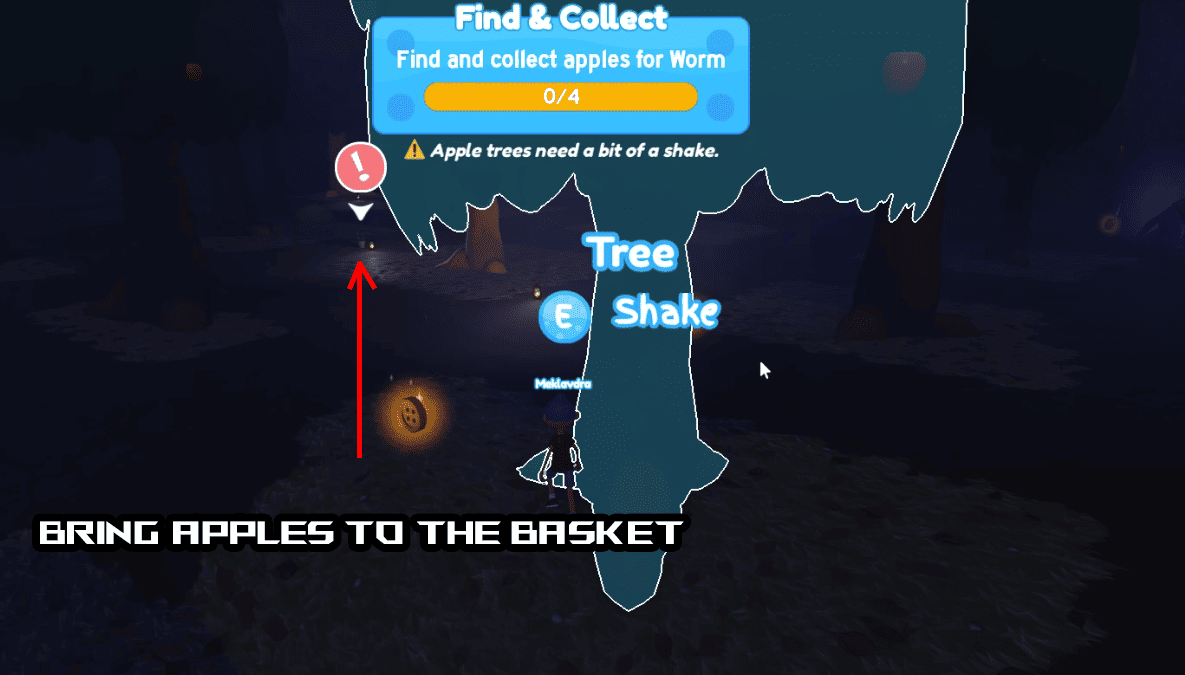
After entering the market for the first time and talking to the Worm, you’ll have to collect four apples:
- The apple tree and the bucket are behind the market and Rocky will come here now from his patrol at Town Square. Use the bush to hide.
- Shake a tree with E to drop an apple, pick it up, and equip it. You can use the same tree four times.
- Place it in the bucket in the middle while avoiding Rocky.
- Repeat three times and note that any tree can drop and apple and you can carry only one.
Once you have all four pick up the bucket and bring it to the Worm in the market. He’ll now tell you to pick up some dirt.
Dirt Puzzle Guide in Threadville
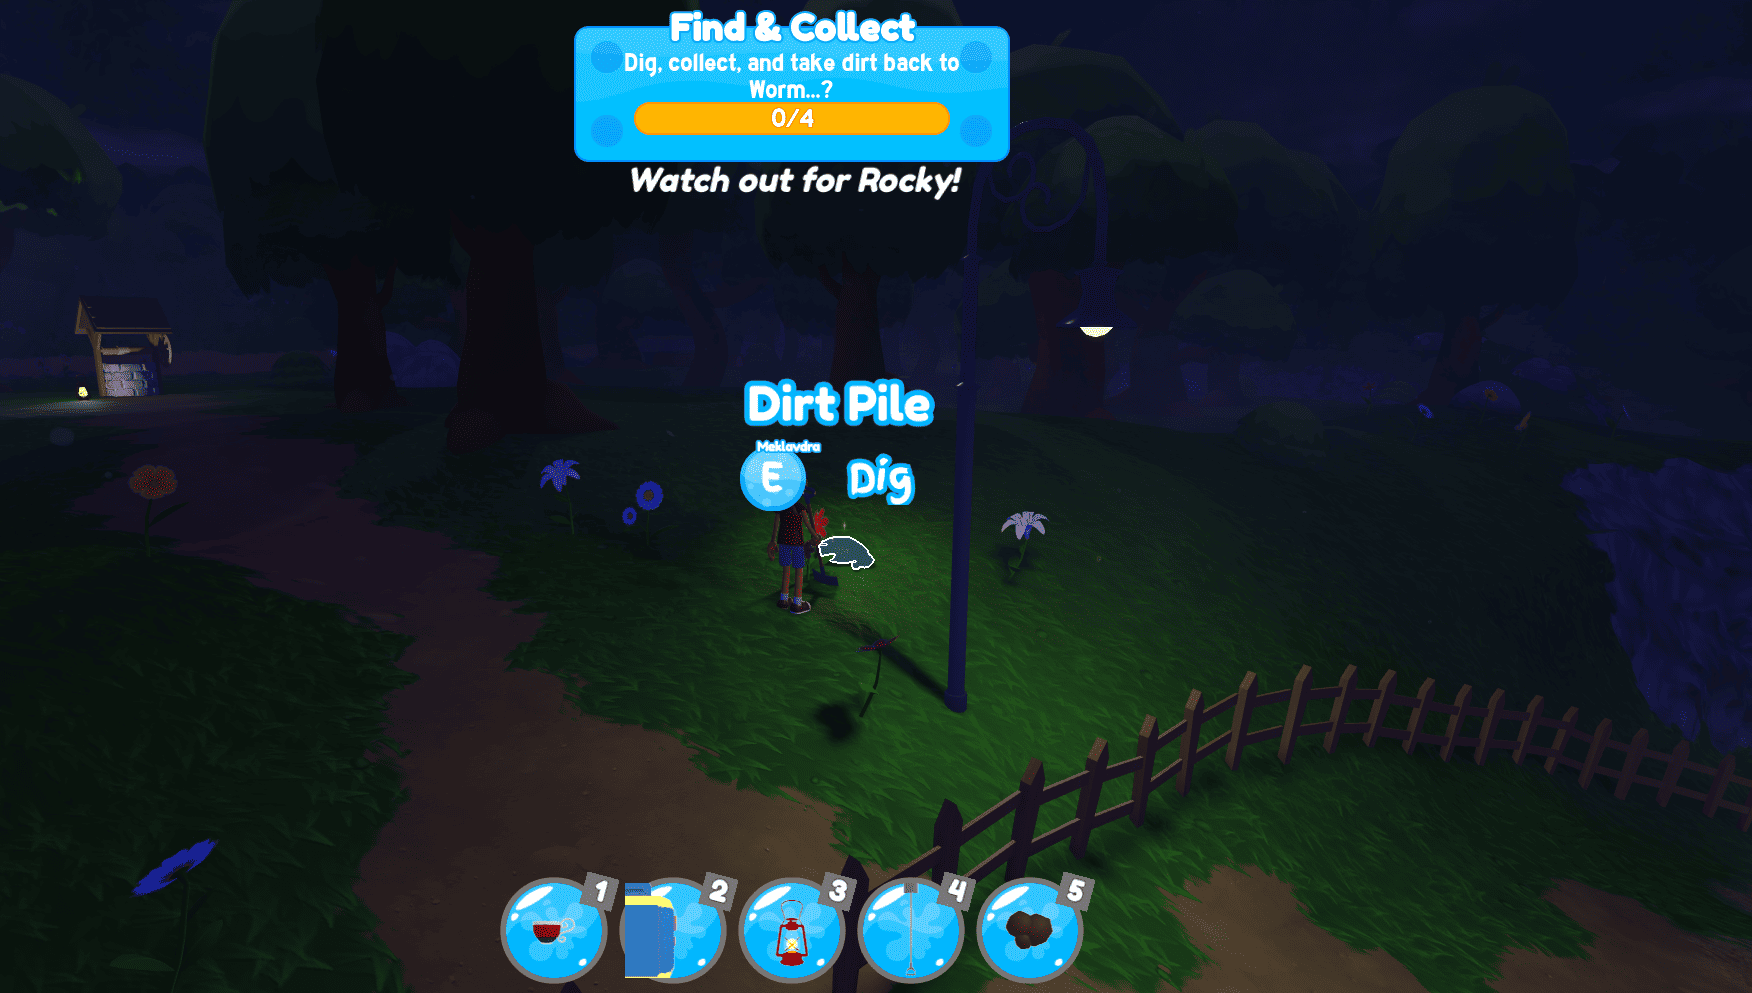
Next up is collecting four pieces of dirt:
- Equip your shovel and go outside the market to look for shiny dirt spots to dig up. You can carry only one Dirt item. Bring it to Worm.
- Note that Rocky will start running now so save your Stamina for escaping him if you’re near. Make use of Bushes if you’re in danger and have your Camera ready to blind him if he gets too close.
- I would use the Tea and Carrot for this segment if you have those since Rocky’s much faster here.
Once you have all four Dirt pieces take them back to Worm for a cutscene. After the cutscene, you’ll have to visit the treehouse to get Rocky’s lunchbox and eventually the key.
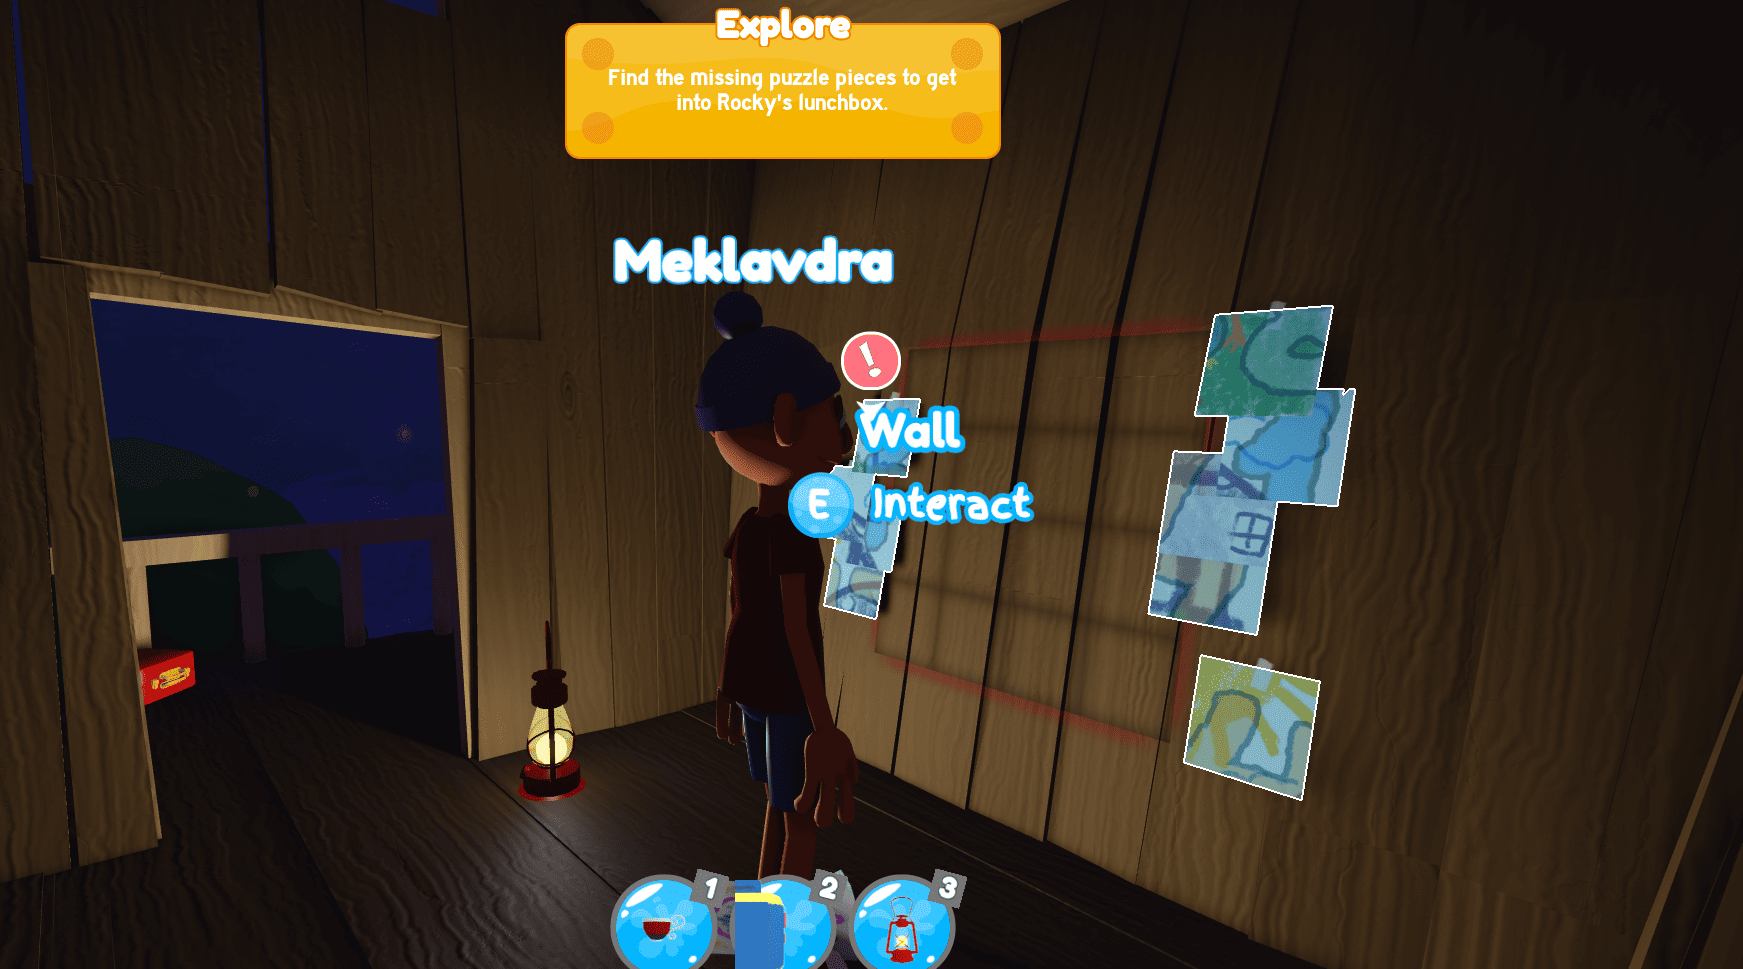
Threadville Rocky Lunchbox Puzzle Guide
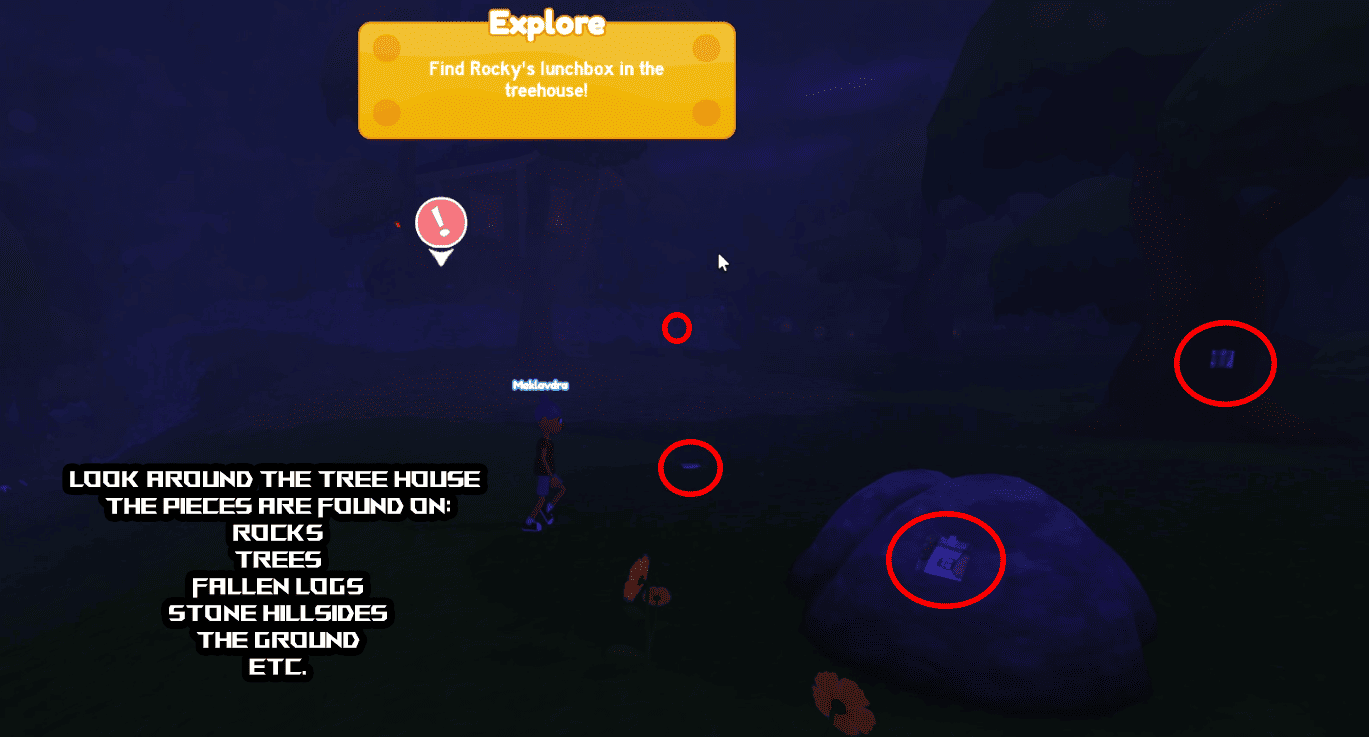
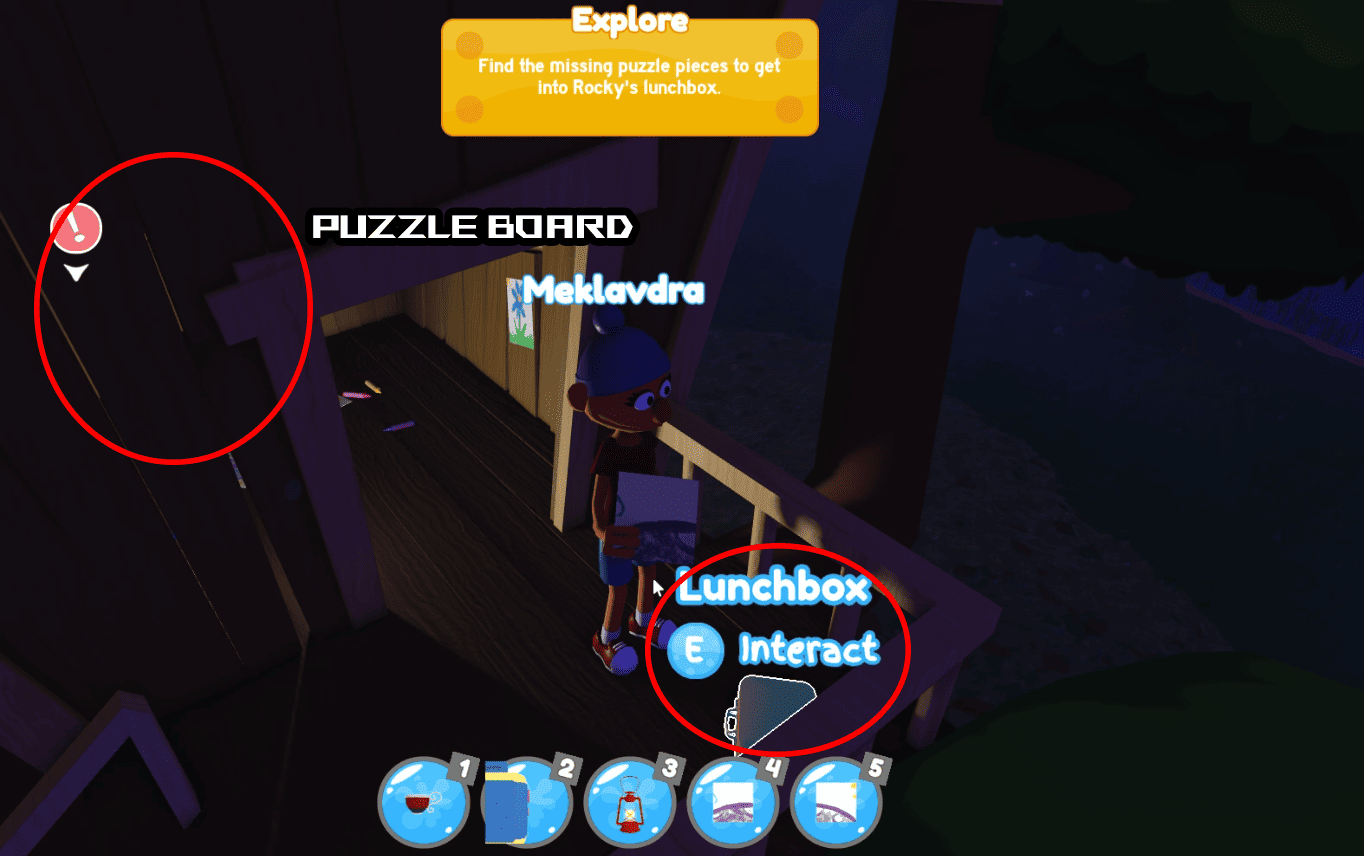


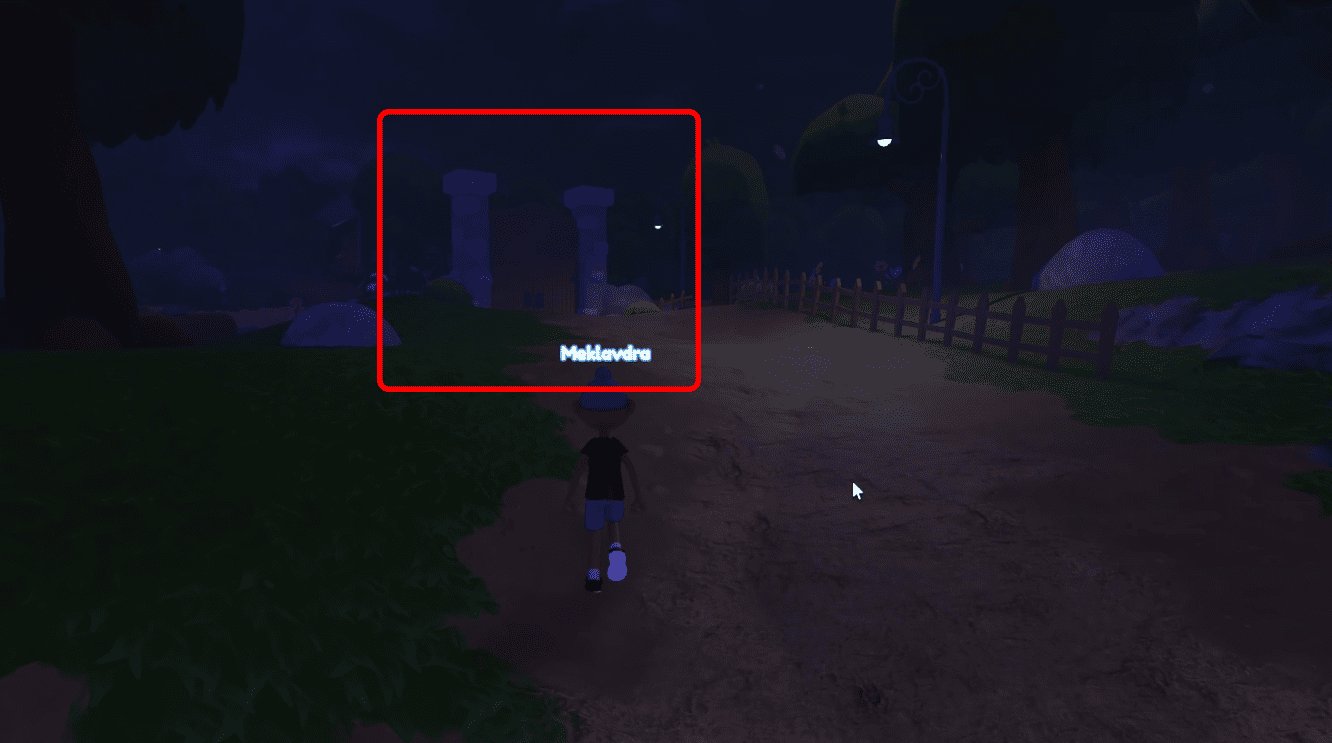
After the cutscene with the Worm, you’ll start at the lake and you’ll have to find picture puzzle pieces which will show a 6-digit code that unlocks Rocky’s Lunchbox. Rocky will also start patrolling this area so as always use bushes and evade him. Here’s a step-by-step guide:
- Look for Paper Pieces: First, look for the paper picture puzzle pieces which are scattered around Rocky’s treehouse. They’re on the ground, on trees, on fallen logs, and on the rocky hillsides. There are 16 in total but you don’t necessarily have to find them all since you can guess the numbers once you place the paper pieces in the treehouse and get a general picture.
- Treehouse: Next, and at any point, visit the treehouse while avoiding Rocky and climb up to place the paper puzzle pieces you found on the board. The lunchbox will be here but you’ll need a 6-number code to open it.
- Treehouse Puzzle Board: Inside the treehouse is the 4×4 board for the paper puzzle pieces. Try arranging them so they fit each other creating a mushroom house (pictures may vary) and slowly build up to the full picture as you get more pieces. Eventually, you’ll start noticing the picture shows 6 numbers. Numbers are randomized for each player. I highly recommend you focus in on the numbers as you build the picture out since you don’t necessarily have to get all pieces and you can guess some numbers just by their top or bottom halves as in the picture above.
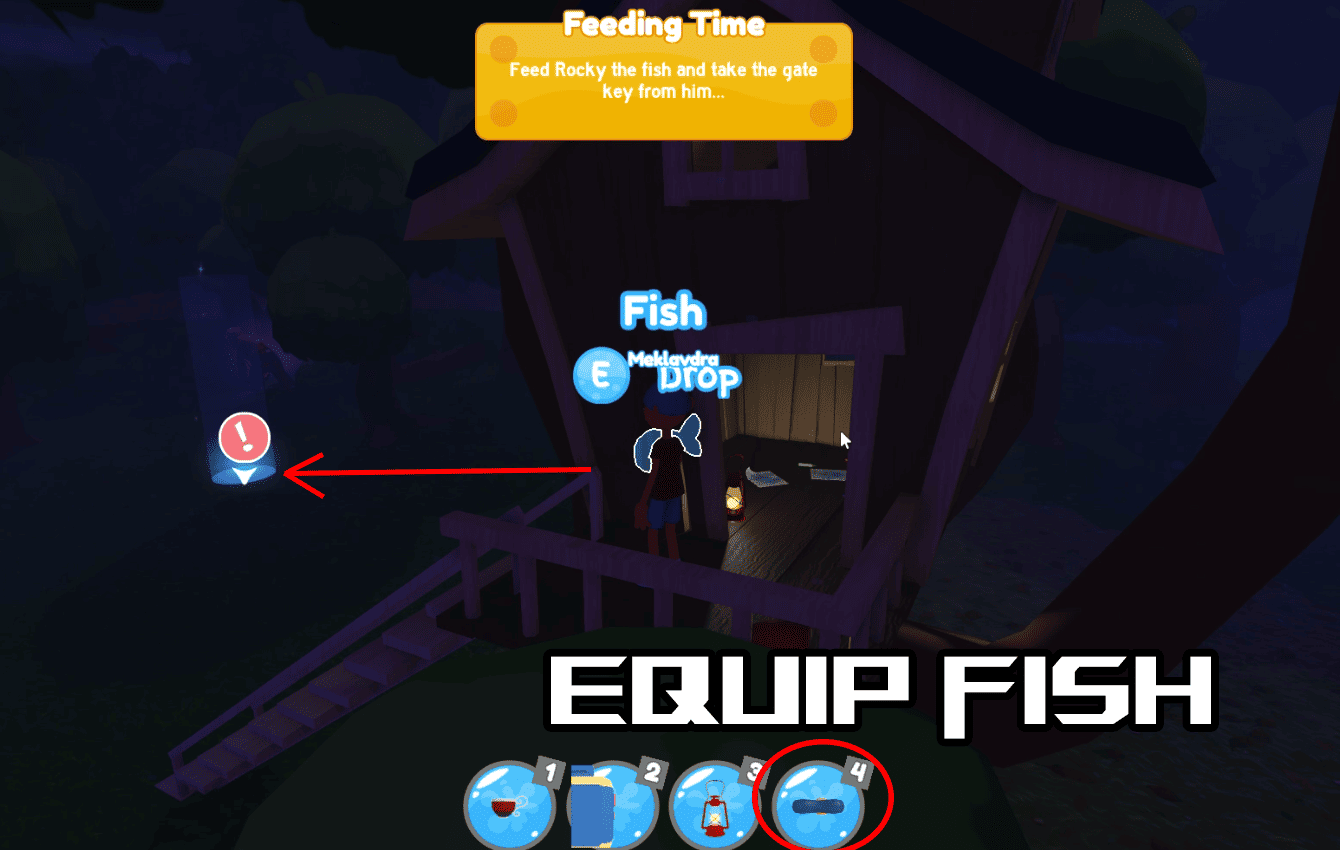
- Lunchbox: Once you have all 6 numbers figured out, interact with the lunchbox outside and input them to open it and find a Fish.
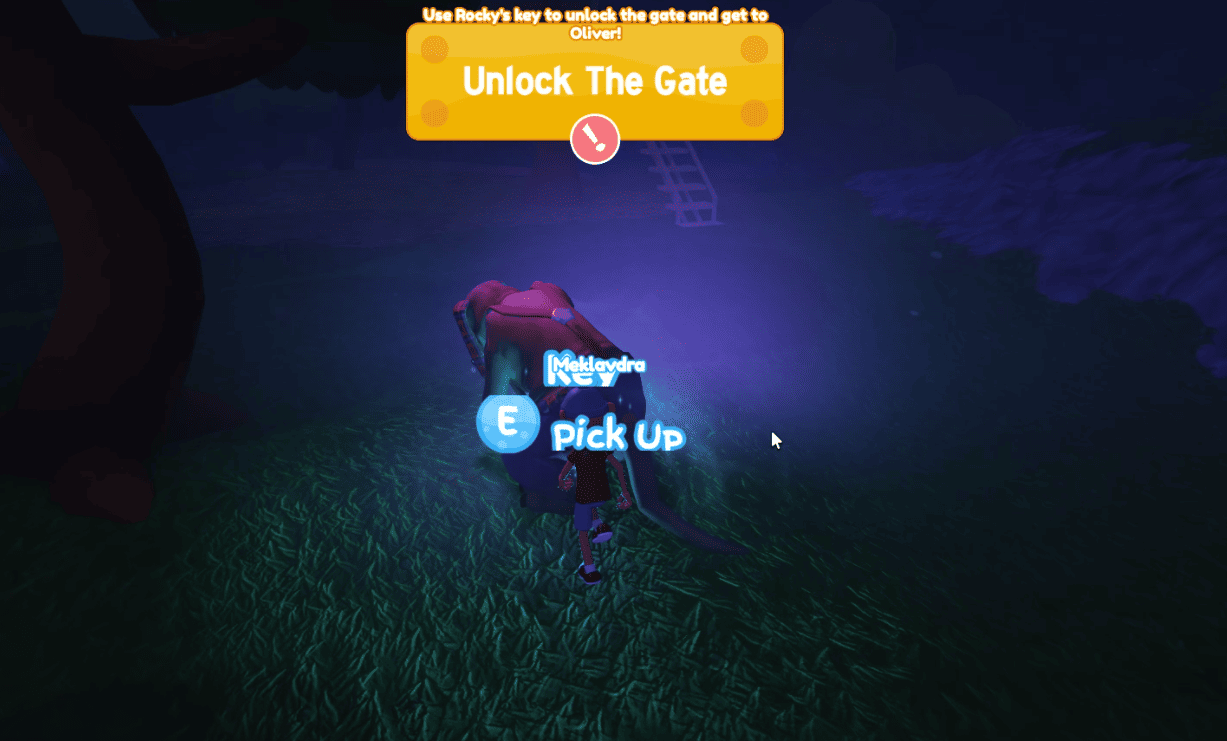
- Rocky Lure: All you have to do now is place the Fish in the marked area. Back away, wait for Rocky to come and start eating it. Approach behind him and interact with E to get the key. Then with the key equipped, go to the town square and the massive wooden gate there.
Once you open the gate, a cutscene will start where you have to sprint to Oliver’s basement for safety. Rocky will start chasing you so be fast, sprint, and jump over fences.
Escape From Rocky Guide in Threadville


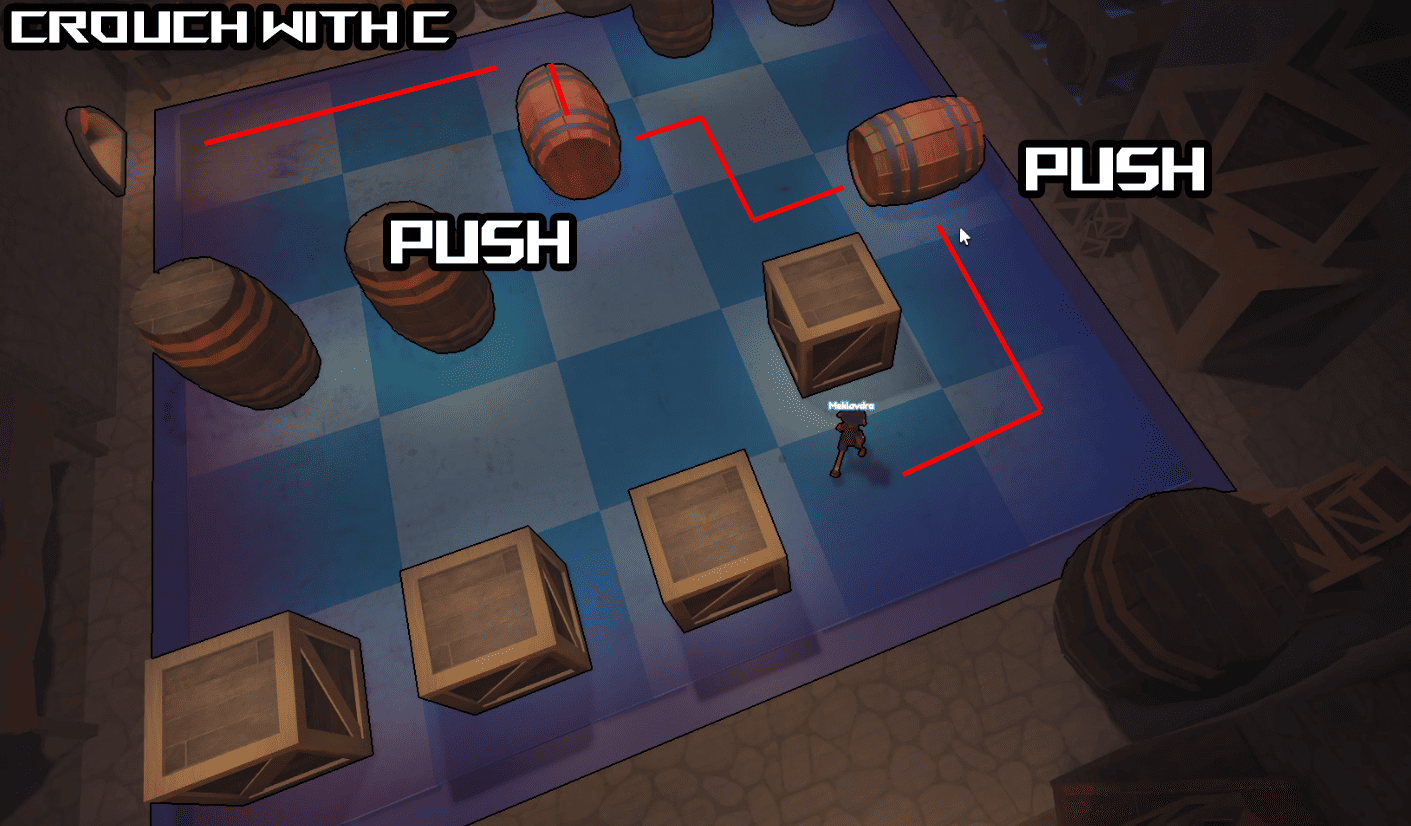


The last part of Act 1 is getting the key from Rocky, opening the town square main gate, and running to Oliver’s basement. Once you’re there a running event will start after the cutscene. You have to hold Shift to sprint and run away from Rocky in the basement. Here’s a step-by-step guide:
- Run!: Keep holding Shift and running down the designated path while avoiding purple liquid pits and jumping over purple streams. At one point, you’ll separate from Oliver and you’ll face a wall and won’t be able to move, don’t worry the wall will break. Your HP will regenerate if you are damaged but don’t stop holding Shift and running or Rocky will catch you.
- Barrel and Box Puzzle: Once you reach about half way you’ll get to the barrel and box puzzle. You need to get to the small vent by pushing barrels away and navigating around boxes. Once you get to the vent hit C to crouch and escape. Keep heading through the vent until you escape.
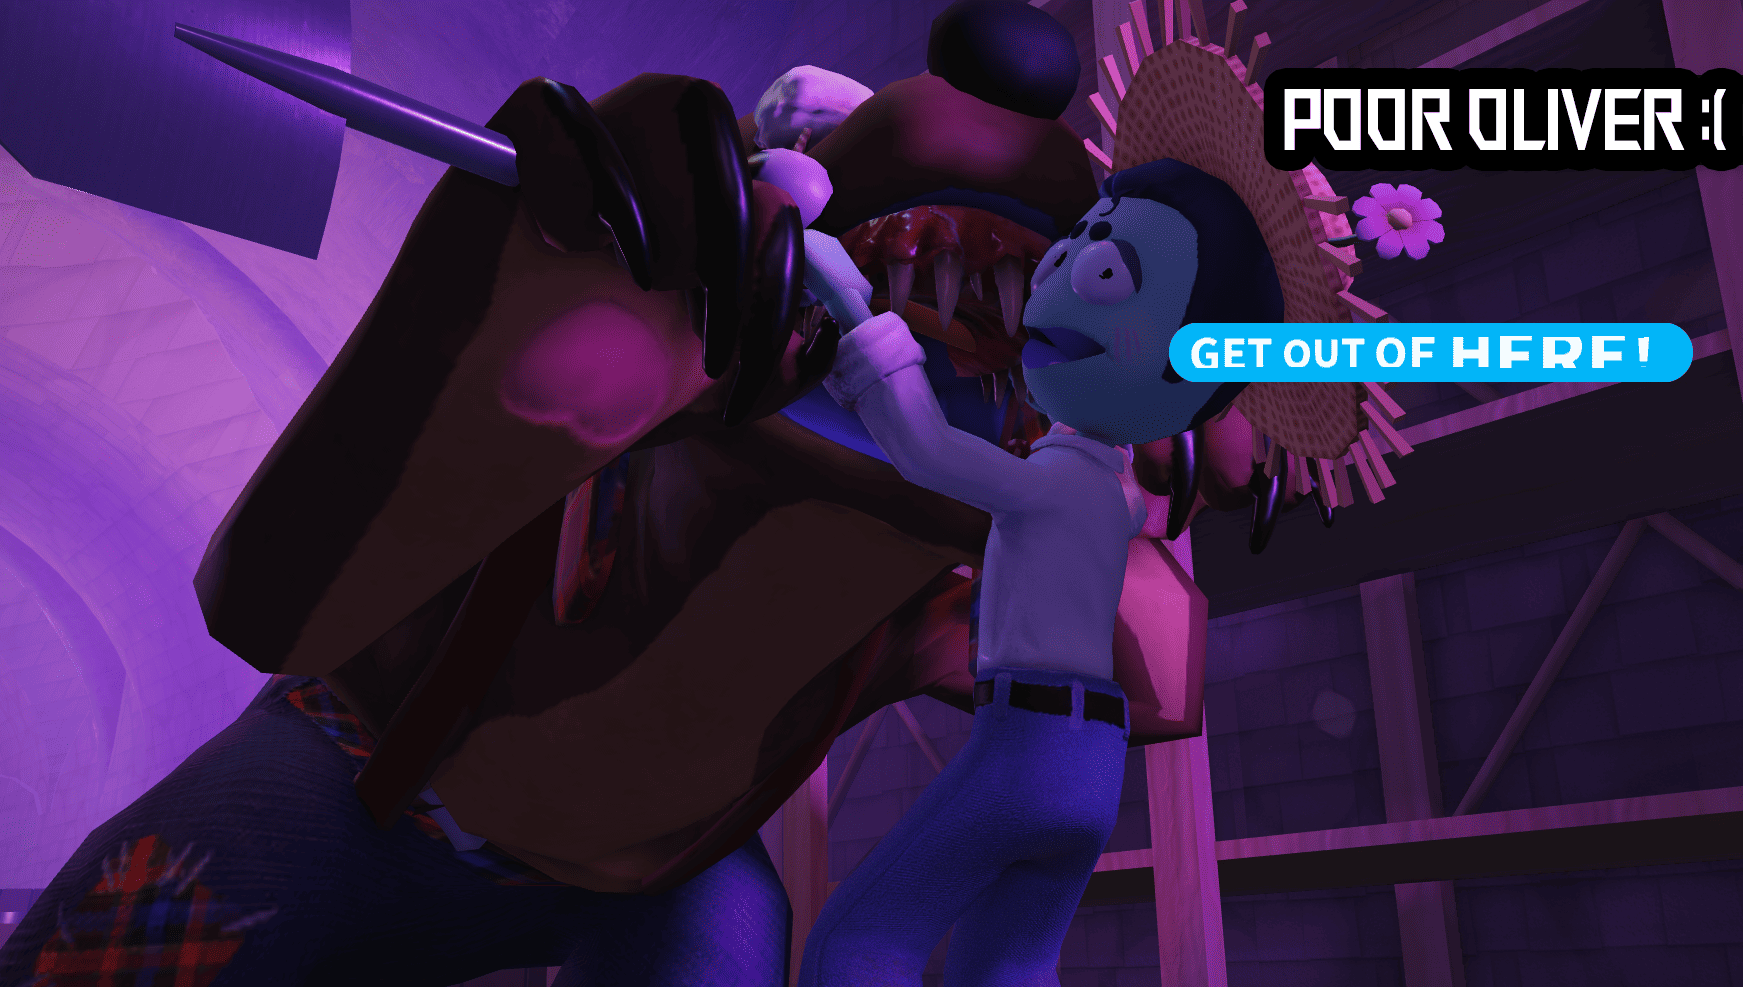
- Keep Running: Now you’ll have to finish the running segment while jumping over barrels, boxes, and purple liquid traps. You’ll eventually reach Oliver and this is where a cutscene will trigger as he fights Rocky to save you.
After this cutscene the Act 1 of Threadville will end. Congratulations, you’ll get all the coins you collected plus the Oliver’s Hat cosmetic head item.
Threadville Coins and Spools Guide
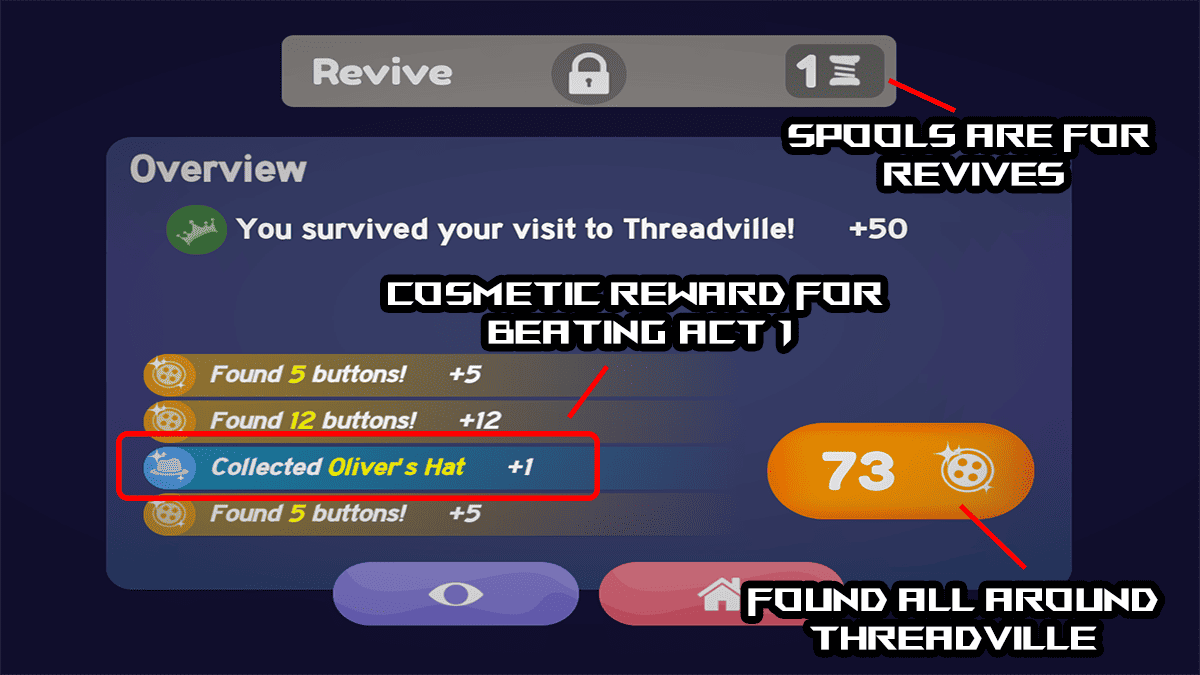
Here’s everything you need to know about Coins and Spools:
- How to Get Coins: You get Coins by picking them up in Threadville. They spawn randomly around the map and you can pick them up at any time. Once you die or finish Act 1, you’ll cash in and get them.
- How to Use Coins: You can use them in the Outfits menu in the lower left to buy new outfits such as shirts, hats, and other cosmetics. You can also use them in the Shop for the latest and popular outfits.
- How to Get Spools: You get Spools by buying them for Robux in the Shop from the lobby or getting them via Codes.
- How to Use Spools: Spools are used once you die to revive instantly. One Spool is one revive.
That’s it for my complete Threadville Act 1 walkthrough guide. Stay tuned to our Roblox guides page for more Threadville.


