
Updated on July 28, 2025: Added and ranked all Killer Perks, added some tips and explained all Survivor Status effects.
Violence District is much closer to Dead by Daylight’s design than Roblox Forsaken. That said, the best options are similar with the top killers being those with the best mobility and capture potential and the best Survivor options being those with the most team utility. Let’s take a look at the best options in this Violence District Killer and Survivor tier list for all Killers and perks and all Survivor items and perks.
Table of contents
Violence District Killer and Survivor Tier List
All the categories here whether Killers or Survivor Perks and Items in Violence District are ranked against each other in their own category despite being in the same tier list. S and A Tiers are your best bets. B-Tiers are situational and C and D are usually underpowered options except The Killer who’s strong but the current meta isn’t for him. I’ll also provide the best Killer perks within their own section/tier list below. Let’s analyze all Killers, Perks and Items in detail.
Survivor Statuses: Winded – No speed boost + become slower | Vulnerable: You always get one shot | Rushed Action – Fast interactions with pallets and vaulting points like windows.
Survivor Tip: Don’t forget to heal each other since this is an incredibly broken mechanic that can be abused for easy Survivor wins with 4/5 players. Plus, the more Survivors heal each other, the better The Killer becomes.
S-Tier
| S-Tier | Ranking Explained |
|---|---|
 The Hidden Killer | • Arguably the best killer in Violence District due to massive mobility • The Mark dash multi-hits along its long range lunge so you can down/damage multiple people or chase-down one plus it gives you wallhack on enemies hit • Leap bypasses obstacles and gives you further mobility options • Low and forgiving cooldown on both abilities beat Jason’s powerful but high CD abilities • Stand still and go invisible which is great for generator camping if you know survivors are coming for it or standing close to a captured player to catch others • Overall a powerhouse killer with no glaring weaknesses • Best Perk From This Killer: Next in Line – Hidden Perks are usually quite weak but Next in Line at least gets you some actually useful info |
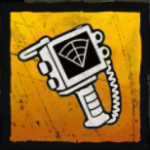
 Parrying Dagger Survivor Item | • Potentially the best item in the game but you have to learn how to use it • First you can’t spam it since Killers are getting used to baiting it out so you have to wait for the attack animation of the Killer to start to stun them • Second, some Killers like The Abysswalker are much easier to parry and you can even parry abilities that swing at you • 40s CD is a little steep which further enforces that you shouldn’t spam it |
 Grab My Hand Survivor Perk | • Probably the best Perk in Violence District due to team-wide utility • A must-have in my opinion that prolongs the win chances for Survivors |
 Great Collapse Survivor Perk | • Whether by dropping an obstacle or by parrying with the Parry Dagger, this Perk will boost your speed • It’s incredible for running away and when combined with jukes and breaking line of sight you’ll be free of the Killer in no time • Note that killers have FPS and you have third-person with rotate-able camera so make the most of this |
 Time to Grow Up Survivor Perk | • Only S-Tier at higher ranks and if you can reach an obstacle/break line of sight after getting hit • Otherwise A or B |
A-Tier
| A-Tier | Ranking Explained |
|---|---|
 The Slasher Killer | • A free killer but is actually one of the strongest options due to huge movement speed boosts • Mist is for amazing movement utility for repositioning incredibly fast across the map whether it’s running to generators or capture points quickly • The aggressive chase-down is with Pursuit that grants a decent speedboost and makes you ignore obstacles for 20 seconds • The main weakness of Slasher is slightly lower reach with M1s and high cooldowns keeping him from S-Tier • Best Perk From This Killer: Brutal Strength – The others just don’t compare to fast-clearing obstacles at Rank 3 which negates maneuver options for Survivors |
 The Abysswalker Killer | • The Abysswalker is high-risk high-reward because you’ll dominate with incredible offense but if your opponents know how to dodge, crouch and use Parrying Dagger you’ll have a bad time • Still, if you can practice timing and the ideal use scenarios Dark Severance can down multiple targets, just bait out their Crouch or Parry Dagger first then use it • Abyssal Burst has amazing range and can both hit players from afar and highlight them for you • Suffers from telegraphed attacks that are easier to parry but has great M1 range • Best Perk From This Killer: Abyssal Covenant – This is by far the best one both granting you a chance to slow down generator progression and reveal player locations (Twice per game) |
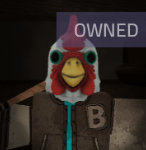 The Masked Killer | • The Masked is B-Tier or potentially S-Tier (due to amazing Perks) depending on which masks you get so I put him in A with a big asterix on which mask you roll • Weak Masks: The Bunny Mask boosts vault speed and the regular Chicken Mask is just for M1 killing both of which are weak options to roll • Better masks: The Panther Mask greatly boosts movement speed and the Lizard Mask reduces your M1 range but makes you Lunge much further • Best Masks: Both the Tiger and the Duck masks offer insta-down M1s where the Tiger makes you slower • If you constantly get better or best Masks you are an A or S-Tier killer for the above reasons, otherwise the bad Masks combined with the self-stun for putting on the mask and the high CD make you B • Best Perk From This Killer: Hard Swing or Combo Streak – The Masked has the best Perks in the game and you can’t go wrong with either of these two for raw aggression |
 High Karma Survivor Perk | • Overall, a pretty useful perk for insta-freeing yourselves after rescuing someone • You just have to wait for heals afterwards • That said this becomes much better if you are the last man standing |
 Flashlight Survivor Item | • Used to be incredibly broken but got nerfed • Still, it’s a great item you just can’t spam it since the killer can turn away • The best time to use it is when the killers FOV in first person is locked in place like when their M1 is on CD, when they’re picking up a player or when they’re crossing or breaking obstacles |
 Bandage Survivor Item | • Actually an underrated source of self sustain for the entire game • Makes it so that your team doesn’t have to heal you and allows you to pull of riskier generator and saving plays where otherwise you would be low HP and a hit away from getting captured |
B-Tier
| B-Tier | Ranking Explained |
|---|---|
 The Stalker Killer | Getting reworked soon, will update once I know more • Incredibly powerful when you reach Tier 3 because it’s infinite but pretty weak on Tier 2 (high aura radius) • That said, once you reach Tier 3 you have one of the best movement speeds in the game like Slasher but all the time and the second-biggest Lunge behind The Masked in Lizard Mask • If you’re playing in a close quarters map like the Space one I recommend staying in Tier 1 since you can still lunge and have low aura radius • Overall highly dependent on the map and takes a while to get powerful which is why it’s B-Tier for me • Best Perk From This Killer: Predator: All of The Stalkers perks are good but I like Predator the most due to strong chase potential with a low cooldown at Rank 3 |
 The Killer Killer | • IMPORTANT: The Killer isn’t bad and is actually quite strong – He’s in B-Tier because his kit just isn’t made for the current meta where players don’t abuse healing or don’t heal each other at all • This is because the main mechanic of The Killer is both his Sloppy Mess anti-heal perk and hitting three chained hits during his ability for the fourth attack to insta-down someone no matter their HP • That said, if players aren’t healing themselves then what’s the point of anti-heal and insta-downs when everyone is already low HP, you basically just become a weaker M1 killer • That said, once Survivors get better at the game, practicing chaining your insta-downs will make The Killer A-Tier for sure along with his anti-heal and other ability boosts • Best Perk From This Killer: Sloppy Mess: While Resentment Clinger is powerful it relies on you getting stunned which you want to avoid whereas Sloppy Mess is always useful for tracking and anti-heals |
 Gate Survivor Item | • A bit situational but can be incredibly useful for planned escapes • Also great for relocating if a killer is in your area and moving will cause you to be spotted • I prefer more offensive ones like Flashlight or Parry Dagger but this is great utility, mobilit and defense all in one |
 On My Own Survivor Perk | • This is incredibly useful when alone, my problem is that this doesn’t happen very often since I usually play in a team • That said if you constantly play in games with randoms that get killed off easily, this becomes A or S |
C-Tier
| C-Tier | Ranking Explained |
|---|---|
 Pacifist Survivor Perk | • Becomes really worth your time at Rank 3 in a team that heals each other • Otherwise it’s not that useful if your team doesn’t have a habit of healing each other |
 Twist of Fate Survivor Item | • Quite situational and best used early when there’s plenty of players • Got buffed to a 60% success 40% failure so it’s not trash • Overall, not that worth it since all gambling features suck unless you like trolling |
 Motion Tracker Survivor Item | • This is great in theory but if you’re playing with headphones and paying attention you can spot the killer by their aura and steps |
 Heads Up Survivor Perk | • This can be quite decent if you have no idea where the killer is and you’re on the last few generators • That said it’s not that powerful unless it’s Rank 3 so C-Tier sounds perfect |
 Snake Step Survivor Perk | • Only really useful on Rank 3 against Killers who really pay attention to steps and wear headphones |
D-Tier
| D-Tier | Ranking Explained |
|---|---|
 We’re Stronger Together Survivor Perk | • Here are the weakest features in Violence District starting with We’re Stronger Together • Useful on paper but the speed boost is so miniscule it’s almost useless |
 Left Behind Survivor Perk | • Niche uses and not that powerful, skip it |
 Nobody Left Behind Survivor Perk | • You shouldn’t be standing and healing others when the doors open, just run and try to juke out the killer, skip this |
Violence District Killer Perks Tier List
I decided to put these in their own separate tier list since there’s a lot of them to avoid clutter. Overall, in terms of the best Killer perks in Violence District I recommend the ones from The Masked/Jacket, The Stalker/Myers and The Abysswalker/Artorias. That said, there’s some powerful ones from other Killers as well. Let’s highlight some of the best ones below individually.
Killer Perk Highlights
| Perk | Effect | Ranking Explanation |
|---|---|---|
 Hard Swing Unlocked at Level 15 The Masked | • Hitting a survivor makes them Winded (Described above) for 10/15/20 seconds. | • Great on all killers and overall one of the most useful and must-have Perks in my opinion. |
 Abyssal Covenant Unlocked at Level 30 The Abysswalker | • When a generator reaches 50% progression, there is a 20/30/40% chance the generator breaks. | • Just raw passive data that will trigger twice per game to help you locate players and also slow down their generator progression without you doing anything. • Only good at Rank 2 or Rank 3 |
 Combo Streak Unlocked at Level 30 The Masked | • Hitting a survivor grants you a 5% speed boost for 8/9/10 seconds. | • Allows you to keep chaining hits • Best combined with mobile Killers like the Hidden, the Slasher or the Masked in mobile or slow Masks |
 Predator Unlocked at Level 15 The Stalker | • When a survivor manages to escape from chase, you see their aura for 4 seconds. cooldown for 60/50/40 seconds. | • Helps you track players who’ve either juked you or stunned you and ran away |
 Corrupted Path Unlocked at Level 15 The Abysswalker | • Hitting a survivor makes them release a trackable trail similar to blood trails for 10/15/20 seconds. | • Similar to Predator |
 Sloppy Mess Unlocked at Level 30 The Killer | • When hitting a survivor, they will leave blood trails more often for easier tracking and slows heal speed by 15/20/25%. | • Similar to Predator and Corrupted Path but potentially more powerful if you’re playing with skilled players who actually heal each other |
 Eternal Torment Unlocked at Level 30 The Stalker | • When stunned by a survivor by any item, they become vulnerable for 10/15/20 seconds. cooldown for 30 seconds. | • You generally want to avoid being stunned but if you do you can one shot that player • Really strong perk but depends on a niche scenario that you want to avoid |
 Crackdown Unlocked at Level 45 The Masked | • Increases generator damage by 2/4/6 charges. | • An overall great perk to add to any build |
That’s it for my Violence District killer and survivor tier list and guide. For more Roblox guides, check out our Roblox section.


