All isn’t as it seems
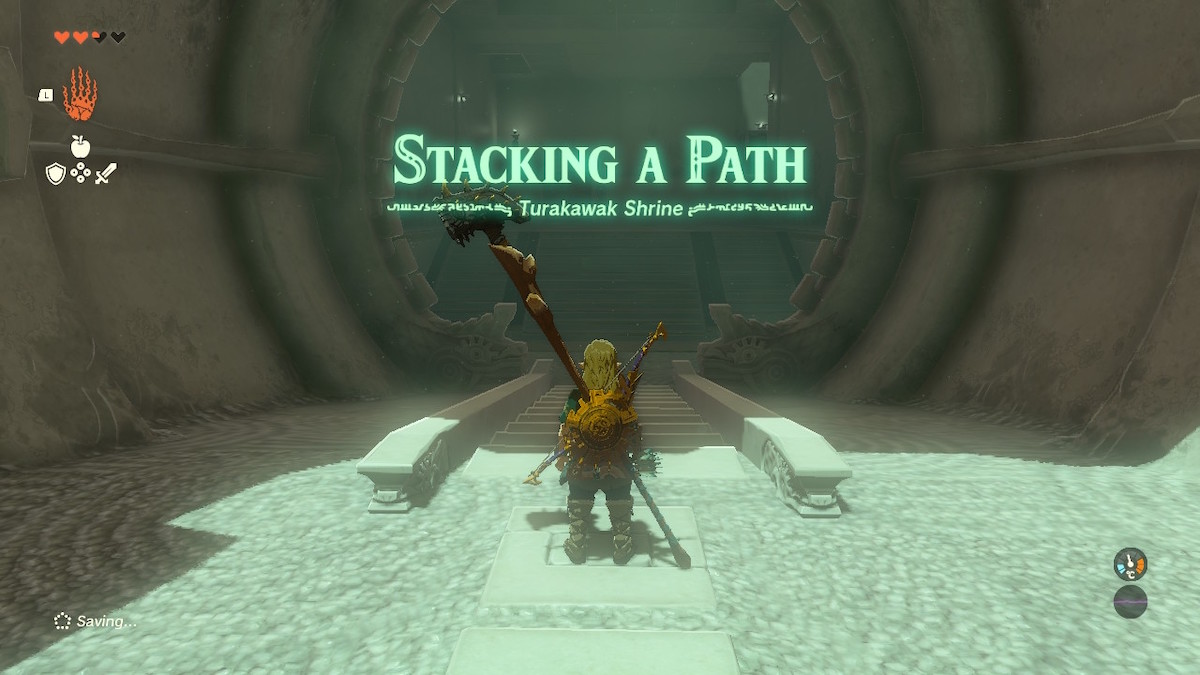
Turakawak Shrine is an interesting puzzle in Tears of the Kingdom. It’s one of those pesky shrines that looks simple on the surface, but after some time, you’ll come to realize that you had it all wrong. It’s also a shrine that you can’t easily access because it is surrounded by thorns. Breath of the Wild players will remember this troublesome shrine.
Alas, we’ll cover how to get into the shrine along with how to complete it below. But first, let’s look at how to find it.
How to find Turakawak Shrine in Tears of the Kingdom
In all likelihood, you won’t come across Turakawak Shrine during your early travels across Hyrule. It’s located just north of Gerudo Highlands and the Gerudo Highlands Skyview Tower. It’s very difficult to traverse the highlands without some good gear to withstand the cold, and it’s even harder to unlock the tower to see the map in this area.
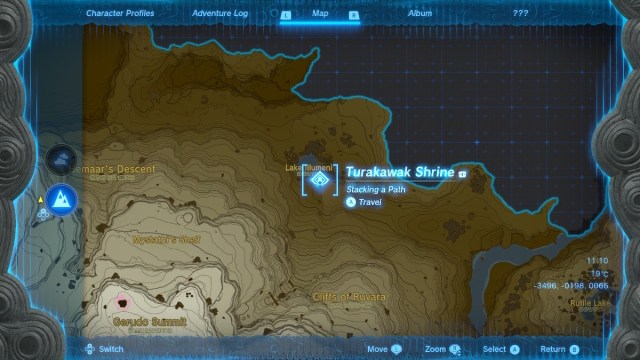
Nonetheless, heading almost directly north from the Gerudo Highlands tower is the easiest way to access Turakawak Shrine at the foot of the mountain range. It’s also possible to walk west from Lookout Landing, although it’s a great distance to travel on foot. Check the screenshot above for the exact location of the shrine on the map.
How to get into Turakawak Shrine
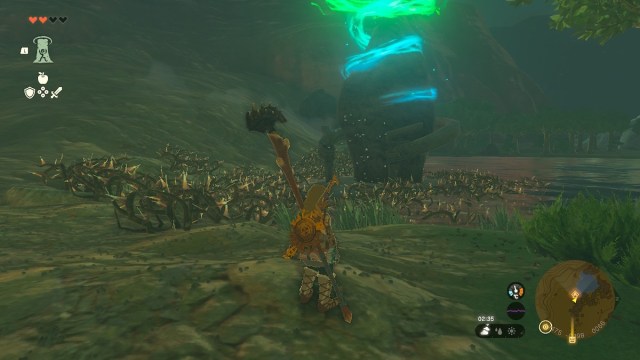
Getting to Turakawak Shrine is just the first half of actually accessing it. Upon arrival, you’ll notice that it is surrounded by thorns that Link cannot cross. Normally you might be inclined to burn them all, but the wretched things are submerged in the water, making them immune to fire.
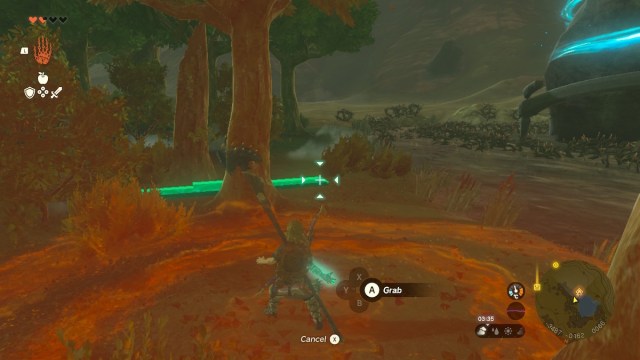
Luckily, there’s a handy plank between two trees just off to the side of the shrine. Check the screenshot above for the exact location. Pick it up using Ultrahand, and use the plank to create a makeshift bridge to get over the thorns.
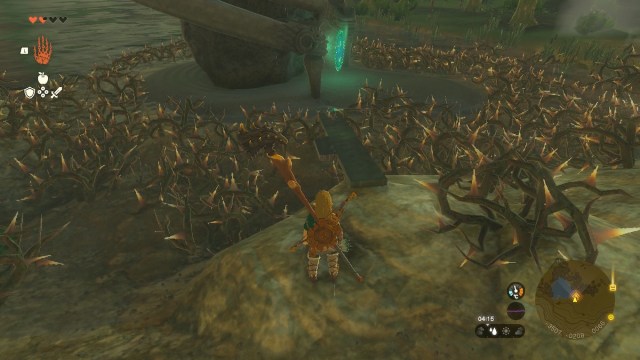
To the left of the shrine, there’s a slight rise in the ground. This is the best spot to place the plank to safely cross the thorns and get into the shrine. See the screenshot above for the best way to place the plank. Be careful while crossing since the plank is narrow, and it’s easy to die if you fall in the thorns. Slow and steady wins the race.
How to complete Turakawak Shrine
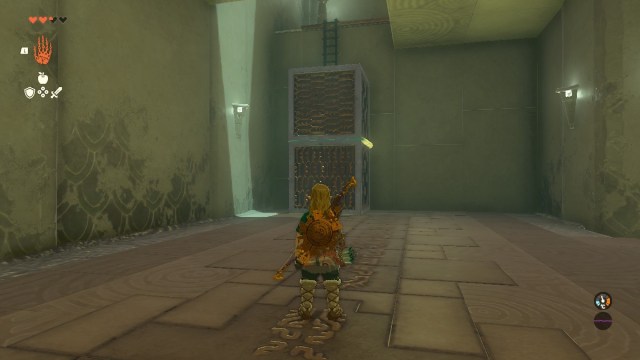
Inside the shrine, you’re going to need to stack boxes to reach the end. However, that’s not all there is to it. To begin, climb on the first box and jump up to the platform. Here you’ll need to use Ultrahand to attach the two boxes together and place them next to the ladders, as seen in the image above.
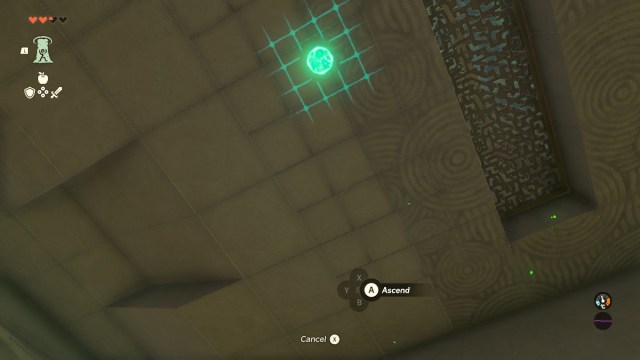
But wait! You’re not going up there. Jump back down and use the Ascend ability in roughly the spot shown in the picture above. This will take you to the next level, where a chest awaits. As a reward, you’ll get a pretty cool Magic Rod. After opening the chest, use Ascend again to get to the top of the cage.

Hop down and retrieve the two boxes you attached together by the ladder. To reach the end of the shrine, you’re going to need to increase the height of the two boxes you have. Unfortunately, you can’t climb the silver box on this level. Because of course it can’t be climbed.
Take the two brown climbable boxes over to the cage with the chest inside and use them to get back to the top. Once on top of the cage, use Ultrahand to attach the two brown boxes to the silver one. The important thing to remember here is that the silver box must be on the bottom.
Position the boxes in a formation similar to the one pictured above. Ideally, you want to have the silver box form a type of platform connected to the other two. Place your weird tower up against the wall and make sure it’s high enough to be level with the top.
Once you’re satisfied with your construction, use Link’s glider to soar from the top of the cage down to the top of the silver box. If you land on top, you can use the brown boxes to climb the rest of the way and complete the shrine.


