It’s all about the logs
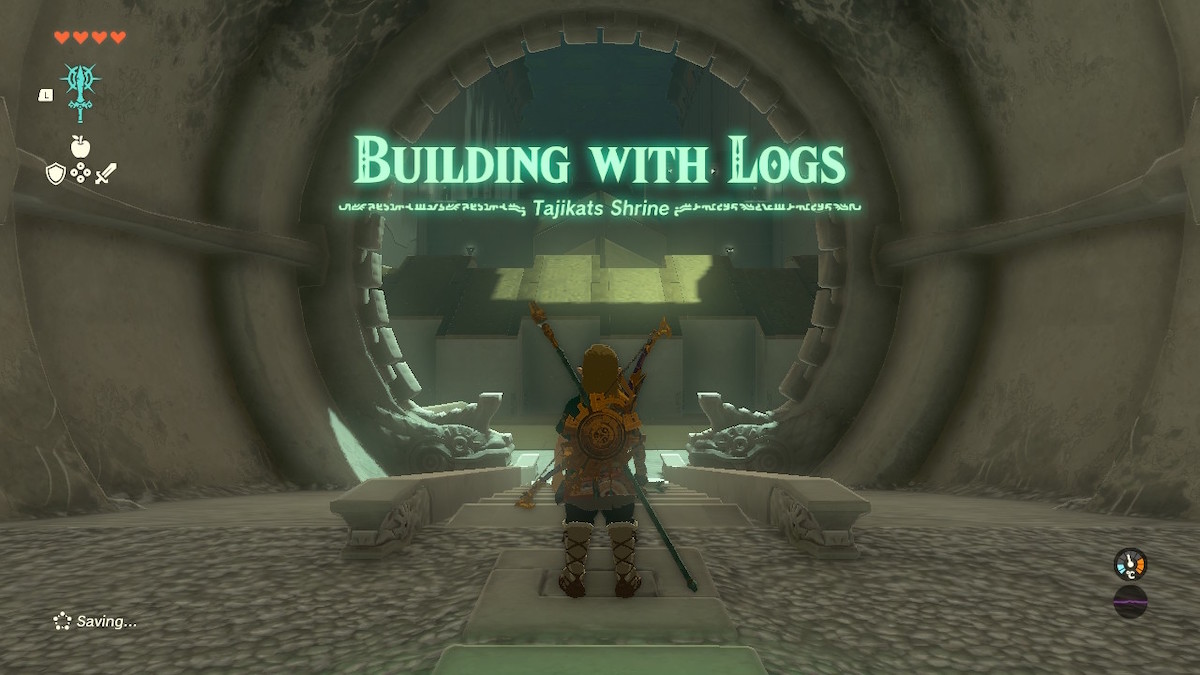
Tajikats Shrine is a classic puzzle shrine that requires ingenuity and skill with the new abilities that Link has received in Tears of the Kingdom. This shrine can be attempted at any point in the game, as it only requires Link’s abilities from the tutorial to complete. Specifically, every part of this shrine can be surpassed using nothing more than Ultrahand.
We’ll take you through each section of this enjoyable shrine, but first, let’s look at where in Hyrule it is located.
How to find Tajikats Shrine in Tears of the Kingdom
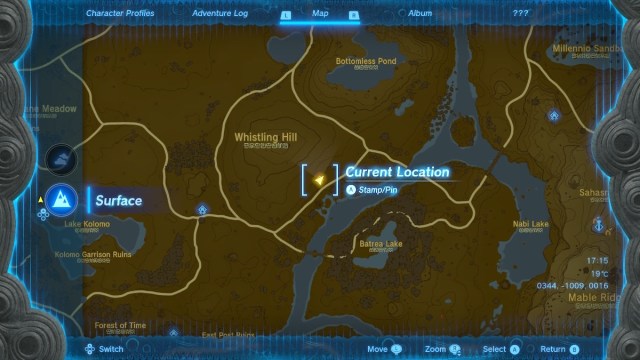
Tajikats Shrine is located in the Hyrule Field area of the map, specifically in the southeast between Whistling Hill and Batrea Lake. If you’re traveling to the shrine from Lookout Landing, you need to head almost directly south and then a little east.
Alternatively, Tajikats Shrine is exactly to the east of Hyrule Field Skyview Tower, which we’d recommend unlocking first if you haven’t already. Check the map above for the exact location of the shrine.
How to complete Tajikats Shrine
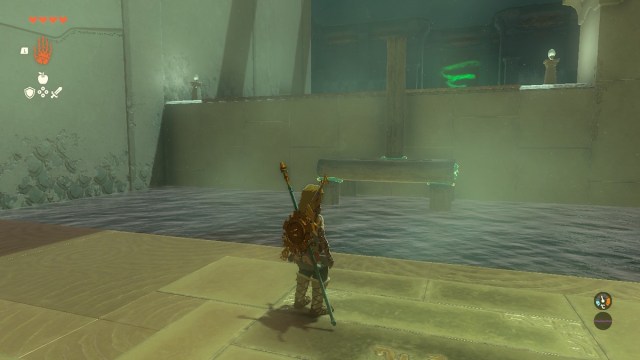
To complete Tajikats Shrine, you need to make full use of the new Ultrahand ability. This shrine requires you to go from the entrance to the finish using large logs to aid your climbing and water crossing. Link won’t be able to climb any of the surfaces himself, and the water current at the end is too strong for him to swim through.
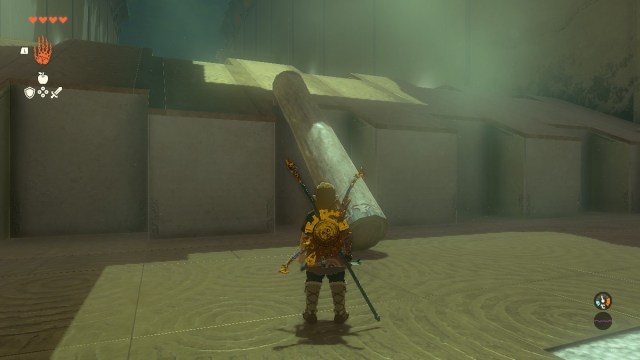
The first log you’ll use, pictured above, is simple enough. Pick it up using Ultrahand and place it against the wall so Link can climb up it. Once you’re at the top, you need to bring the log with you for the next section.
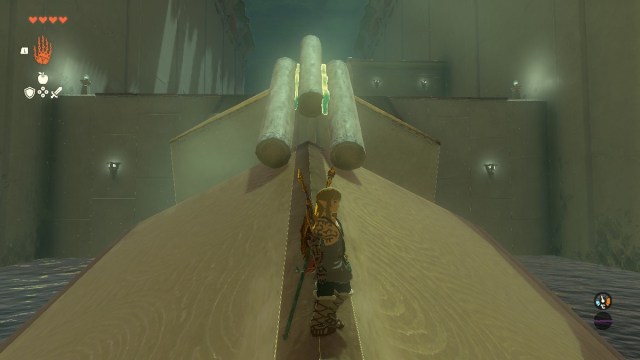
After you’ve brought the first log with you, there are three logs available in the second section. The next crossing is much trickier due to the slopes. Simply placing a log or attaching them lengthways will lead to them falling off. In order to pass, connect the logs in a Y shape. It’ll look like a Y-Wing from Star Wars.
Just make sure that there’s enough length available to get across the gap. The bottom two logs should be placed on the Link-side of the chasm, steadying the construction on either side of the slopes, with the single log resting on the point at the end. Check the picture above for placement guidance.
Next, we have a simple water crossing. Take your Y-Wing and place it so that it touches the ground on either side of the water. You may need to make an adjustment to its length if it doesn’t reach. There are more logs in this section that you can use, but they aren’t necessary.
This is where you really need to channel your inner Bob the Builder. To get to the next level above the water, you’re going to need to say goodbye to your Y-Wing and build a platform. Attach four logs together side-by-side, and connect four vertical logs to the base, just like a table. Finally, attach a vertical log on top and to one side of the structure.
You’ll need to place it in the water with the vertical log closest to the wall, like in the picture above, to stop it from falling over. Don’t worry if it takes a couple of attempts to get it to stand.
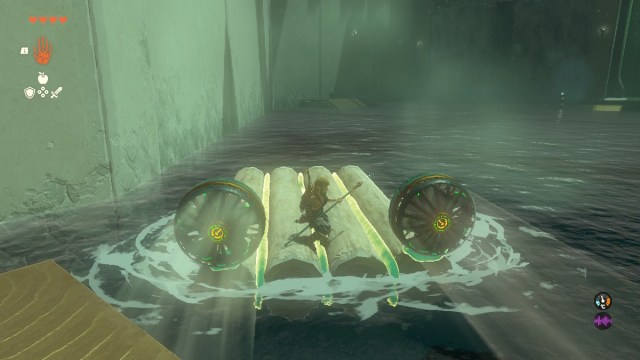
Finally, you’re almost there. To get across the water to the end, you need to disassemble your previous mega table, disconnecting the vertical log and four table legs. It should go down to just the flat side-by-side logs. Then attach two of the fans available in this section. When you have a boat like in the picture above, you’re good to go.
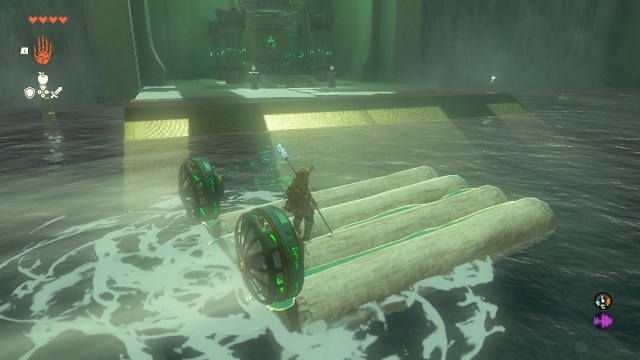
Before heading straight for the exit, there’s a treasure chest on a peninsula on the left side of the water. To get there, simply point your boat in that direction when placing it in the water and strike the boat to turn on the fans. Don’t forget to hit the boat again before you stop to turn it off so you don’t lose it!
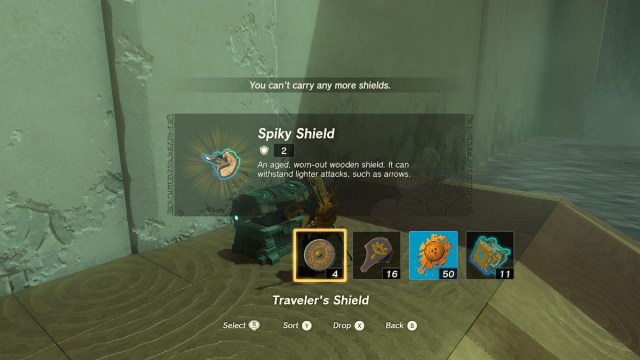
After getting the Spiky Shield from the chest, pick up your boat and place it towards the final platform. If you’re as close as in the picture above, you can jump off the boat and swim. Hit the boat again to make it go, and you’re home-free. Tajikats Shrine is complete!
Related: Zelda: Tears of the Kingdom — Orbs of Water Shrine Guide on GameSkinny


