Mind the gap
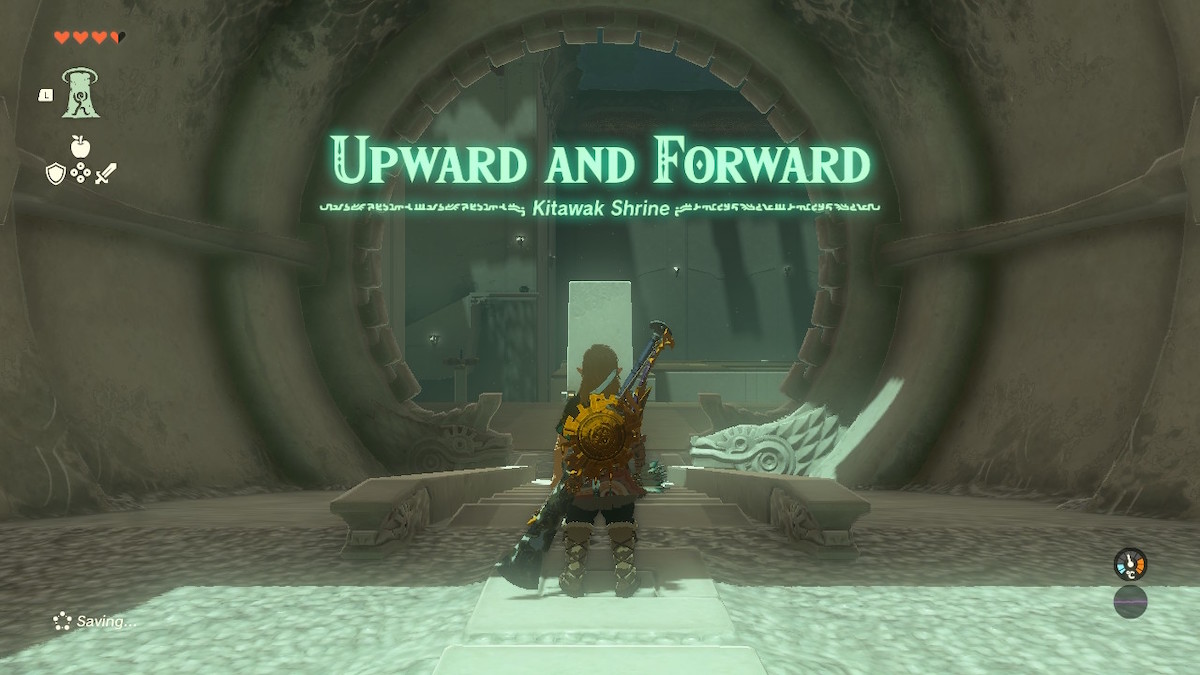
Kitawak Shrine is a quintessential puzzle shrine that will be familiar to Tears of the Kingdom players and Breath of the Wild fans alike. It makes good use of the new Ultrahand ability to get to the end in fun and interesting ways.
We’ll cover how to complete every section of the shrine below, but let’s take a look at how to find it first.
How to find Kitawak Shrine in Tears of the Kingdom
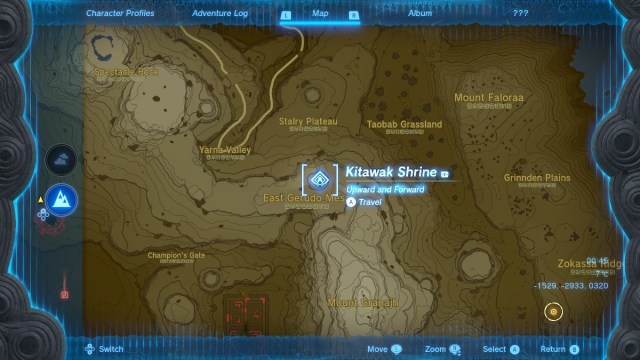
Kitawak Shrine is located in the Gerudo Highlands area of Hyrule which is a section of the map that most players will likely spend time in later in the game. The shrine can be found just north of Mount Granajh. If you’ve unlocked the Greudo Canyon Skyview Tower (not Gerudo Highlands) you can find Kitawak by heading southeast. The shrine can be found at roughly the halfway point between Gerudo Canyon Tower and Faron Grasslands. Check the screenshot above for the precise location on the map.
How to complete Kitawak Shrine
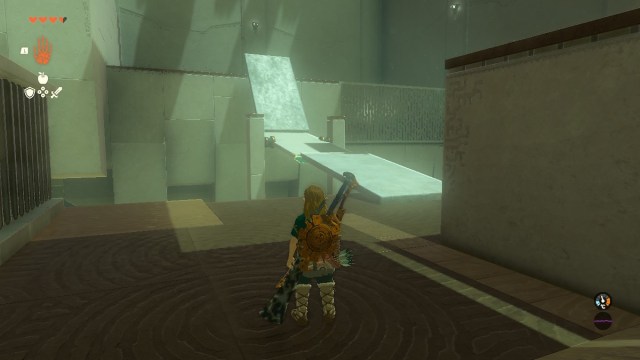
When you enter the shrine, the first challenge is to cross the gap that has a vertical plate on Link’s side. The plate can move but is far too short to reach the other side. There’s another plate leaning against the wall to the right. Take it using Ultrahand and attach it to the fixed plate to create a bridge. As soon as you attach it, the connected pieces will drop to form a crossing.
Just be sure to make it long enough to reach the other side.
Once you’ve made it across, take the plate and attach it to the spinning cog on the left. This will allow you to cross the gap as it spins and reach the chest at the top. Try to attach the plate as close to the edge of the cog as possible. Otherwise, you’ll fall while trying to jump onto it. In the chest are a bundle of arrows. That might not seem like a great reward, but you’ll need them to finish the shrine if you didn’t already have some.
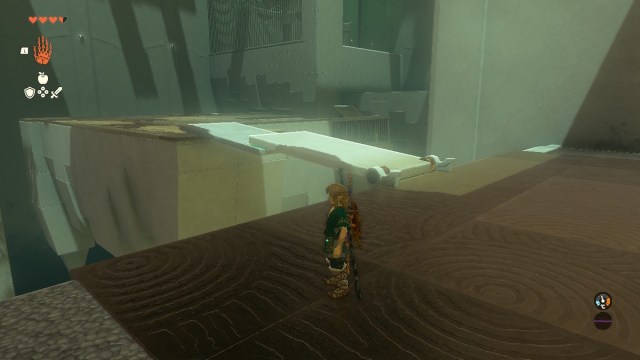
After getting the chest, you’ll need to disassemble the spinning platform. You still need that plate! Take it with you to the next section. Similar to the first bridge, you’ll have a plate that can be moved and a ledge to reach. Unlike the first moving plate, this one has a much greater range of motion, which you’ll need to utilize.
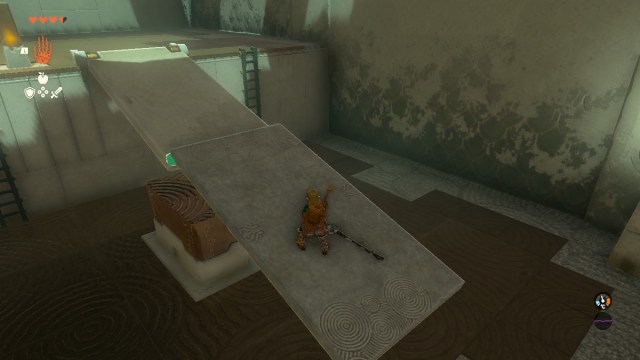
To start, attach a plate to it to bring the moving plate down to the same side that Link is on. It should look like a bridge similar to the first one, although that’s not all there is to get to the top, as the ledge is much higher than the first. Take the second plate you have and place one end on the ledge and the other on the bridge to form a ramp. It doesn’t need to be attached so long as it is stable.
The key here is to make the ramp stable enough for Link to walk up it (he can’t climb it) without making it too steep so that he slips before reaching the top. Check the screenshot above for the ideal placement of both plates. The ramp plate above is at nearly the steepest point where Link can still get to the top.
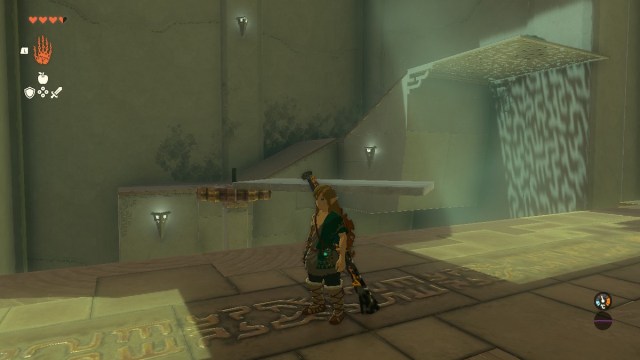
After you’ve gone up the ramp, pick it up to once again take the plate with you. For the final moveable plate, you’re going to need to attach a second plate to the end. It should lengthen the plate like in the picture above. From here, you can activate the yellow plinth by shooting an arrow at it. The plinth will turn on the pillar beneath the two plates. Activating the pillar will send the two plates into the air like a catapult.
To get to the end of the shrine, you’ll need to stand Link close to the very end of the plates. The further back you stand, the higher Link should fly when activated. Fire an arrow at the yellow plinth to turn it green and then shoot the catapult. When Link is high enough, use the glider to fly safely to the end of the shrine. If you miss the shot, you can reset the catapult by hitting the plinth again to turn it back to yellow.
That’s it! Kitawak Shrine is complete.


