In Kingdom Come: Deliverance 2, Blacksmithing is one of many activities you can do between traversing the Kingdom of Bohemia. Even though there is an in-game tutorial for how to be a Blacksmith, it’s still a bit tricky until you understand exactly what to do. As such we’ve put together this Kingdom Come: Deliverance 2 Blacksmithing guide as well as some tips to help you be successful.
Where to learn how to start Blacksmithing
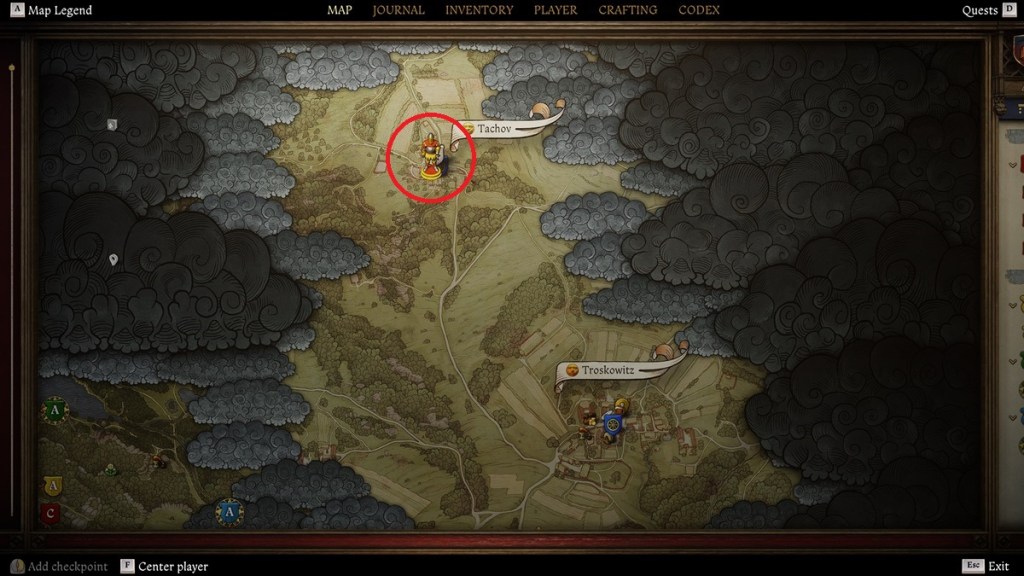
You will learn how to Blacksmith from Radovan, the Blacksmith in an early-accessible town named Tachov. After the prologue to the game, you’ll me Radovan in Troskowitz where he will offer you some Blacksmithing work. Head to Tachov and find Radovan, and he will give you a beginner tutorial on how to successfully complete Blacksmithing.
Step-by-step Blacksmithing guide
In order to successfully blacksmith an item in Kingdom Come: Deliverance 2, there are a series of steps you must follow.
- Make sure you’ve learned the desired Blacksmithing design. Radovan will start you out with the recipes for Horseshoes and a Work Axe, which need to be consumed from your inventory to learn how to blacksmith them.
- Check the resource requirement for the recipe. You can either visit a Blacksmithing Anvil or simply hit ‘I’ to open your Inventory then click on the crafting tab. It also says ‘C’ brings up this menu, but for me, it just makes Henry crouch.
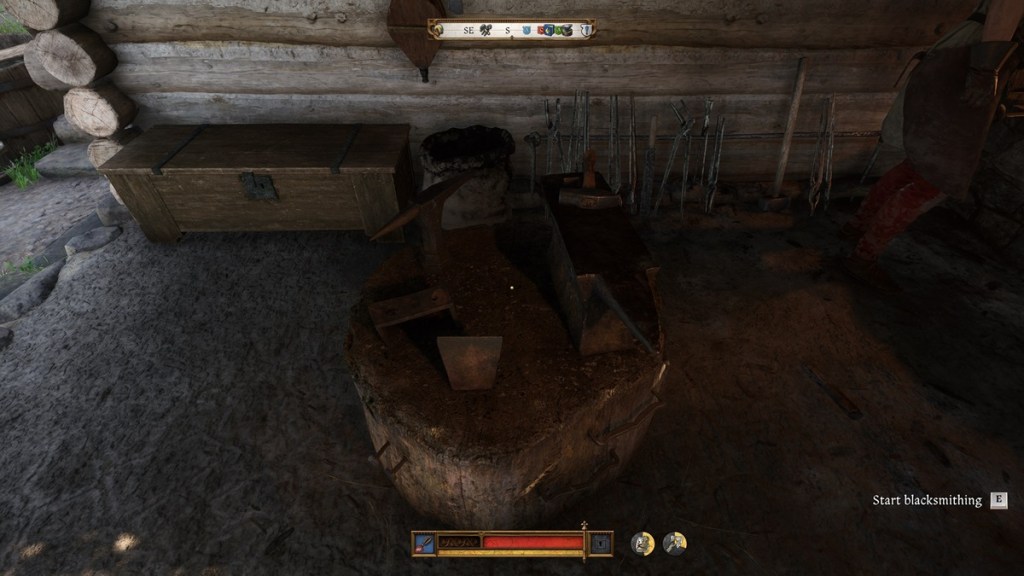
- Start the Blacksmithing process at an Anvil. Interact with any Anvil—one can be found by Radovan in Tachov—and choose which recipe you want to craft. As long as you have the required resources, Henry will walk over to the nearby barrel and pull out the base for the item and take it to the furnace.
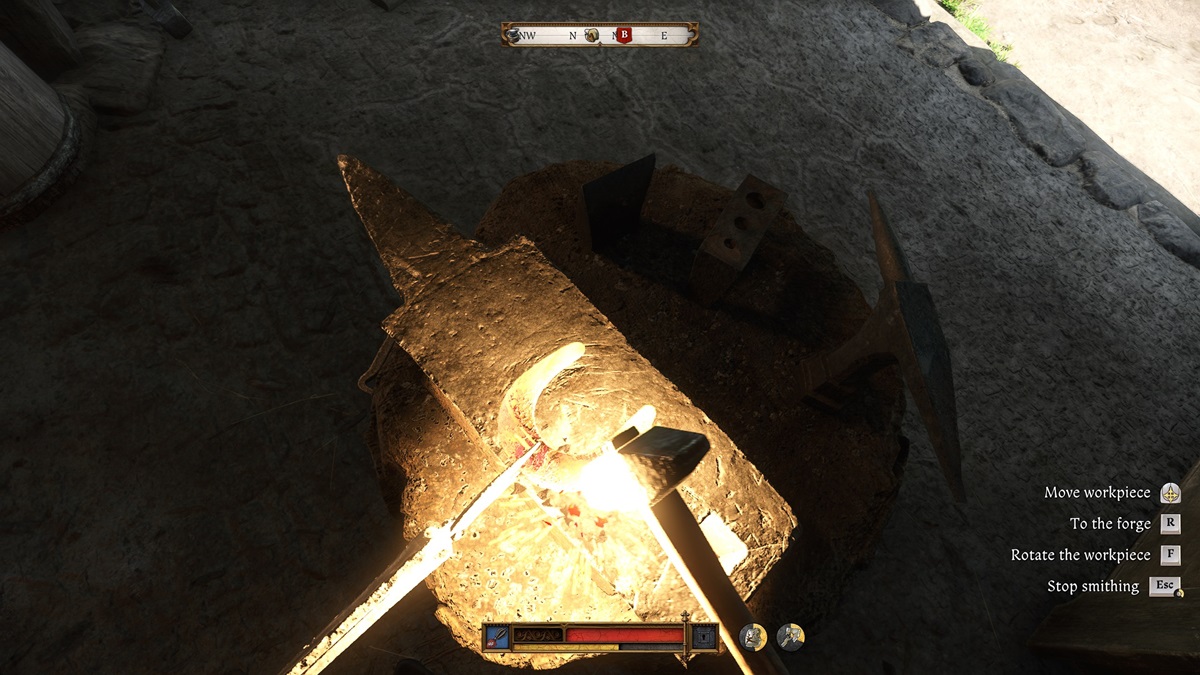
- Heat up the entire item on the furnace using the Bellows. As you heat the item, it will begin to glow red, then orange, then a bright yellow. Move the item around in the furnace using your mouse, and keep the heat from the bellows coming in by holding the ‘Q’ key. As Radovan says, it will “look like straw”. For certain items like the Horseshoe and Work Axe, the base item is small enough that the entire thing will fit in the furnace, so it will heat evenly. For other items, like a sword, you will need to move it back and forth across the flame to heat it evenly. If Henry says it’s getting too hot or catching fire, it’s time to switch it to the Anvil.
- Hammer to shape the item on the Anvil. While the item is hot off the forge and still yellow, you can hammer it to bend the shape of the item to your will. You can move the hammer around using the mouse, then hold the left mouse button to pull back the hammer, then let go of the left mouse button to strike the hammer down.
- Pay attention to the sparks flying off the item as you hit it. After each hit, move the hammer slightly away from where you last hit, and strike it again at full strength. Striking the same point over and over is not effective, but moving just slightly is enough to register a quality hit. You will know this happens because there will be lots of sparks, and Henry will start whistling. As you continually strike the item, pay attention to Henry’s whistling. It’s meant to keep you in rhythm. But also, if you hear Henry stop whistling, it means your most recent hit was not good.
- If the item cools down too much, return it to the Furnace. Henry will mention the item has cooled too much, but you can also tell by the color of the item. It will slowly cool back down from yellow, to orange, to red. Once it cools enough, you can no longer shape the item. Return it to the Furnace, get the bellows going again, and reheat the item to a bright yellow.
- Each successful strike that sends sparks flying will shape your item. Once you’ve done that enough, the item will be completed. If you’re quick and efficient with your hits, you can do it after one heating. If you’re too slow of ineffective, it may take several heat-ups. Henry will comment once the item is shaped correctly, at which point you then press the ‘R’ key to move it back to the furnace to temper it.
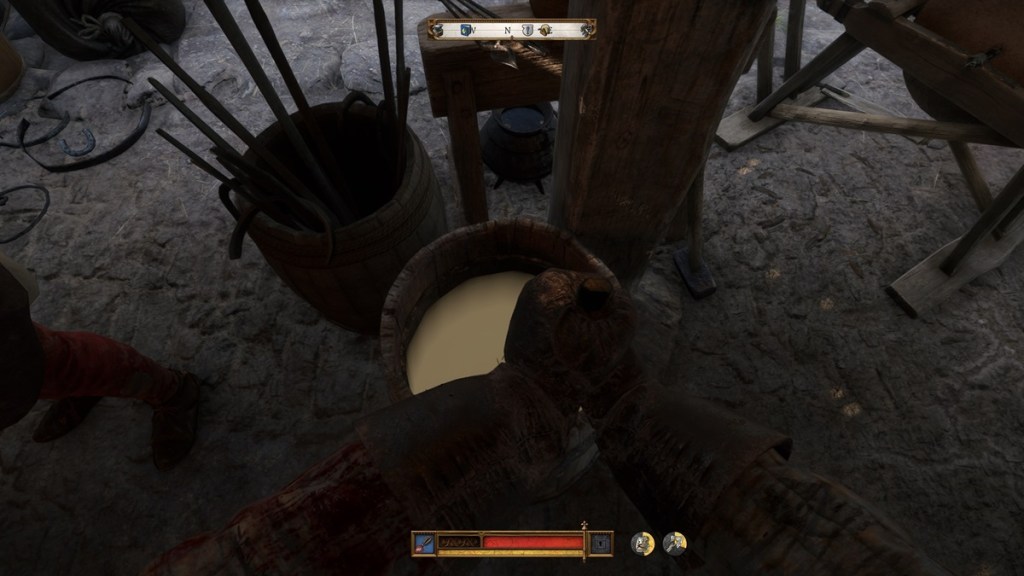
- After tempering, hit the ‘R’ key to quench it. Both tempering and quenching happen automatically, but you must press the key to move on to the next step. Henry will then take the item and dip it in the barrel of water which will complete the item! Congratulations, you are a Blacksmith!
All Blacksmithing and Craftsmanship Perks Leveling Rewards
Even though Blacksmithing is its own activity, skill-wise it is part of the Craftsmanship skill. As you complete Blacksmithing crafts and other activities such as sharpening your weapons, using repair kits on your armor, or washing your clothes, your Craftsmanship skill will increase. As you increase your base level, you will receive Perk Points that you can use to unlock certain Craftsmanship-specific perks. Here are all the Craftsmanship Perks in Kingdom Come: Deliverance 2:
| Craftsmanship Perk | Level Required | Description |
| Razor-Sharp | 6 | If you sharpen a weapon on the grindstone to a condition of 98% or higher, the weapon gains a bonus effect that increases its slashing damage by 10%. This effect will remain active as long as the weapon’s condition stays above 75%. |
| Seven-League Boots | 6 | If you wear boots repaired by yourself, sprinting will cost you 25% less Stamina, so you can run longer and go further. |
| Well-Fitted | 6 | Armor and clothing that you repair yourself with the Armorer’s kit will make less noise when worn. The effect lasts until the item’s quality level drops. |
| Helping Hand | 8 | Repairs by craftsmen will be 20% cheaper for you. |
| Thorough Maintenance | 8 | Your gear will be damaged 10% slower, so you don’t have to repair it as often. |
| Hardened Steel | 10 | The weapons you forge will have excellent properties and will therefore take damage 20% slower. |
| Keen Eye | 10 | If you get your gear repaired by a craftsman, you’ll gain a little experience in Craftsmanship. The experience you gain will increase along with the repair price. |
| Locksmith | 12 | When picking locks, your Thievery skill will count as 3 higher, so it’ll be a lot easier. Plus, you can also make use of scrap iron, so you’ll get an extra 1-3 lockpicks for each item you successfully forge. |
| Totally Legit | 12 | Stolen weapons, armor, and clothing in your inventory will lose their stolen status 20% faster. |
| Bowyer | 14 | Bows and crossbows that you repair yourself with the Bowyers kit are 10% more powerful. Thus your shots will fly farther and have more penetration. |
| Thorough Maintenance II | 14 | Requires Thorough Maintenance. Your gear will take 20% less damage. |
| Martin’s Secret | 16 | Now you will be able to forge weapons of the fourth, i.e. the highest quality. Weapons of this quality cannot be obtained in any other way than by forging them yourself, and their strength and effectiveness is unmatched. |
| Seven-League Boots II | 16 | Requires Seven-League Boots. If you put on self-repaired boots, the sprint will cost you 50% less stamina, so you can sprint longer and run further. |


