


We’ve officially invited Winnie the Pooh as another Disney Dreamlight Valley villager. This time, he’s residing in Honeyglow Woods, and he’s now ready to continue the DLC’s main storyline through an interlude mission. We now begin Interlude: The Misplaced Honey.
How to complete Interlude: The Misplaced Honey in Disney Dreamlight Valley
After finishing Chapter 3: A Very Satisfied Bear, you’ll unlock this interlude mission upon talking to Winnie the Pooh. He’ll reference the box of crayons you found in the previous quest and lead you to an art-full place.
Go to Winnie the Pooh’s art-full place
The two of you will travel to the Everoak Tree, where you’ll see its entrance blocked with tree roots. The two of you determine that using the crayons to draw a picture near the tree will help you advance further.
Explore the honey-filled hollow
Upon entering the Everoak Tree, you’ll discover a huge stash of Pooh’s honey inside it. There’s much to find in here, but for now, we’ll focus on exploring this honey-filled hollow. Head up the tree’s staircase to find a note on the wall for you to read. It reads as “Majikal Sun-Glo Hunny Goes Heer.”
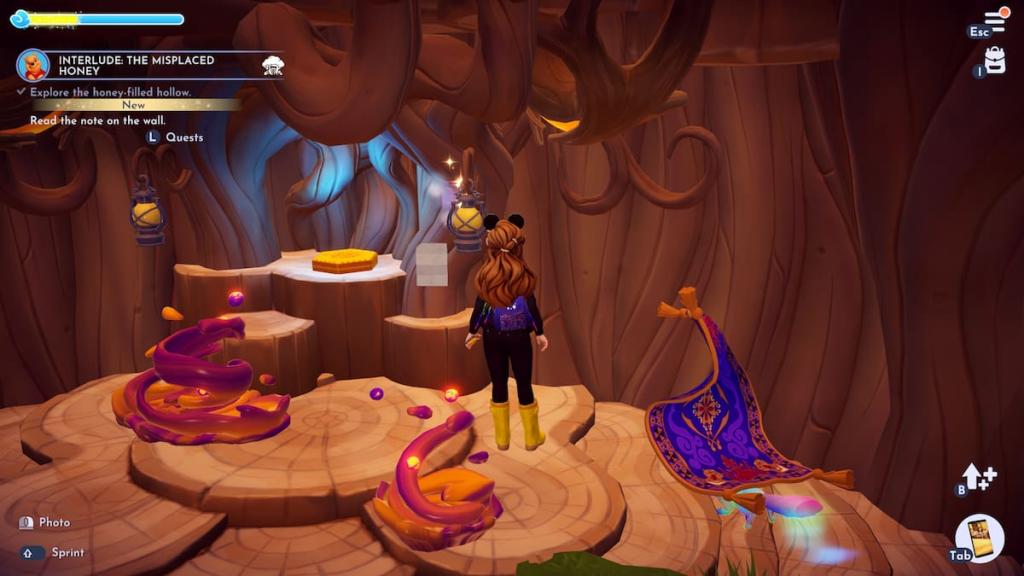
Although it seems like gibberish at first, talking to Winnie the Pooh reveals that the note is talking about his favorite type of honey, Sun-Glow Honey. Talking about it makes him hungry, requiring us to fetch him another honey pot. Grab any honey pot from the floor inside the cave before returning to Pooh. You’ll receive a Memory Shard in return.
Dig out a honeypot from behind a shelf
As you speak to Winnie the Pooh again, he’ll tell you that he recalls burying a pot of honey in the ground behind a shelf. The shelf we’re looking for is on the far left side of the tree’s interior, near a massive pot of honey.
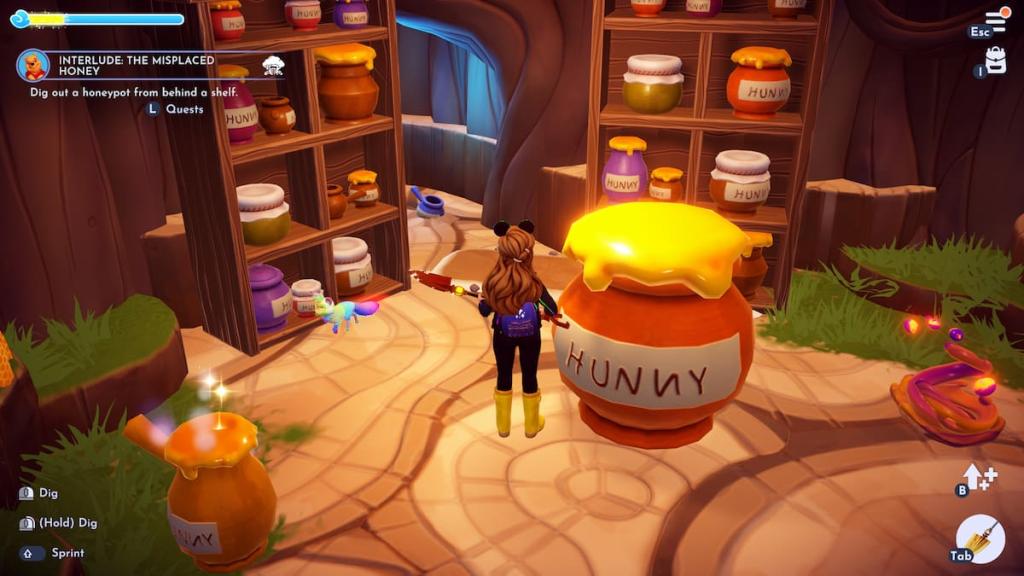
To access this spot, move the large money pot before sliding the shelf on the right over. Doing so reveals a small opening in the wall with a honey pot buried in the center of the floor. Dig it out before bringing it to Pooh to receive a second Memory Shard.
Dig out a honeypot from behind a shelf
Pooh reveals that the honey in the memory is Merryberry Honey. After exclaiming that he’ll eat more honey to unlock more memories, he eventually gets a tummy ache from consuming too much. You’ll need to make him a Tummy Tonic.
You can make the Tummy Tonic using the ingredients on the table next to the tree’s entrance. You’ll also find a book that gives a hint on how to make the tonic, revealing the following passage:
“Cook two seasonings and tea together to make a soothing drink. Don’t add anything too spicy or sweet! That might make the tummy more upset than before.”
With this hint in mind, you’ll need the following ingredients for the Tummy Tonic:
- Ginger
- Mint
- Jasmine Tea Leaves
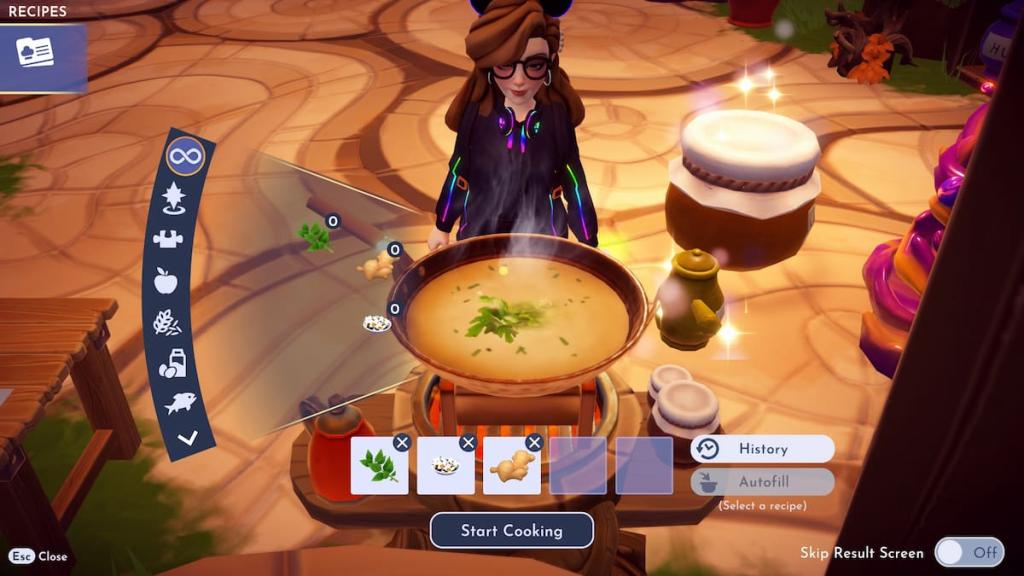
Using these three items in the cooking station next to the table will reward you with a Tummy Tonic. Give it to Pooh to receive the third and final Memory Shard. He now remembers where the Sun-Glow Honey is.
Search for the pot of Sun-Glow Honey
The Sun-Glow Honey pot is on the middle shelf near the cooking station from the previous quest task. Using the memory image as a reference, we can head in this direction and interact with the center shelf to obtain the honey pot.
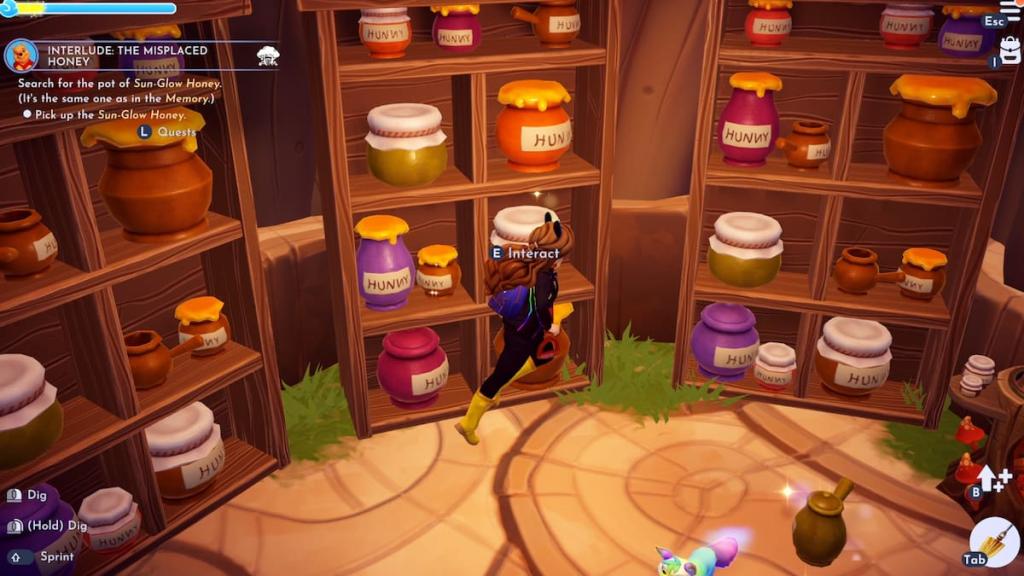
Grab the honey pot, bring it upstairs, and use it on the honeycomb spot to obtain another Memory Shard. Following another conversation with Pooh Bear, the two of you will leave the Everoak Tree, where you’ll encounter a cutscene. Honeyglow Woods is beginning to change for the better.
Clear the Corrupted Honey Wall to reach the Gloommeadow
Excited about this realization, Pooh leads you towards the entrance to Gloommeadow. However, you’ll first need to clear away the corrupted honey wall blocking access to the biome.
You’ll need the following materials to clear the honey wall:
- Four Honeycrunch Bar
- Four Acorn Snail
- Three Honey Agate
- Three White Thistle
- Seven Soft Limestone
The first item you need is Honeycrunch bars. You’ll need a total of four Golden Honey from your beehives and four Sweet Chestnuts from Drowsybloom Acre’s trees to make them. You’ll also need Honey Agate and Soft Limestone, which you can find by breaking dark mining spots around this same biome.
Next are Acorn Snails. You’ll obtain these by fishing in white ripples within any Honeyglow Woods biome. For now, we only have access to Drowsybloom Acre, so you’ll need to focus your attention on the river within this biome.

The last new item in our quest series is White Thistle, a flower that spawns within Drowsybloom Acre. If you don’t find all three right away, clear out every flower in the biome and wait for more to spawn. As more appear, look around for White Thistles, then rinse and repeat until you find all three that you need. Alternatively, you can equip a companion who automatically collects nearby flowers to passively collect them as you gather the other four items for this quest.
You can also use this chance to finish the quest’s optional tasks. They appear as follows:
- Restore the Chez Remy Tree.
- Help Winnie the Pooh by completing his first Friendship quest, Grown-Up Things.
- Add ten decor pieces to Drowsybloom Acre.
Once you have all five items and either complete the optional objectives or skip them, head to the corrupted honey wall and place them inside its menu. Doing this completes Disney Dreamlight Valley’s Interlude: The Misplaced Honey quest, leading directly into Chapter 4: A Tail Tale.


