In Baldur’s Gate 3, you, as the player, have the ultimate freedom (more or less) on what you do or don’t do in Faerun. This includes which characters you decide to invite into your camp. In fact, some companions are only encountered within certain time frames, making them missable. This is the case for the Githyanki warrior, Lae’zel.
Lae’zel assists you in escaping from the Illithid ship at the beginning of Baldur’s Gate 3, but when the ship crashes, she’s nowhere to be found. The first opportunity to save her is during the encounter with nearby Tieflings. You can save her from being taken hostage not far from where you wake up, south of the Emerald Grove and just a bit north of the Roadside Cliffs waypoint.
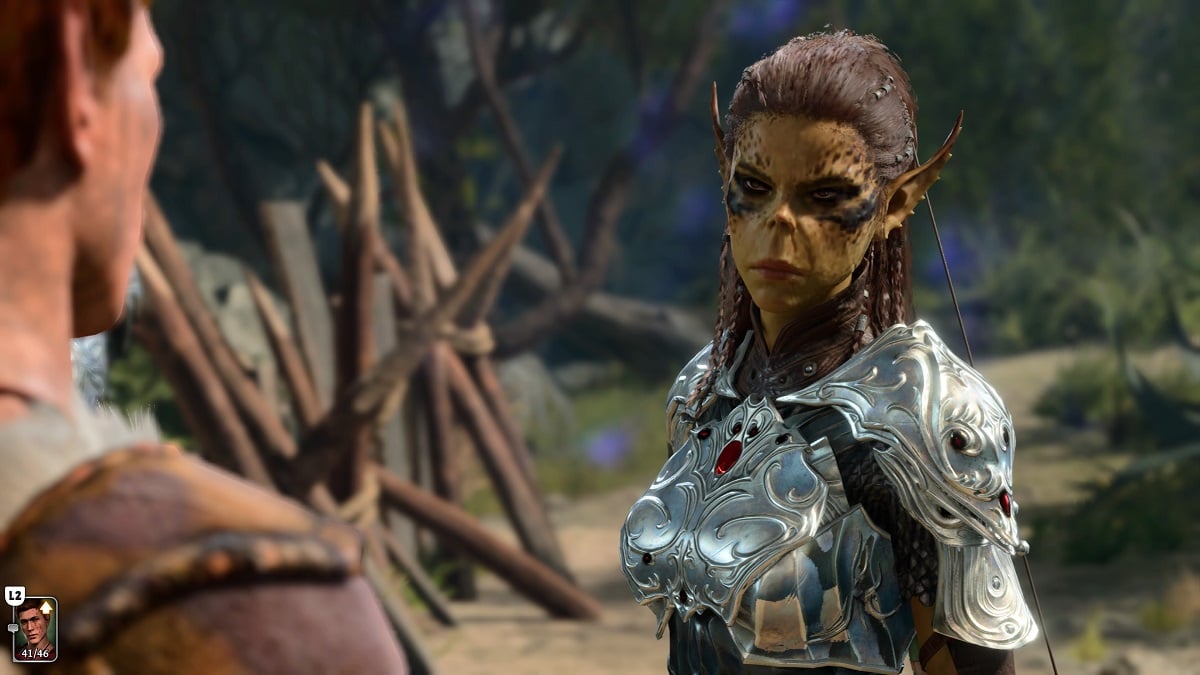
Lae’zel can be encountered a second time, later in Act 1, but it’s a missable encounter — in my playthrough, I inadvertently ran into her corpse. If you’re anything like me, you might’ve gone a different path and never encountered the poor Githyanki stuffed in a cage, so I’ll explain how to recruit Lae’zel later in Act 1, just in case you missed her.

How to recruit Lae’zel at the Mountain Pass
Timing is very important here because, at some point, Lae’zel frees herself from her Tiefling would-be captors and makes her way to the Mountain Pass. It would seem that the secret here is to travel to Mountain Pass; if the cutscene plays featuring the Githyanki Patrol (and if the gigantic dragon is still sitting just before the bridge), then you can still save Lae’zel from certain death. As you approach, one of your party members will warn you about the Gith, but don’t let that stop you.
As Lae’zel sees you approach, she’ll tell you to stay quiet via telepathy. But, we’re not gonna do that. You will be met with three choices, but you’re going to want to select the second: If you want to speak, speak to me. This causes another series of skill checks. I chose the option linked with persuasion: I don’t know you, I pose no threat, which requires a roll higher than 15.
From here, you need to continue to select dialogue options that won’t lead to an all-out brawl. Say whatever it is you have to in order to get the dragon rider, Kith’rak Voss, to leave the area. In my case, I eventually managed to successfully complete another persuasion check just by telling him to leave. He did so, but only after giving me “orders” to find and kill other survivors of the nautiloid.
As the Gith Patrol leaves the area, Lae’zel will remain. Interact with her, and you’ll be able to ask her to travel with you. If you don’t have any room in your party, send her to your camp, and you’ll have saved Lae’zel from a truly unfortunate end. If you fail at any point and start a battle with the Gith Patrol, make sure you’re at least semi-appropriately leveled, because it’s a very tough encounter.

Specific dialogue options to save Lae’zel
| When Kith’rak Voss says: “Your name, child.” | Respond with: “If you wish to speak, speak to me.” |
| When Kith’rak Voss says: “Tell me, pet: why shouldn’t I run you through this instant?” | Respond with: [PERSUASION DC 15] “I don’t know you. I pose no threat. |
| When Shadowheart says: “Don’t help them. Don’t tell them a thing. We’re dead if you do.” | Respond with: “You’ll need to start from the beginning – what is this weapon you’re after?” |
| When the Narrator says: “He begins to move his hand in a quick flurry of gestures.” | Respond with: [ARCANA DC 10] “Silently interpret the meaning of the gestures.” |
| When the Narrator says: “You realise he’s casting Detect Thoughts.” | Respond with: [WISDOM DC 10] “Resist the probing into your mind.” |
| Respond with: [PERSUASION DC 15] “You ought to just leave. You’ve no right to decide my fate.” | Respond with: [PERSUASION DC 15] “You ought to just leave. You’ve no right to decide my fate.” |