Did brigands wipe your meager militia in Manor Lords and take all your weapons with them? Me too. In order to rebuild your militia, you need more weapons, but they can be tough to come by.
There are two ways to get more weapons and armor. The first is to trade for it, and the second is to make it yourself using a blacksmith, armorer, and fletcher (person who makes arrows but also bows in this case). We’ll look at both methods individually.
How to create weapons and armor in Manor Lords
In order to create weapons in Manor Lords, you need two things: an artisan and the materials.
I go into detail about creating an artisan in this guide here. However, to quickly summarize, you need a burgage lot large enough to have an extension, and then you need to build that extension. When you do, the family will be locked into that profession, but you’ll be able to make items you otherwise couldn’t. For bows, you need a fletcher. For sidearms, polearms, and spears, you need a blacksmith. For armor you need an, er, armorer.
As a note, to make armor, you also need to unlock basic armor-making from the skill tree.
The materials you need vary on what you are building. Most armor requires iron bars, which means you need to mine the iron and smelt it into bars. Bows just require wood planks. All melee weapons require iron bars and also planks. Once you have the materials, click on the artisan house you want to build with from the General tab, then choose the item you want them to focus on. They’ll keep building until they run out of materials.
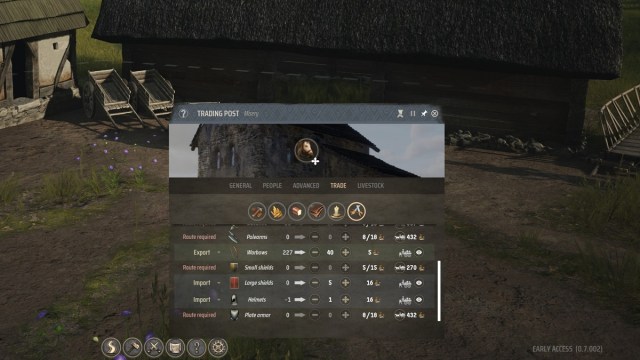
How to trade for weapons and armor in Manor Lords
There are also two things you need to simply import weapons and armor from elsewhere in Manor Lords: a trading post and trade routes. Also regional wealth, so I guess that’s three things.
Regional wealth is gained through taxes or trading, and a trading post is built at your discretion. Once you’ve built the trading post, you’ll need to assign families, click on the building, select the trade tab, and then choose what you want to import. If you go under the weapons icon, you’ll see that much of what you might want is not available for trade. That means you have to establish a trade route, which is the icon on the right-hand side of the window.
Establishing a trade route requires you to pay a hefty fee, but it’s necessary. Once one is established, you can then start purchasing gear for your surplus, which will then get distributed throughout your militia. Note that you need a trade route for each item you want to import. Buying items through trade will, of course, cost even more money, which you can possibly offset by exporting some of your industry.

