SteamOS is streamlined and provides all you need to take advantage of your Steam library. Some players may want to take things further with their handheld, which is possible if you load Windows OS onto it.
Though you can change your Steam Deck’s operating system, there are a few things to consider. Firstly, the handheld was designed for SteamOS, and while it can run Windows fine, you may experience some performance dips simply because the OS is more taxing on your hardware. Secondly, the process can be completed in a single afternoon, but it’s no fun, and it’s easy to get things wrong.
Lastly, with Windows OS, you’ll be able to do more with your Deck, but you’ll also have to deal with all the issues that come with Windows, including the constant updates, clunky design, and other inconveniences that can sometimes interfere with your productivity and gaming. As a personal recommendation, I’d advise you not to use Windows on your Deck, but if you have a good reason to, this guide will show you how.
The guide below was created through occasionally painful trial and error. There are several guides around, and some of them will lead you astray or take you through unnecessary steps. Others leave out key details assuming you’re an expert on the matter already. I’ve tried to avoid that in this guide and give you links to every resource you need.
Rest assured that regardless of how tech-illiterate you are, you’re highly unlikely to permanently brick your device during this process. Furthermore, if you don’t want to deal with Windows anymore, you can load SteamOS back and it’s thankfully a much simpler process.
Why load Windows onto the Steam Deck?
The Steam Deck runs on a Linux-based operating system, and with Proton tools, it can handle most games that are developed for Windows. There are exceptions, and this can occur for various reasons. Sometimes, games run anti-cheat or anti-piracy software that doesn’t play nice with SteamOS. If you already have a library on the Windows Store, you might want to access it on the Deck which you can’t do on Valve’s OS.
Using Windows can also turn your Deck into a fairly powerful handheld PC capable of completing work tasks and improving your productivity. If these scenarios match your situation, it may be a good idea to get Microsoft’s OS on your Deck. If not, leave good enough alone and enjoy SteamOS.
What do you need to load Windows onto the Steam Deck?
Surprisingly, you’ll need a Steam Deck. You’ll also need a PC. I’ve managed to do it via a Macbook, but that would require a separate guide, so we’ll stick to Windows PCs for now.
You’ll need a USB hub that plugs into USB C ports. A flash stick with a capacity of at least 64GB is also necessary. Lastly, you require either a microSD card or an internal SD that’s at least 512GB. If you wish, you can also use a keyboard to make installation on the Steam Deck easier, but it isn’t required.
Acquiring your Windows ISO and creating a bootable USB drive
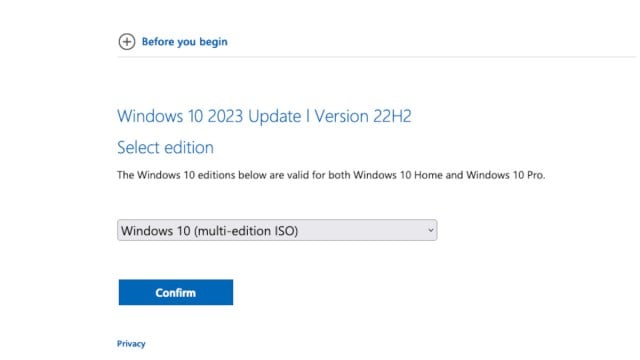
The first step is to get your Windows ISO, a disc image containing the OS. Microsoft allows you to download it for free here. Now that you have the file, download Rufus. This small application will allow you to turn a USB stick that you use to install Windows on your handheld.
Connect your USB stick to your PC. I’d advise you to use one that you don’t intend to use for any other reason. Also, take note that everything on it will be erased. Once Rufus has been downloaded, open it. You’ll have a few options to deal with. This is what you need:
- Device – your USB stick
- Boot selection – Windows.iso
- Windows option – Windows to Go
- Partition scheme – GPT
- Target system – UEFI (non CSM)
- File system – NTFS
- Cluster size – 4096 bytes (Default)
Now you can press “Start,” at which point you’ll be asked which version of Windows you want. Select Windows 10 Home, leave everything unchecked in the next window, and select “OK” when you’re given a final warning that all data will be erased from your USB stick. Rufus will then get to work creating a bootable USB drive.
At this point, it might be useful to explain why it’s smarter to go the USB route when loading Windows. It is possible to do it via microSD, but it’s a finicky process with no guaranteed results. The problem seems to partially stem from the fact that Windows on Deck doesn’t automatically detect your microSD slot.
Loading Windows OS onto your Stem Deck
Once Rufus has done its magic, you’re ready to load up your new OS onto your Deck (which should be completely switched off). Connect your USB hub to your handheld and plug your bootable USB drive into it.
Next, you want to do a special kind of start-up for your Deck. Instead of pressing the power button, hold down both the power button and the volume down button at the same time for a few seconds. This will bring up the Boot Options Menu.
It’ll give you a list of boot devices. Select the one correlating to your USB stick, and this will begin the Windows installation process. The device will have to be used vertically at this point. You’ll be asked for a product access key. You don’t need one so select the “I don’t have a product key” option.
You may also be asked what version of Windows you want. Again, select Windows 10. Agree to the license terms, then on the next screen, select “Custom: Install Windows only.” This will lead you to perhaps the trickiest part of the whole process – partitioning your SD.
Many guides will give you different advice on how to handle this part, and I’ve tried some of them with disappointing results. If you plan on having Windows replace SteamOS, delete Drive 0 Partition 8, click “New” then create a new partition. Select it, then click “Next.”
At this point, you’ll go through the regular Windows installation where you’ll be asked for your region and internet settings. You can skip it for now, and just let the OS install. It takes a long time to install, so give your device at least half an hour.
Congratulations, you now have Windows on your Deck! There’s just one more essential problem to tackle – the vertical orientation. You can change this by going to Settings, then Display, and at the Display orientation option you can change the orientation to horizontal.
Your Deck’s now ready to be used as a Windows PC. However, you’ll notice that there are a few minor features still missing, including sound. This can be fixed.
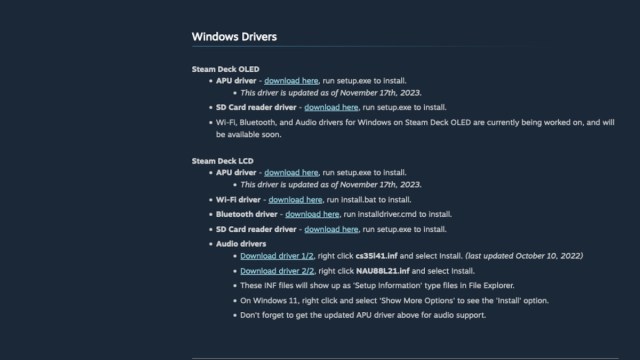
Installing your Windows drivers
Valve’s handheld wasn’t built for Windows, so while it can handle the OS, there will be some issues present. Fortunately, Valve has released Windows drivers that you can access here. There are options for both the LCD and OLED versions of the device available.
With Windows on your Deck, you have access to a larger library of games as well as some of Microsoft’s productivity tools. If this is the right fit for your needs, then you’ve just turned your handheld into an even more useful device.


