Please don’t use Azumarill this time
Pokemon Scarlet & Violet have brought its third 7-Star Tera Raid battle into the game, and with it comes a change of pace. The previous Charizard and Cinderace raids favored Pokemon who could tank Fire-Type hits like a champ, but many of these monsters won’t necessarily excel against Greninja. There is one returning champion, but we’ll get to that later.
As has been tradition with the 7-Star Raids so far, you can only catch one Greninja while the event is live. That said, you can freely grind this raid for higher drop rates of rare items like Ability Patches and Bottle Caps. More importantly, since Greninja will always sport the same moves and Poison Tera-Type, you can repeat a winning strategy as often as your teammates are willing to cooperate. Here’s how to take this frog ninja down.

Greninja’s moves
Unlike the previous raids, Greninja is a mixed attacker. It will use Gunk Shot and Night Slash to deal Physical Poison and Dark-Type damage respectively. Conversely, it will use Ice Beam and Hydro Pump to inflict Ice and Water-Type damage that scales off of its Special Attack. Its attack pattern ultimately depends on your Pokemon’s stats and Type. Whatever does the most damage to you, Greninja will generally spam that move.
Having said that, it’s clear that Greninja’s Special Attack stat is much higher than its Physical Attack. This allows for strategies that seem outright foolish at first glance. Depending on your Pokemon’s stats, Greninja may opt to use moves that you resist over moves that would otherwise inflict neutral damage to you. Keep this in mind as you decide whether to build Pokemon that prioritize their Defense or Special Defense stats.

Greninja’s extra mechanics
At the start of the fight, Greninja will use Toxic Spikes and Double Team. Toxic Spikes will poison your Pokemon if it returns to the field after getting knocked out. The obvious solution here is “don’t die,” but that’s easier said than done. Double Team is scripted to be used as Greninja’s health falls, so it won’t necessarily spam this move while your team sets up its buffs. That said, once Greninja’s evasion rises enough, it becomes a major pain to land any attacks on. Fortunately, select Pokemon can counter this.
Beyond that, Greninja has similar mechanics to the other 7-Star Tera Raids. It will erase your stat boosts at turn 3 of the encounter. This will weaken your party’s ability to fortify itself early in the fight, though fortunately, your stat boosts after this will stick. Greninja will also clear its stat debuffs during or after its shield phase, so make sure Greninja doesn’t sneak in a KO after this happens. Otherwise, the usual rules of the shield phase remain here. Status moves and debuffs won’t land, though attacks that have a secondary effect like Chilling Water remain viable.
Because of Greninja’s mechanics, the best counterplay depends on which Pokemon you’ll bring to the field. That said, as a universal rule of thumb, absolutely prioritize your defense first. Even if Greninja clears your stat boosts early, it’s still worth fortifying yourself to withstand its initial attacks. That said, remember that Cheers or moves like Light Screen will still persist after Greninja clears your stat boosts.

The best Pokemon to bring
After some initial confusion, the meta for countering Greninja has revolved around a familiar friend returning to reign havoc. No, it’s not Azumarill; in fact, a belly drum Azumarill shouldn’t be anywhere near this encounter. That said, remember to max the EVs and IVs of whatever Pokemon you bring as we recommended in the Azumarill build guide.
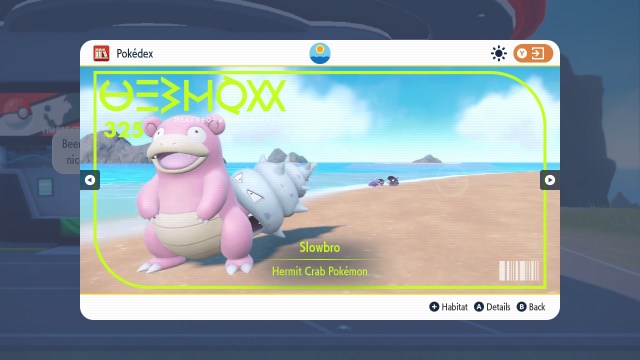
DPS MVP: Slowbro
As it turns out, the Stored Power strategy from Cinderace is so good that even Greninja can’t withstand it. Considering Slowbro takes Super Effective damage from Greninja’s Night Slash, it’s honestly incredible it does so well in this fight.
Just like before, your strategy revolves around boosting your stats to the moon. Begin the encounter with Iron Defense to bolster Slowbro’s respectable Defense stat. Even if Greninja clears your stats early, your goal in the early game is to just survive. Use Slack Off as needed for valuable self-healing, and segue into Nasty Plot once your Defense is maxed. Finally, with maxed Defense and Special Attack, you’ll functionally boost the base power of Stored Power to a whopping 260. This won’t nuke Greninja as hard as it did to Cinderace by itself, but these are still insanely heavy hits.
That said, do be mindful that Greninja is dealing Super Effective damage to you. While Slowbro is viable for solo clearing the fight, I recommend two support Pokemon in a party to help Slowbro survive and set up. Even a party member who can manage a Defense Cheer goes a long way in helping Slowbro’s early game. Greninja is bulky enough that two Slowbros are viable, but three or four are a bit unnecessary.

Attack and Support MVP: Gastrodon
Anecdotally, Slowbro is the most consistent force popping up in rooms online. Gastrodon hasn’t seen as much usage in my testing, but when played well, this monster can help this fight go very smoothly.
Gastrodon can either be run as a static support Pokemon or as a mixed attacker and supporter. The ability Storm Drain is essential. This will completely nullify Greninja’s Hydro Pump and turn it into a Special Attack boost. This has a fun interaction with another strategy, but we’ll get to that in a bit. Additionally, Gastrodon can learn Clear Smog as an Egg Move, which is beyond valuable for countering Double Team. This move will revert all of Greninja’s stat boosts to their neutral state, meaning this is optimally used at the start of the encounter and after Greninja clears its stat ailments later.
Recover is a must for Gastrodon, but from there you have a few choices. Stockpile can be used to bolster Gastrodon’s defenses, which may be valuable if you find you’re taking more damage than you can handle. Mud-Slap and Mud Shot harass Greninja’s Accuracy and Speed respectively, which can help bolster your party’s survivability. Yawn is another potential Egg Move that can put Greninja to sleep if its shield isn’t up, giving your team a free turn or two to take advantage of.
Finally, if you’re looking to deal damage with Gastrodon, Earth Power is your key here. It’s less powerful than Earthquake, but it benefits from those boosts you can accrue via Storm Drain. This brings us to our next option.

Healer Option: Cloyster
This is my personal build for this encounter. Thanks to Cloyster’s monstrous Defense, Greninja will be goaded into spamming Hydro Pump. This is based on a universal HP/Defense build, so allocate points into Special Defense or adopt a Careful Nature to make this build comfier in this fight. Use Light Screen to protect yourself and party members vulnerable to Special Attacks, and throw in a Defense Cheer for good measure. Remember, these won’t expire when Greninja clears your stat boosts. Have Cloyster hold Light Clay to extend the duration of Light Screen.
From here, spam Life Dew as much as you or your party needs it. Here’s the fun synergy: Life Dew triggers Gastrodon’s Storm Drain ability in lieu of receiving healing. This makes it easy to get Gastrodon to +6 Special Attack and shine in offensive builds. You won’t necessarily capitalize on this strategy, especially given Slowbro’s dominance as a DPS option. But when it works, it really works.
Hydro Pump is only 80% accurate, so depending on RNG you may get some free turns. Use this opportunity to use Chilling Water to help party members like Slowbro who are taking physical attacks. Finally, if you see Stored Power launching, use Helping Hand if your party is healthy to tear down Greninja quickly. Remember that Greninja may be working with evasion boosts, so don’t neglect healing the party to boost a Stored Power that might not connect.
The only weakness with this build is that you can get caught in a bad spot when Light Screen wears off. To handle this, press Y to keep track of Light Screen’s turn duration. Keep yourself healthy as the count reaches 0, and consider a Defense Cheer the turn before it expires.

Slowbro’s Bro: Qwilfish
If you want the return of Slowbro’s Stored Power defeating the boss in one hit, bring a Qwilfish to play pure support.
First off, Qwilfish can learn Intimidate as a hidden ability. This will make a significant impact on the party’s early survivability, especially for Slowbro as it takes Night Slashes. Once Greninja clears your stats, use Haze to write off its evasion boosts. From there, use Chilling Water until Greninja’s damage output is at an acceptable level, and use a mix of Acupressure and Acid Spray. The idea with Acupressure is to give Slowbro as many stat boosts as possible to bolster Stored Power even further, and Acid Spray will help Slowbro hit way, way harder. If another party member is not using Yawn, Thunder Wave can work here as well.
Qwilfish can replace a second DPS in a party, and it absolutely does make the fight go smoother when played right. That said, whether or not it’s worth investing in for this encounter is up to you.

Honorable mention 1: Clodsire
From here, just a quick overview of other viable options. Clodsire fits a similar niche as Gastrodon, especially given its Water immunity via Water Point. Your build options are similar, though you can opt for Acid Spray as support here as well. Clodsire can run Curse and Earthquake, so if you aren’t a fan of Slowbro, there’s an option there.

Honorable Mention 2: Vaporeon
Vaporeon is also worth a quick shout since it can run a Stored Power set like Slowbro. While it’s more favorable defensively, it does lack Slowbro’s STAB boost to the move as well as a consistent healing option. Vaporeon does get Wish, but you’ll have to play around the move’s delayed effect.

There are many viable strategies
As per usual, the Pokemon listed here are not the only counters to Greninja. In fact, synergetic teams can defeat Greninja in one turn without using any of the above Pokemon! These recommendations are based on their efficacy in your random pickup groups, but you will be at the mercy of your team no matter who you bring. It always helps to build two or three counters to the fight so you can fit whatever niche your team needs, though there’s no saving a party that has Koraidon or Garchomp in it.
In the end, find the strategy that brings you the most consistent results and stick with it. Once you can regularly clear the encounter, you’ll be swimming in items to help you build your next perfect Pokemon. Happy farming!


