I still don’t know what a Manalis is
Lapis Manalis is the new Level 90 dungeon introduced in Final Fantasy XIV Patch 6.3. It can be unlocked by progressing the Main Scenario until you reach the quest King of the Mountain. Like previous dungeons, you can choose to complete this area either with Trusts or three other players.
Compared to previous dungeons, there are surprisingly tough mechanics to contend with here. Though any group of random endgame players should be able to clear Lapis Manalis, you might want to play it safe with shields and damage mitigation when fighting the second and third bosses. Here’s what to expect.
Light story spoilers are contained below
Trash Pulls
At the start of the dungeon, you’ll be locked to the top of your vehicle while enemies spawn. This isn’t too terribly tough, though the Albus Griffin can be treated like a miniboss. The mechanics here aren’t noteworthy, just burn it down with your single target skills and dodge its AoEs as necessary.
After this introduction, go ahead and big pull the remainder of the monsters if you are tanking. You can’t take on more than two groups of enemies until you hit a wall, so your incoming damage won’t be much worse than any dungeon prior to this. The pull leading to the final boss arena is harsher than normal, so consider saving invulnerability for here. Otherwise, heal and mitigate damage while dealing your best AoE damage.
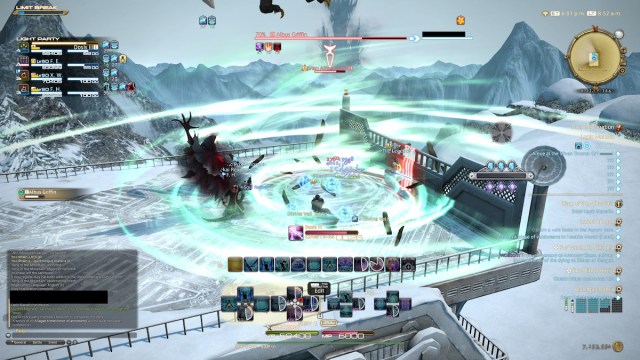
Boss 1: Albion
Not to be confused with fellow MMORPG Albion Online, Ablion is far and away the easiest boss of the dungeon. Shortly after you engage it, it will cast Call of the Mountain. After the cast bar finishes, look to the edges of the arena for a cloud of snow being kicked up. A wave of untargettable enemies will stampede straight across the arena from here, so drag the boss away from here or keep yourself out of range. Stampedes will continue to emerge before one is finished, so keep your eyes peeled.
From here, familiar looking mechanics will play out. Left Slam will target the left side of the arena relative to Albion’s position, so dodge accordingly. I only ever saw him use Left Slam, so I can’t tell if it can target either side of the arena. Knock on Ice is another predictable attack, just dodge the ice chunks as they fall and move away from the one Albion looks at and targets. Like Fenrir from Snowcloak, hide behind a chunk of ice before Albion finishes casting the room wide AoE Roar of Albion. You can come out of hiding the moment the cast bar disappears, even though the animation plays a few seconds later.
Albion will repeat these mechanics until you defeat it, so just don’t get hit and hit it as hard as you can.
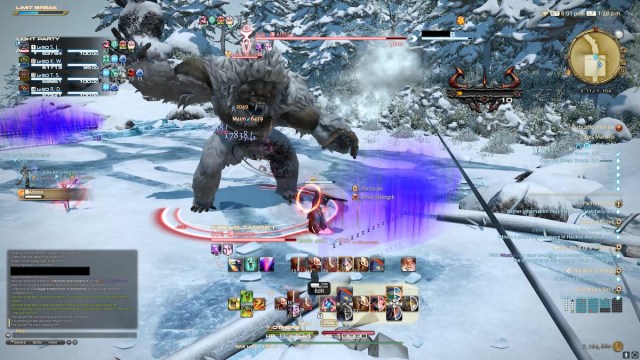
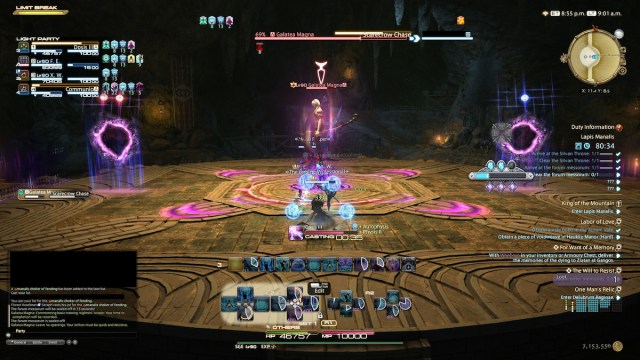
Boss 2: Galatea Magna
Here’s where things get spicy. Right off the bat, Galatea will use a donut AoE Waning Cycle followed by a circular AoE immediately after. To dodge this, wait for the first AoE marker to disappear and then immediately retreat away from her. In case she uses Waxing Cycle instead, stay away from her first and then move in close right after. After this, Galatea Magna will use a predictable AoE in Soul Scythe followed by the room wide AoE Soul Nebula. Dodge and heal accordingly.
From here, Galatea Magna will introduce her trickiest mechanic: Scarecrow Chase. You will see an X-shaped AoE forming underneath her and two portals marked with one or two orbs. After the cast bar is finished, Galatea Magna will warp to each orb and resolve an X-shaped AoE in the order they are marked. She won’t change the direction she faces during this, so try to visualize the safe spots before the attack begins. To cheese this first mechanic, just stay near the center of the room and you’ll dodge both attacks. Keep in mind that each of these AoEs are quite wide, so stay in max melee range to be safe.
Note that anyone hit by Scarecrow Chase will suffer from the Doom debuff. You have 15 seconds to remove this debuff before they instantly die. Cast Esuna or any equivalent spell to save yourself or your party.
Now the rest of the fight
Galatea Magna will next cast Tenebrism, which does zero damage but causes a debuff to count down on every party member. Four meteor markers will form and resolve around her in rapid succession, so each party member should stand in one each for the mechanic to go smoothly. The debuffs from Tenebrism will resolve at this point by making gaze markers appear above everyone’s heads, so look away from each other and keep fighting once the animation goes off.
These mechanics will repeat from here. Make sure to watch out for Waxing or Waning Cycle and lay on as much damage as possible. That said, Scarecrow Chase will spawn four portals here instead of two when you see it again. No obvious safespot will form here, but to make this mechanic easier, make note of the portal in the center of the room. Stay near the center to dodge initially, and then move away from the center in a cardinal direction once she gets ready to resolve the center portal. Move back in after the AoE if you need another safe spot.
Scarecrow Chase is far and away the riskiest mechanic of this fight, so don’t be afraid to use defensive cooldowns or shields to help your party get through this. The other mechanics in this fight should be simple to dodge once you get a hang of them
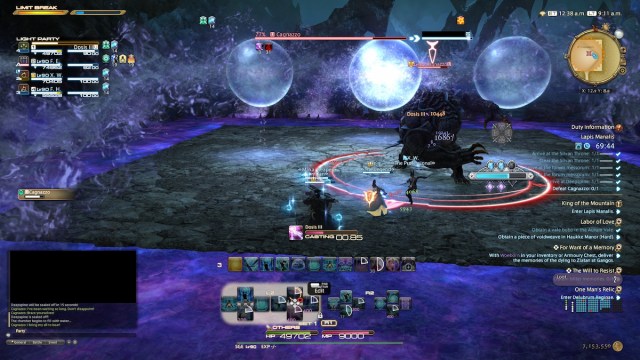
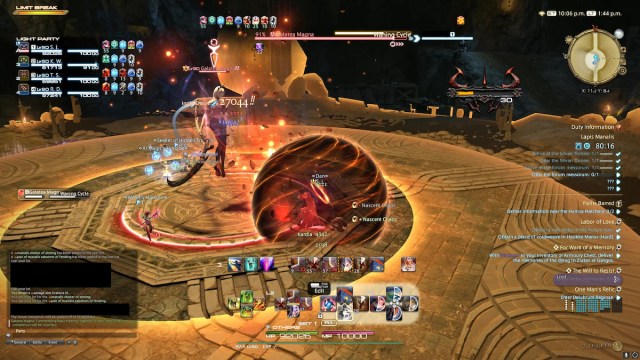
Boss 3: Cagnazzo
If there was ever any doubt, the next Elemental Fiend waits for you at the end of the dungeon. Cagnazzo begins the fight with Stygian Deluge, a mild room wide AoE that you can easily heal after. Cagnazzo will then cast Antediluvian, spawning water bubbles above the arena. Take note of the order the bubbles spawn, as three sets of two will appear. Large cicular AoEs will resolve in the order the bubbles appear, so move around the boss to dodge or find a safe corner.
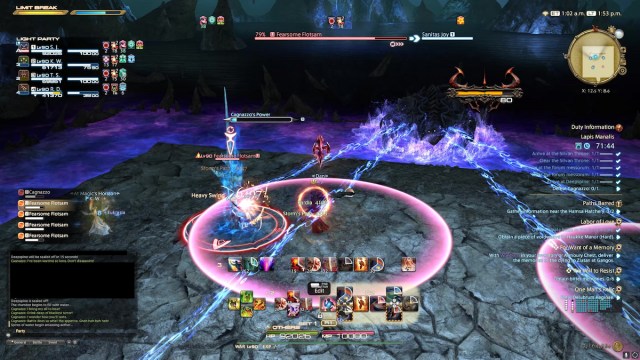
Before the last bubbles pop, Cagnazzo will cast Body Slam as indicated by the knockback AoE in the arena’s center. Move in close and position yourself so you’ll get pushed into a safe zone away from the last bubbles. If you step in the water, you’ll sustain damage over time for 15 seconds.
After this, Cagnazzo will charge Hydraulic Ram and mark a rapid series of AoEs on the floor. This is extremely hectic to dodge, as circular AoEs will be resolving as Cagnazzo dashes across the arena in a zig-zag pattern before returning to its initial location. You’ll gain a vulnerability stack with each hit, so defensive cooldowns and barriers are recommended. That said, even a non-tank Job should be able to take at least two hits without dying in this phase.
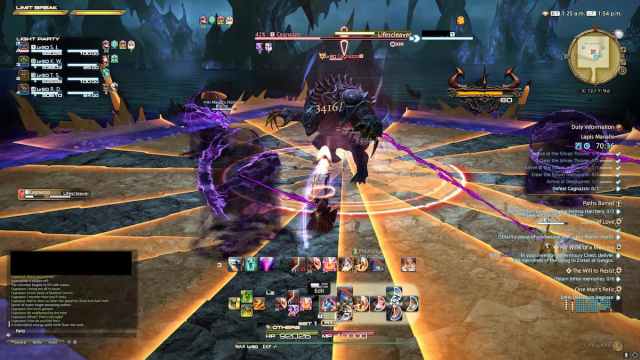
Here comes the add phase
Gather for a stack AoE in Hydrofall, which is thankfully weak. Heal up and you’ll be fine, even with vulnerability stacks. Cagnazzo will proceed to use Cursed Tide before triggering an add phase. Note the four debuffs that appear here. Three party members will have a shorter debuff that resolves a proximity AoE on all of them at once. The longer debuff is a stack AoE, so get ready to regroup once those proximity AoEs go out. If you have the Stack AoE, try to position yourself in max melee range of an add towards the center of the arena. This will make it easier for your party members to form a group around you.
Be mindful of the AoEs and chip away at the Fearsome Flotsams before Cagnazzo’s Power maxes out. That said, this is a very casual DPS check. Keep yourself safe while dealing as much damage as you can and you’ll be fine. You’ll have a long intermission waiting for Cagnazzo to cast his next attack once the Flotsams go down, so heal up and throw some shields if you can.
After this, Cagnazzo will use Void Cleaver and tether each party member to an orb. Cone AoEs will sporadically appear in the direction that the tether is facing, so move near your orb to dodge. All ranged players should stay near the arena’s edge to safely bait their tethers away from their party members. Melee DPS don’t have much they can do here without sacrificing DPS uptime, though some tanks can potentially wiggle in between their Global Cooldowns to bait an AoE away while keeping their attacks going. Cagnazzo will use its own series of cone AoEs followed by a tank buster during this phase, so just keep dodging and keep yourself safe.
After this, the mechanics repeat
Cagnazzo will continue to rehash each phase until you take it down for good. Take Cagnazzo down and rejoice in the sweet loot and tomestones. Good luck with your Expert Roulettes!


