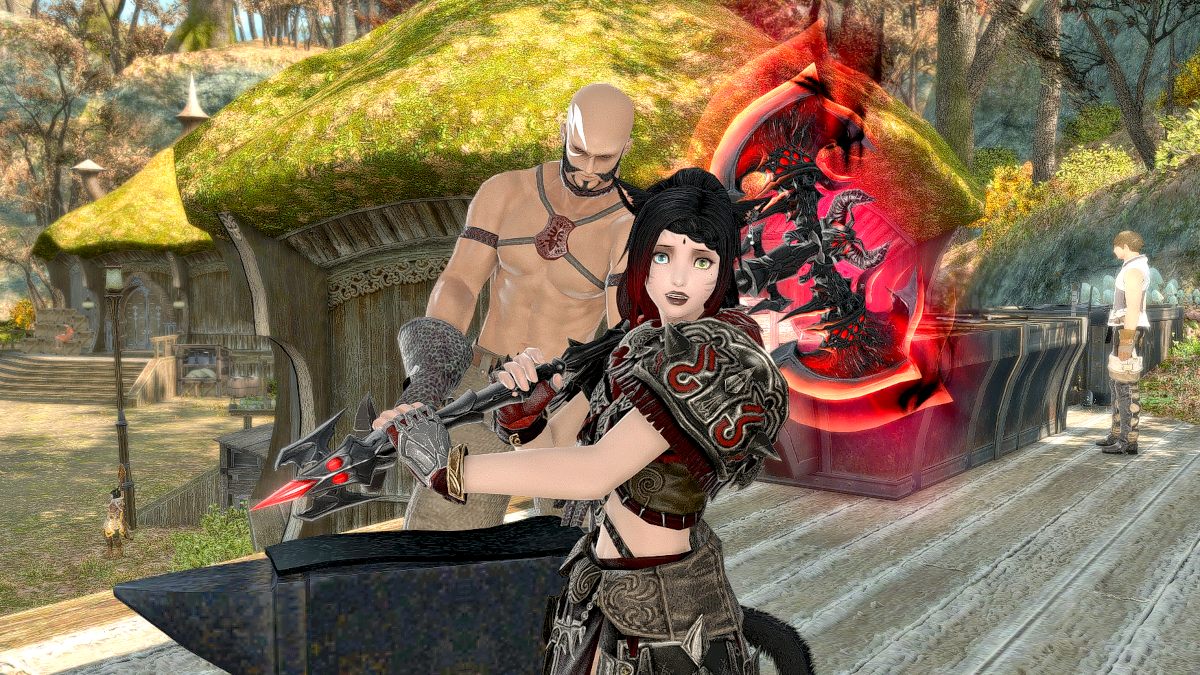
If you’re after a relic weapon in Final Fantasy XIV and don’t mind a grind, then you might want to go after a Zodiac weapon.
Make no mistake, this Relic carries arguably the most arduous grind of any Relic in FFXIV, but they are glorious to look at and, as a bonus, come with the <Z> title. You’ll need to be prepared for a lot of hard work if you want a Zodiac weapon, but if you’re up for the challenge, let’s look at the steps in detail.
Before you can begin the Zodiac grind, you’ll need to have completed a few things:
- Complete the level 50 MSQ quest “The Ultimate Weapon”
- Complete all Class and Job quests for your chosen job, including the level 30 quest, which gives you the Job Stone
How to complete The Weaponsmith of Legend in Final Fantasy XIV
You’ll only need to complete this quest before you begin your first Zodiac weapon grind. When beginning additional weapons, you’ll skip over this one.
Head to Vesper Bay and talk to Nedrick Ironheart (X:12.0, Y:14.0). He’ll send you off to Mor Dhona to speak to Rowena (X:22.0, Y:6.0) before you head to Hyrstmill in North Shroud to see Gerolt (X:30.0, Y:20.0).
This final location will be the main go-to point for the entire Zodiac grind, so you’ll get pretty good at finding it quickly.
How to complete A Relic Reborn in Final Fantasy XIV
Relic stage: Unfinished
This quest has a lot of different steps, each of which requires some effort to complete:
Step one: Finding your broken weapon.
Where you need to go to find your broken weapon depends on which job you’re trying to get a Zodiac weapon for. Broken weapons are spread between the various A Realm Reborn Beastmen Strongholds:
| Job | Weapon co-ordinates | Beastmen Stronghold |
| Paladin Monk | (X:30.0, Y:19.0) (X:32.0, Y:18.0) | Zahar’ak (Southern Thanalan) |
| Warrior Black Mage White Mage | (X:23.0, Y:10.0) (X:23.0, Y:11.0) (X:24.3, Y:6.4) | U’Ghamaro Mines (Outer La Noscea) |
| Dragoon Bard | (X:34.0, Y:21.0) (X:34.9, Y:20.5) | Natalan (Central Coerthas Highlands) |
| Ninja Scholar | (X:16.0, Y:17.0) (X:15.5, Y:16.9) | Sapsa Spawning Grounds (Western La Noscea) |
| Summoner | (X:25.0, Y:19.0) | Sylphlands (East Shroud) |
Step two: Attach materia to a weapon
To complete this step, you’ll need to either craft or purchase a specific weapon for your chosen class, then purchase two of a specific low-level materia to meld onto it. You can either meld the materia yourself or pay a Materia Melder NPC to do this for you.
Here’s the weapon and materia you’ll need for each Job:
| Job | Weapon needed | Materia needed |
| Paladin Warrior | Aeolian Scimitar Barbarian’s Bardiche | Battledance Materia III |
| Dragoon Monk | Champion’s Lance Wildling’s Cesti | Savage Aim Materia III |
| Ninja Bard | Vamper’s Knives Longarm’s Composite Bow | Heavens’ Eye Materia III |
| Black Mage Summoner | Sanguine Scepter Erudite’s Picatrix of Casting | Savage Might Materia III |
| White Mage Scholar | Madman’s Whispering Rod Erudite’s Picatrix of Healing | Quicktongue Materia III |
Step three: Getting Alumina Salts
This one’s easy, especially if you’re going into this on a level 90 Job. You’ll need to complete A Relic Reborn: The Chimera, which is a level 50 Trial. However, it can be easily completed unsynced within a few seconds solo with any level 90 Job.
To enter A Relic Reborn for the first time, you’ll need to head to Coerthas Central Highlands to find the entrance (X:32.0, Y6.0). For any additional weapons, you’ll be able to access this trial through the Duty Finder.
Once you’ve completed the Trial, you’ll be rewarded with some Alumina Salts. With these in hand, head back to Gerolt in Hyrstmill.
Step four: Getting an Amdapor Glyph
Again, this is a relatively easy step. All you need to do is complete the level 50 dungeon Amdapor Keep in order to get an Amdapor Glyph. Thankfully, as long as you complete the dungeon as your chosen Job, you can do it unsynced, so this is another step you can complete very quickly.
Once you’ve got the Glyph, take it back to Rowena in Mor Dhona and then revisit Gerolt in Hyrstmill.
Step five: Hunt some Beastmen
At this point, Gerolt will have given you an unfinished Zodiac weapon. You’ll now need to equip and go hunting for Beastmen. Again, which Beastmen you need to defeat depends on the Job you’re trying to get a Zodiac weapon for, but they’re in the same area as where you found your broken weapon in step one:
| Job | Enemy 1 | Enemy 2 | Enemy 3 | Location |
| PaladinMonk | 8 Zahar’ak Lancer | 8 Zahar’ak Pugilist | 8 Zahar’ak Thaumaturge | Zahar’akSouthern Thanalan |
| WarriorBlack MageWhite Mage | 8 U’Ghamaro Quarryman | 8 U’Ghamaro Bedesman | 8 U’Ghamaro Priest | U’Ghamaro MinesOuter La Noscea |
| DragoonBard | 8 Natalan Boldwing | 8 Natalan Fogcaller | 8 Natalan Windtalon | NatalanCoerthas Central Highlands |
| NinjaScholar | 8 Sapsa Shelfspine | 8 Sapsa Shelfclaw | 8 Sapsa Shelftooth | Sapsa Spawning GroundsWestern La Noscea |
| Summoner | 8 Violet Sigh | 8 Violet Screech | 8 Violet Snarl | SylphlandsEast Shroud |
Step six: Complete some Trials
You’ll need to complete four different Trials in order to complete this step. The first of these needs unlocking – A Relic Reborn: The Hydra.
Like A Relic Reborn: The Chimera, you’ll need to physically go to the entrance location for this Trial the first time you complete this step. The entrance is located in Eastern Thanalan, directly next to the entrance to Halatali (X:14.0, Y:30.0). This step needs to be completed with the unfinished Zodiac weapon equipped but can be completed unsynced. When complete, return to Gerolt.
After that, Gerolt will send you into three Trials one by one to obtain their quest-specific drops, talking to him again between each Trial. You do not need to have the unfinished Zodiac weapon equipped to complete these trials, but you do still need to complete them as your chosen Job:
| Trial | Drop |
| The Bowl of Embers (Hard) | White Hot Ember |
| The Howling Eye (Hard) | Howling Gale |
| The Navel (Hard) | Hyperfused Ore |
Step seven: Get some Radz-at-Han Quenching Oil
Radz-at-Han Quenching Oil can be purchased from Auriana in Mor Dhona (X:22.7, Y:6.6) for 15 Tomestones of Poetics each. You only need one and then you can return to Gerolt to finish this first quest of the Zodiac grind.
How to upgrade to a Zenith Zodiac weapon in Final Fantasy XIV
Relic Stage: Zenith
Unlike any other steps in the Zodiac grind, this one involves no quests (yay!). This is a really easy step, and all you need is 60 Tomestones of Poetics to purchase 3 Thavnairian Mist. These can be purchased from Auriana in Mor Dhona.
Once you’ve got them, take them to the Furnace in Hyrstmill and combine the Mists with your weapon. Ta-da!
How to complete Up in Arms in Final Fantasy XIV
Relic stage: Atma
For this next step, you’re going to have to complete a lot of FATEs. And I do mean a lot.
After speaking to Gerold, he’ll send you to Jalzahn (located very close by), and he will tell you that you now need to collect 12 Atmas, each of which drops from FATEs completed in specific areas. However, these Atmas have an abysmally low drop rate even today, so this step might take you a while to complete. You’ll need to complete these FATEs with your Zenith weapon equipped.
As soon as you talk to Jalzahn, this quest will be marked as completed whether you have collected the Atma or not. Keep track of them by organizing your inventory. If this isn’t your first Zodiac grind, you do not need to talk to Jalzahn this first time and can immediately progress to collecting Atmas.
Here’s all the different Atmas and where to get them:
| Atma | FATEs zone |
| Atma of the Lion | Outer La Noscea |
| Atma of the Water-bearer | Upper La Noscea |
| Atma of the Ram | Middle La Noscea |
| Atma of the Crab | Western La Noscea |
| Atma of the Fish | Lower La Noscea |
| Atma of the Bull | Eastern Thanalan |
| Atma of the Scales | Central Thanalan |
| Atma of the Twins | Western Thanalan |
| Atma of the Scorpion | Southern Thanalan |
| Atma of the Archer | North Shroud |
| Atma of the Goat | East Shroud |
| Atma of the Maiden | Central Shroud |
Once you’ve collected your Atmas, head back to Jalzahn and hand them back to him. He’ll upgrade your weapon to the Atma stage.
As a side note, if you happen to end up with extra Atmas from any area (if you’re doing this grind with a friend, for instance), I strongly recommend keeping them somewhere. You never know when they’ll come in handy.
How to complete Trials of the Braves in Final Fantasy XIV
Relic stage: Animus
Even I have to admit that this is the stage that causes people to take a break or give up the Zodiac grind altogether — the dreaded Books.
With your Atma Zodiac weapon equipped, talk to Jalzahn, and he will explain that you need to recreate the ‘valorous deeds’ of the Zodiac Braves. In order to do this, you’ll need to complete objectives set out in 9 books with your Atma weapon equipped.
Head to Mor Dhona and talk to Rowena first, then to G’jusana, who is also in Mor Dhona (X:22.9, Y:7.3). From here, you can purchase books, but there is one big caveat to this – you can only ever own one book at a time, and each book must be completed in full before purchasing the next book.
Each book contains the following which must be completed:
- 10 specific monsters
- 3 Dungeons (can be completed unsynced)
- 3 FATEs
- 3 Levequests
Completing each book upgrades a stat on your Atma weapon, which varies depending on your chosen Job:
| Book | Category |
| Book of Skyfire I Book of Skyfire II Book of Netherfire I | Primary attribute (Strength, Dexterity, Intelligence or Mind) |
| Book of Skyfall I Book of Skyfall II Book of Netherfall I | Vitality |
| Book of Skywind I Book of Skywind II | Secondary attribute (Tenacity, Direct Hit, Spell Speed, Critical Hit, or Determination) |
| Book of Skyearth I | Secondary attribute (Tenacity, Direct Hit, Skill Speed, Critical Hit, or Determination) |
Once you’ve completed all nine books, head back and talk to Jalzahn again. He will reward you with an Animus stage Zodiac weapon.
Upgrading your Animus weapon to a Novus weapon will require you to complete the next two quests.
How to complete Celestial Radiance in Final Fantasy XIV
Speak to Jalzahn in Hyrstmill with the Animus weapon equipped, and he’ll send you to Mutamix Bubblypots in Central Thanalan (X:23.0, Y:13.0). Speak to him, and he’ll ask you to get 3 Superior Enchanted Ink. This can be purchased from Rowena in Mor Dhona (X:21.0, Y:5.0) for 25 Tomestones of Poetics each.
Take these to Hubairtin in Central Thanalan (X:23.0, Y:13.0), and he will provide you with a Sphere Scroll, which serves as the blueprint for the Novus upgrade.
How to complete Star Light, Star Bright in Final Fantasy XIV
Relic Stage: Novus
For this stage, you will need two things:
- Roughly 75 Materia of varying levels, beginning at level 1 and ending at level 4. I’d recommend getting 20 of each level.
- 75 Alexandrite
If you’re getting a Zodiac weapon for glamour purposes, which you most likely are considering the relatively low Lvl, it doesn’t matter too much which Materia you choose to use. Use Universalis to see which Materia is cheapest and go from there. You will need to use multiple different types of Materia, but this is entirely down to personal choice.
How to get Alexandrite in Final Fantasy XIV
There are a few different ways to obtain the Alexandrite you need to meld Materia onto the Sphere Scroll:
- Complete FATEs with an Animus Zodiac weapon equipped
- Purchase from a Hunt Billmaster in Ul’dah, Gridania or Limsa Lominsa for 50 Allied Seals each
- From treasure chests located using a Mysterious Map, which rewards up to 5 Alexandrite at a time
How to get Mysterious Maps in Final Fantasy XIV
Mysterious Maps can be obtained in a couple of different ways, but most easily through purchase from Auriana in Mor Dhona for 75 Tomestones of Poetics each.
The other way to get them includes a couple of steps:
- Complete the side quest “One Man’s Trash”, picked up by talking to Ealdwine in North Shroud (X:29.5, Y:19.7)
- After completing “One Man’s Trash”, you’ll unlock the daily repeatable quest “Morbid Motivation,” which requires you to run Duty Roulette: Level 50/60/70/8- Dungeons
Once you’ve successfully melded enough Materia to your Sphere Scroll, head back to Hyrstmill and talk to Jalzahn, who will reward you with your Novus weapon.
How to farm Zodiac Light in Final Fantasy XIV
Relic stage: Nexus
Speak to Jalzahn with your Novus weapon equipped and complete the quest “Mmmmmm, Soulglazed Relics”. Select which weapon you wish to Soulglaze (the one that you’re working on, and remember to choose both the Sword and Shield if you’re working towards a Paladin weapon), and then you’ll be into the next grind.
In order to upgrade your Novus weapon to its Nexus stage, you’ll need to run duties to gather 2,000 Light. These duties can be completed unsynced, and you earn light by running any duty that’s part of A Realm Reborn. Each duty provides a certain amount of light:
- Feeble (8 points)
- Gentle (16 points)
- Bright (32 points)
- Brilliant (48 points)
- Blinding (96 points)
- Newborn Star (128 points)
While it may be tempting to try for Newborn Star levels of light, this is only a possible bonus in either Syrcus Tower or The World of Darkness, which require a lot of time to complete.
The easiest way to complete this step solo at any level is by completing unsynced runs of the following dungeons, which reward guaranteed Brilliant light (48 points) per completion and a possibility of Blinding light (96 points) for any run:
- Sashtasha
- Tam-Tara Deepcroft
- Copperbell Mines
- Halatali
- Thousand Maws of Toto-Rak
- Haukke Manor
- Brayflox’s Longstop
- Sunken Temple of Qarn
- Cutter’s Cry
- Stone Vigil
- Dzemael Darkhold
- Aurum Vale
Once you’ve gained 2,000 Light, return to Jalzahn and select “Relic Weapon Novus Enhancement” to upgrade your Zodiac weapon to the Nexus stage.
Upgrading to Zodiac Braves in Final Fantasy XIV
Relic stage: Zodiac Braves
In order to upgrade your weapon to the Zodiac Braves stage, you’ll need to complete the following four quests to get four items:
- A Ponze of Flesh (reward: Book of Skylight)
- Picked up from Papana in Mor Dhona (X:22.9, Y:7.3)
- Labor of Love (reward: Zodium)
- Picked up from Guiding Star in Mor Dhona (X:21.9, Y:6.9)
- A Treasured Mother (reward: Flawless Alexandrite)
- Picked up from Brangwine in Mor Dhona (X:22.0, Y:6.7)
- Method in His Malice (reward: Zodiac Scroll)
- Picked up from Adkin in Central Thanalan (X:23.0, Y:13.0)
These four quests all require you to gather up a large number of items, talking to the respective NPC at intervals through the quest. I’d suggest picking all four quests up at the same time and completing the stages for each before moving on to the next stage and so on. Once you’ve handed all items to an NPC, the quest will be complete.
These quests do not need to be completed as your chosen Job and any dungeons required can be completed unsynced. You’ll need four Bombard Cores total and four Bottles of Sacred Spring Water in order to complete these quests.
Here’s the full list of items you’ll need, along with who you need to hand them in to:
| Item | How to get | Cost / Recipe | Hand in NPC |
| 4 Bombard Core | Purchase from Quartermaster in an GC | 20,000 GC seals each | Papana Guiding Star Brangwine Adkin |
| 4 Sacred Spring Water | Auriana in Mor Dhona | 200 Poetics | Papana Guiding Star Brangwine Adkin |
| 1 Bronze Lake Crystal | Purchase from Junkmaster in Upper La Noscea (X:26.2, Y:26.5) | 100,000 Gil | Papana |
| 1 Horn of the Beast | Dzemael Darkhold | Papana | |
| 1 Narasimha Hide | Halatali (Hard) | Papana | |
| 1 Sickle Fang | Snow Cloak | Papana | |
| 1 HQ Furnace Ring | Purchased on the Marketboard or crafted by Goldsmith | 1 Aged Eye of Fire 1 Belah’dian Silver 1 Basilisk Whetstone 2 Wind Clusters 1 Fire Crystal | Papana |
| 1 Bundle of Perfect Firewood | Purchased on the Marketboard or crafter by Carpenter | 1 Aged Spear Shaf t2 Cypress Logs 1 Grenade Ash 2 Wind Cluster 1 Ice Cluster | Papana |
| 1 Lump of Allagan Resin | Purchased from the Merchant & Mender in Southern Thanalan (X:15.9, Y:29.0) | 100,000 | Guiding Star |
| 1 Vale Bubo | Aurum Vale | Guiding Star | |
| 1 Piece of Voidweave | Haukke Manor (Hard) | Guiding Star | |
| 1 Slip of Amdapor Vellum | The Lost City of Amdapor | Guiding Star | |
| 1 Indigo Pearl | Sashtasha (Hard) | Guiding Star | |
| 1 HQ Perfect Mortar | Purchased on the Marketboard or crafted by Armorer | 1 Aged Mortar Pieces 1 Belah’dian Silver 1 Mahogany Lumber 2 Ice Clusters 1 Earth Cluster | Guiding Star |
| 1 HQ Perfect Pestle | Purchased on the Marketboard or crafted by Blacksmith | 1 Aged Pestle Pieces 1 Cypress Log 1 Peiste Leather 2 Fire Clusters 1 Earth Cluster | Guiding Star |
| 1 Brass Kettle | Purchase from Tool Supplier & Mender in North Shroud (X:29.9, Y:18.9) | 100,000 Gil | Brangwine |
| 4 Lost Treasures | Amdapor KeepPharos SiriusTam-Tara Deepcroft (Hard)Stone Vigil (Hard) | Ealdwine | |
| 1 Tailor-made Eel Pie | Purchased on the Marketboard or crafted by Culinarian | 1 Vintage Cooking Sherry 1 Worm of Nym 1 Pie Dough 1 Smooth Butter 1 Black Pepper 1 Cloves 2 Fire Clusters 1 Water Cluster | Brangwine |
| 1 Piece of Perfect Cloth | Purchased on the Markerboard or crafted by Weaver | 1 Stained Cloth 1 Pumice 1 Linen Yarn 1 Effervescent Water 2 Lightning Cluster 1 Wind Cluster | Brangwine |
| 1 Vial of Tonberry Blood | The Wanderer’s Palace | Adkin | |
| 1 Vial of Royal Gigant Blood | Copperbell Mines (Hard) | Adkin | |
| 1 Vial of Kraken Blood | Hullbreaker Isle | Adkin | |
| 1 Vial of Vicegerent Blood | Sunken Temple of Qarn (Hard) | Adkin | |
| 1 HQ Page of Perfect Vellum | Purchased on the Marketboard or crafted by Leatherworker | 2 Earth Clusters 1 Wind Cluster 1 Aged Vellum 2 Pumice 1 Shark Oil | Adkin |
| 1 HQ Pinch of Perfect Pounce | Purchased on the Marketboard or crafted by Alchemist | 1 Dried Ether 1 Aetherlouse 1 Electrum Sand 2 Water Clusters 1 Lightning Cluster | Adkin |
| 1 Handful of Furite Sand | Purchase from the Merchant & Mender in Coerthas Central Highlands (X:13.2, Y:15.9) | 100,000 Gil | Adkin |
Once you’ve completed all four quests and got all four items, head to Hyrstmill and talk to Gerolt with them in your inventory to pick up “His Dark Materia”. Gerolt will send you to talk to Mutamix Bubblypots, then head back to Gerolt.
Finally, after all of this, talk to Jalzahn and select “Zodiac Weapon Recreation”. You’ll get a warning that this process has only a 1.4% chance to succeed but do not panic – this process is guaranteed to succeed. You will be rewarded with your upgraded Zodiac Braves weapon.
Upgrading to Zodiac Zeta in Final Fantasy XIV
Relic stage: Zeta
Head to Swiftperch in Western La Noscea and talk to Remon (X:34.3, Y:31.7), picking up the quest “Rise and Shine”. It’s a relatively simple travel and talk quest, which will allow you to progress once completed.
Return to Remon, and he’ll allow you to attach Mahatma to your weapon. There are 12 Mahatma in total, and, once again, you need to gather 40 Light for each Mahatma. You can only have one attached to your weapon at any time, and attaching a Mahatma costs 50 Tomestones of Poetics. You’ll need to revisit Remon to attach a new Mahatma once the previous one is completed.
With any Mahatma attached, you’ll need to run A Realm Reborn duties in order to gather Light. Again, there are different tiers of Light rewarded for different duties:
- Feeble (4 points)
- Faint (8 points)
- Gentle (16 points)
- Steady (24 points)
- Forceful (48 points)
With each Mahatma requiring 40 points of light to complete, it’s tempting to run duties that reward Forceful levels of Light. However, the only two duties that reward this are Syrcus Tower or The World of Darkness, and these require a lot of time, especially given the need for 12 runs to complete all Mahatmas.
Once again, the easiest way to do this solo at any level is by unsyncing the dungeons noted in the previous Light gathering stage, such as Aurum Vale or Sunken Temple of Qarn.
Once you’ve completed all 12 Mahatmas, head back to Jalzahn in Hyrstmill and select “Zodiac Weapon of Awakening” to complete your Zodiac relic weapon, get your <Z> title, and swear off doing this hellish grind ever again.


