Mercifully, the Nibel Region of Final Fantasy 7: Rebirth only has four fiend intel encounters. Most of them are relatively straightforward, and the last one is only somewhat taxing. I’ll try to get you there. Here are all the fiend encounters in Nibel.

Fiend Intel 1: Roaring Flames – Pyretail
- Pressure an enemy.
- Stagger an enemy.
- Defeat all enemies within the time limit.
The Pyretails are, as the crow flies, directly east of the starting position on the runway. However, you have to follow the road up a hill and wrap around to the cliff they’re on.
Pyretails are a variant of the Nibelwolf. They spend a lot of time on fire, by which I mean they’re wrapped in blue flames. The quickest way to bring them down is to watch for when they’re in this state. You then need to do as much damage as possible to pressure them. A heavy attack like Braver can do the trick, but they’re also weak to fire magic.
If they’re not on fire, you can still pressure them. You simply need to avoid getting hit directly by either blocking or dodging.

Fiend Intel 2: Gluttonous Devourer – Carnifex
- Pressure an enemy.
- Stagger an enemy.
- Defeat all enemies within the time limit.
East from Intel 1 (west of Nibelheim) is the Carnifex. However, there’s again a trick to getting to them. You’re going to need the Region’s Chocobo, Serena. With this Chocobo, you can fly (or hover, I guess) over water. You need to go north up the river and enter the cave. Once in, start hovering and drop onto the ledge. You’ll emerge in a small area with the intel.
This fiend is very straightforward. Hitting it with ice magic (its elemental weakness) will pressure it. Once pressured, build up its stagger gauge until it becomes vulnerable, then pour on the attacks.

Fiend Intel 3: Mako Cursed Abomination – Marquis Valron
- Pressure an enemy.
- Stagger an enemy.
- Defeat all enemies within the time limit.
These dudes are tucked in the deep-south of Nibel. If you head directly south from the starting runway, you’ll eventually be led up a series of ramps to a plateau at the top. In the southeast of this plateau is the Marquis Valron.
Like the previous encounter, the Marquis Valron are straightforward. They’re weak to ice, and that’s what pressures them. Hit them with their elemental weakness, push up their stagger gauge, then go for the kill. One thing I haven’t mentioned in these strategies is that, if you want to eliminate these things quicker, spend the MP on the most powerful version of their elemental weakness. In this case, it’s Blizzaga. It will do massive damage, pressure them, and they won’t be difficult to finish off.

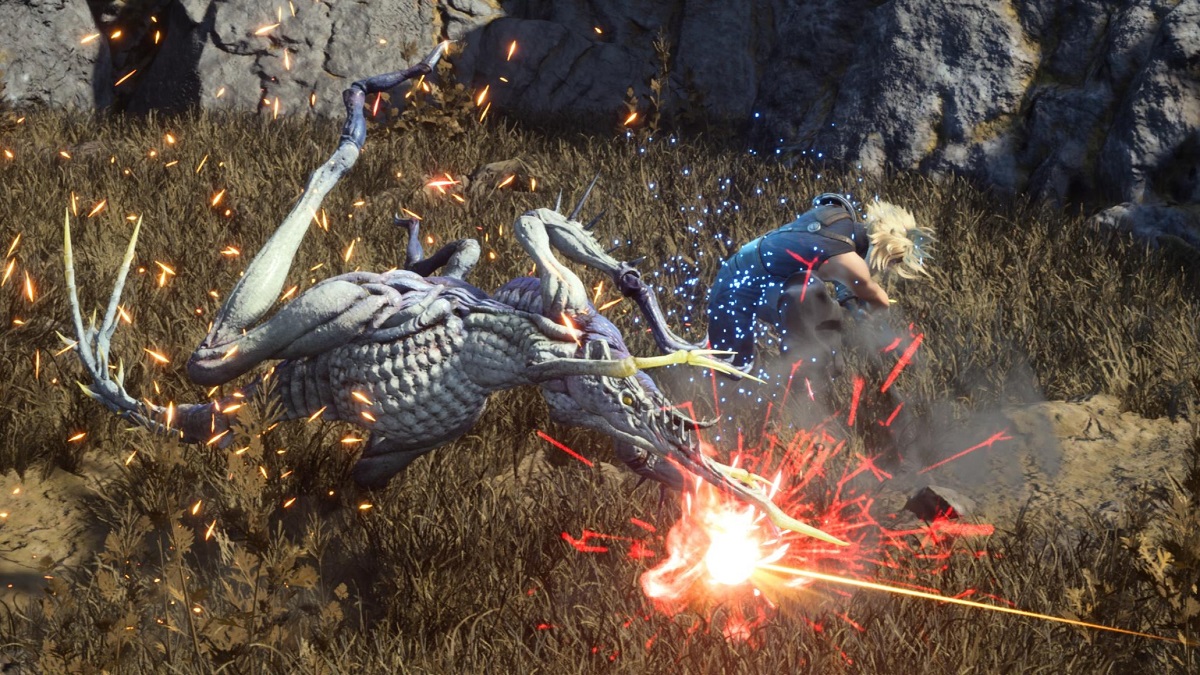
Fiend Intel 4: Stone-cold Spitter – Suevite Disgorgon
- Pressure an enemy.
- Stagger an enemy.
- Defeat the enemy within the time limit.
Out in the islands, on the southern island, there’s a cave on the west side. Travel through that on Selena, and eventually, you’ll emerge near the Suevite Disgorgon.
This thing makes up for the previous encounters being relatively simple. To pressure it, you need to hit its jaw with ice magic when it’s using Petrifying Mist. This means that, for the entirety of the fight, you’ll need to watch carefully for those red letters to appear above its head. When you see them, get some distance (preferably not directly in front of the monster), and then fling your ice magic at it. Despite what I said in the previous entry, you’ll probably want to stick to Blizzara on this one.
Once it is pressured, that’s your opening to feed it every stagger-increasing move in your arsenal. For more difficult fights like these, I’ll typically charge up Barrett and Cloud’s ATB meter, then unleash focus shot and focus thrust. That usually is enough to stagger, but if it doesn’t, it should at least be spitting distance from it.