If you’ve already knocked out the Fiend Intel for the Grasslands Region in Final Fantasy 7 Rebirth, it works pretty much the same way in Junon. There are four Fiend Intels in Junon, each with three Combat Assignments making it a total of 12. Most of these Combat Assignments are relatively easy, but Fiend Intel 2 can be a bit tricky if you don’t know how to approach it. Here’s every Fiend Intel location and strategy for all Combat Assignments in the Junon Region in FF7 Rebirth.
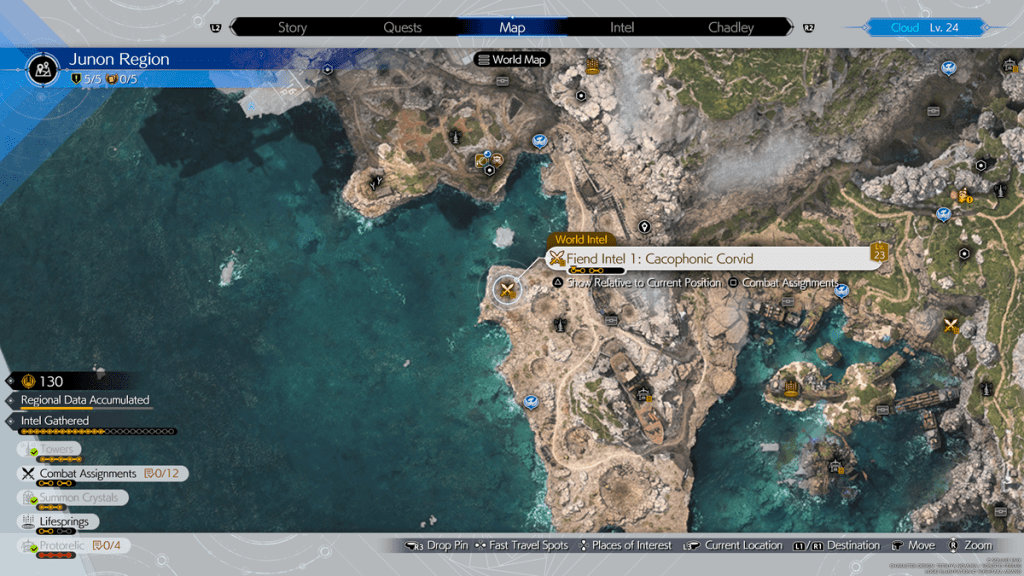
Fiend Intel 1: Cacophonic Corvid — Fonadu
Combat Assignments:
- Pressure an enemy.
- Stagger an enemy.
- Defeat all enemies within the time limit.
The rare variant Fonadu is found in the western part of the Junon Region, near where you enter from the Mythril Mine. This flying creature is weak to Wind Element damage, so definitely make use of Aero here.
Once you’ve dealt enough damage, the Fonadu will do a deadly attack called Death from Above. It will fly into the air, and start channeling a brief cast before flying down in y our direction. If you execute a well-timed evade, you will immediately Pressure the Fonadu which will allow you to make quick work of it. You will want to do this since Pressuring the Fonadu is one of three Combat Assignments. Spam damage on the Pressured Fonadu and you will push it into Stagger.
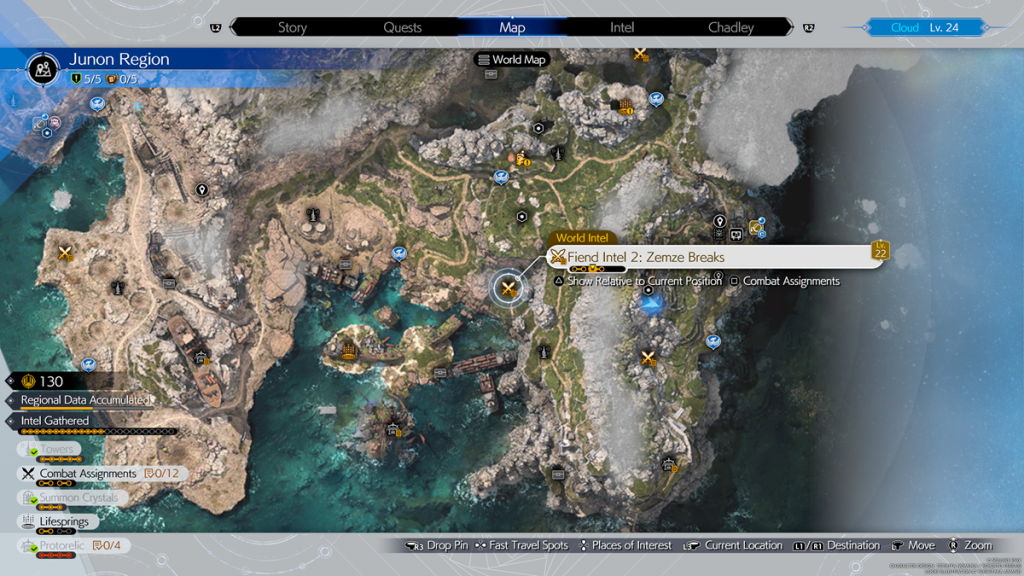
Fiend Intel 2: Zemze Breaks — Zemzelett
Combat Assignments:
- Stagger an enemy.
- Prevent enemies from taking flight when using Soothing Breeze.
- Defeat all enemies within the time limit.
In order to track down the second Fiend Intel of the Junon Region, you’re going to want to Fast Travel to the Prospect Tower on the eastern peninsula. Immediately go northwest and ride Belle down three climbable walls in a row and you will see two blue Zemzelett’s. This is your target for Field Intel 2.
This one was kind of tough simply because of the Combat Assignment to prevent enemies from taking flight when using Soothing Breeze. When one of them starts channeling Soothing Breeze, you need to immediately switch and start dealing massive damage to that Zemzelett. Doing so will break the channel and prevent them from taking flight with Soothing Breeze. With two active Zemzelett’s at the same time, it can be tricky to make sure you have the damage output to handle both of them.
The best strategy I found for this Fiend Intel was to use Barrett. Focus damage on a single Zemzelett, but don’t expend your ATB charges. By dealing damage to a single Zemzelett you can force it to start casting Soothing Breeze a little sooner than the other. Immediately use Maximum Fury which will consume your ATB charges and deal a ton of damage, interrupting Soothing Breeze. You then need to immediately switch to the other one and start building your ATB charges so you can do the same thing.
Rinse and repeat this process 3-4 times and you will successfully gather Field Intel 2!
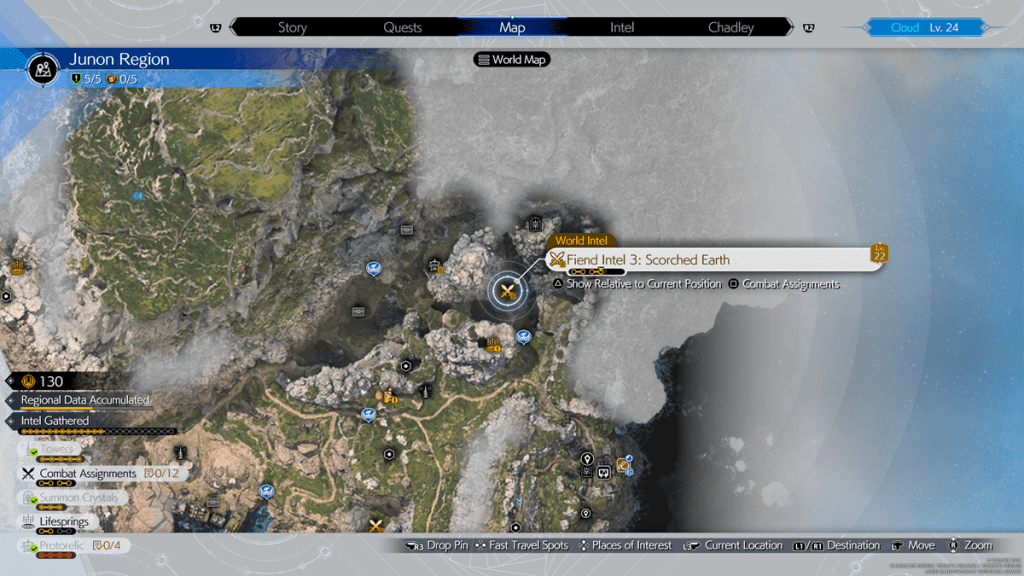
Fiend Intel 3: Scorched Earth — Lavalisk
Combat Assignments:
- Pressure an enemy.
- Stagger an enemy.
- Defeat all enemies within the time limit.
Head north from Crow’s Nest and you will see a Chocobo Stop. Using Belle, ride up the climbable wall and immediately look to your right.
You’ll see four rare variant Ignilisks called Lavalisks. Thankfully, the Combat Assignments for this Fiend Intel is very easy. The Lavalisk os weak to Ice Element damage, so cast Blizzard on them. This not only does high amounts of damage, but it also Pressures them.
After you trigger Pressure on the Lavalisk with Blizzard, follow up with auto attacks from Cloud to quickly Stagger the Lavalisk. Repeat this for each one to take them all out within the time limit and you should be able to easily complete Fiend Intel 3.
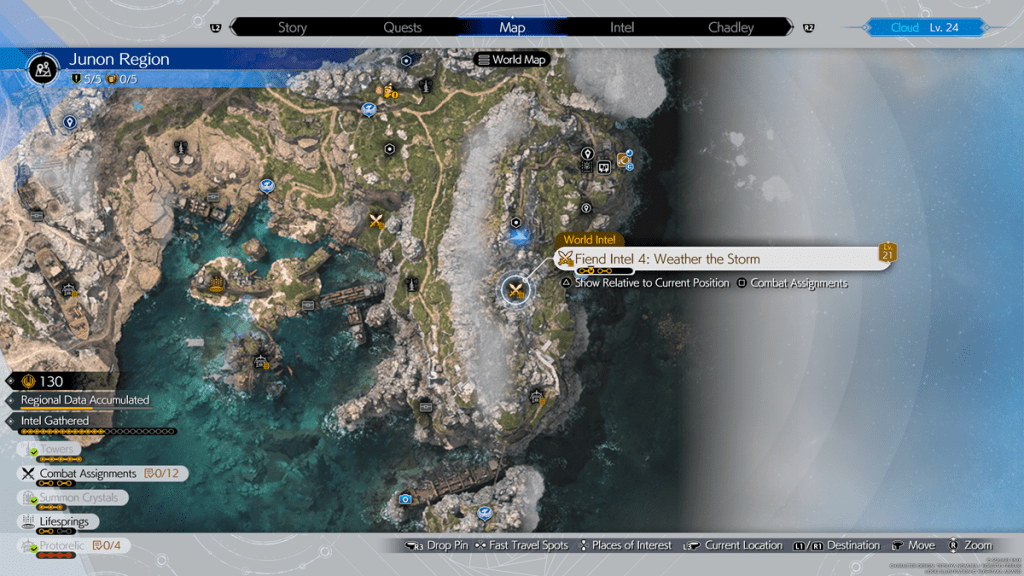
Fiend Intel 4: Weather the Storm — Stormwing
Combat Assignments:
- Pressure an enemy.
- Stagger an enemy.
- Defeat all enemies within the time limit.
You need to unlock Crow’s Nest in order to access Fiend Intel 4 in the Junon Region. From Crow’s Nest, head south until you reach the Chocobo Stop, and then head west up the nearby path and you’ll find three Stormwings circling around.
The key to this Fiend Intel us your Wind Element spell Aero. The Stormgwing’s are weak to Aero meaning you will deal bonus damage, but it also triggers Pressure on them. When Pressured, just spam melee attacks with Cloud and you will quickly Stagger it.
Just do this to all three Stormwings and you’ll easily complete the Combat Assignments for Fiend Intel 4.


