Falconer is one of the two new Masteries that got added to Last Epoch in the 1.0 update, and oh boy is it fun.
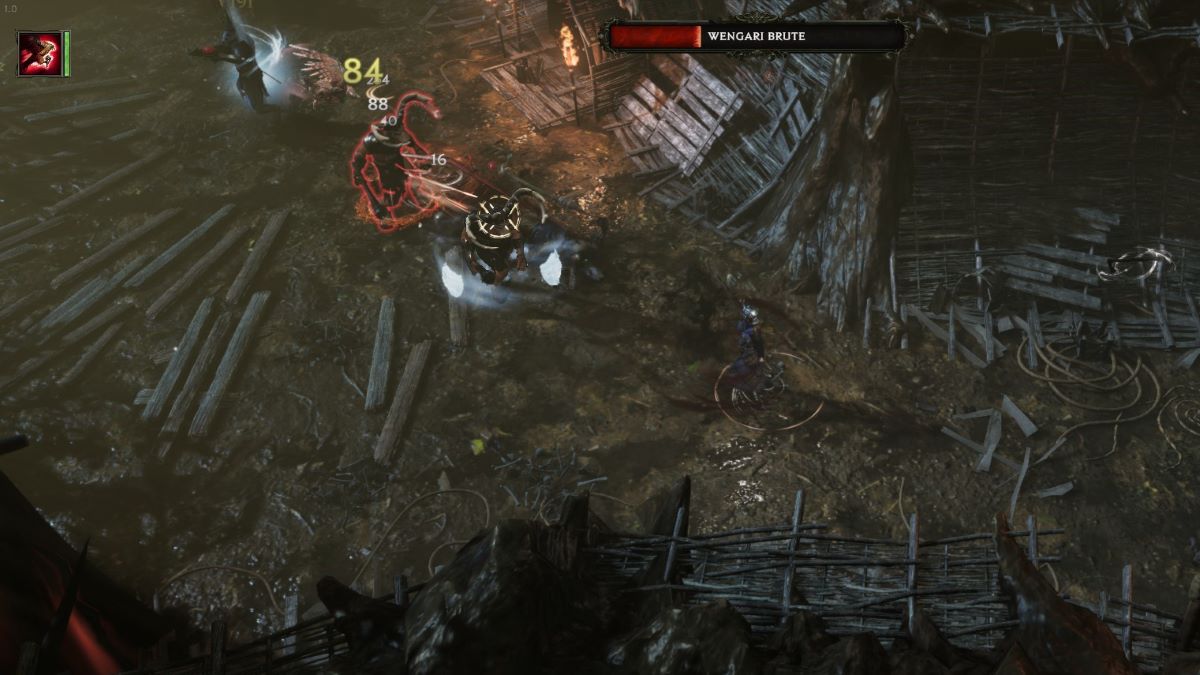
As the name implies, the main draw of this Mastery is the pet falcon that circles above your head as your forge your path through Eterra. It’s great to see a single minion class in the game, and let me tell you, the falcon is way more than a cosmetic pet. My falcon helped me easily clear screens, all while giving my access to a great new mobility skill that had me flying over the heads of my enemies.
Rogue’s are weaponry experts that can throw shuriken as easily as dual-wielding daggers. For this build, I decided to focus on bow abilities because I loved the idea of picking off enemies while my falcon swooped in to distract them. With the help of Falconer abilities like Net and Explosive Trap, I found this to be an excellent build for charging through the campaign and gaining power while building toward the endgame.
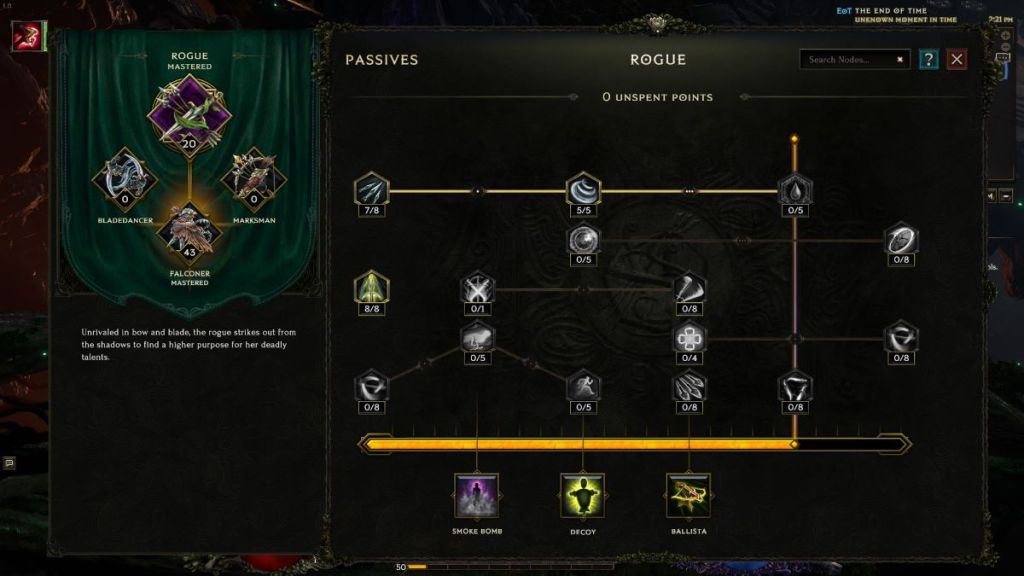
Rogue Passives
Rogue passives introduce you to the many flavors of rogue in Last Epoch. Here you can pick up skills that supercharge dodge rating and glancing blows, open up dual wielding options, and add poison damage to your attacks. Since this is a ranged build with a focus on the falcon minion, we’ll mostly grab damage-boosting passives. Swift Assassin and Lethal Cadence make your arrows hit harder and Steady Hand offers a useful boost to Dexterity and general survivability. Here’s what you need:
- Swift Assassin
- Steady Hand
- Lethal Cadence
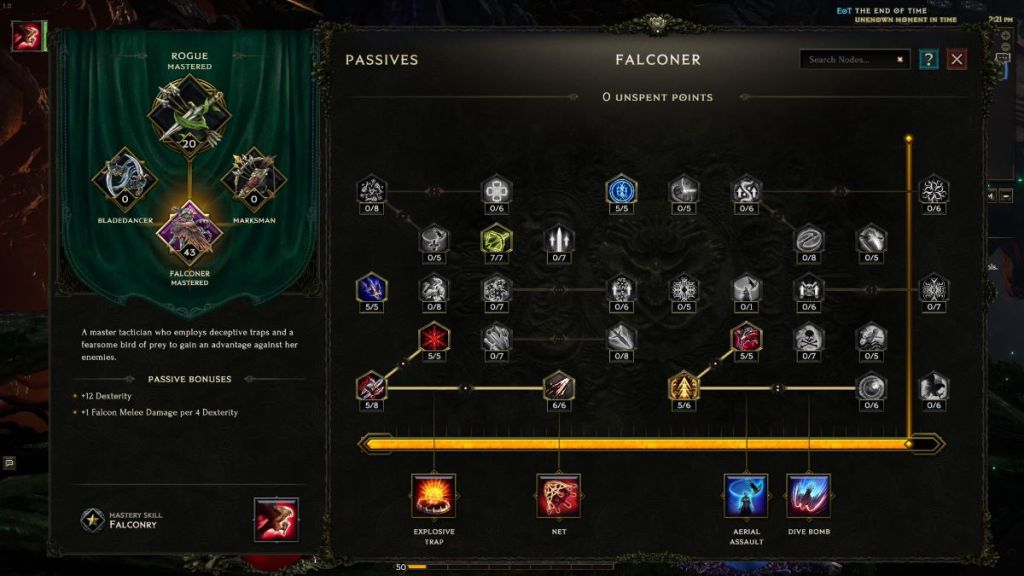
Falconer Passives
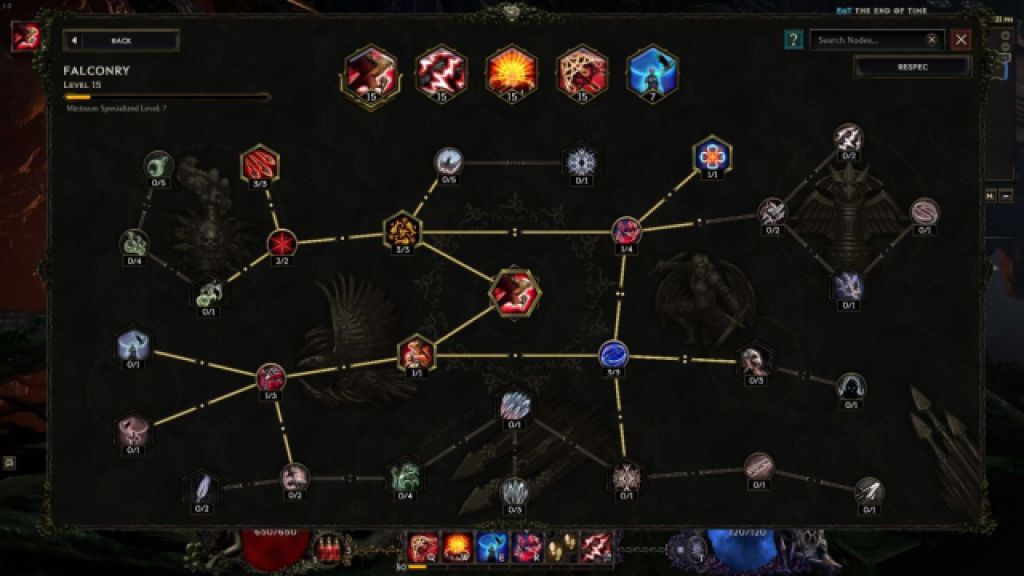
The Rogue passives hint at how many build options there are, but the Falconer passives really throw the variety into overdrive. There are skills tied to daggers and spears, dodges and glancing blows, but our focus is going to be entirely on bows and falcons. A handful of passives here boost your falcon’s damage, but Raptor’s Wings and Relentless Talons are the most important because they can give you Haste and restore your HP whenever your falcon deals damage. Ranger’s Mark also deserves a shoutout for keeping your bow damage in line with what your falcon is putting out. These skills were the standouts:
- Raptor’s Wings
- Ranger’s Mark
- Crimson Skies
- Tactician
- Relentless Talons
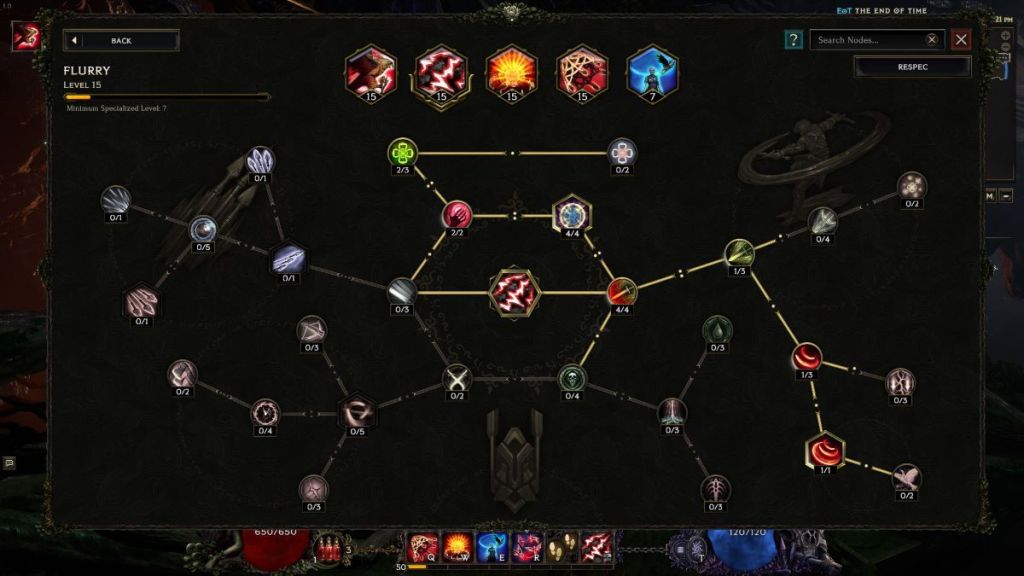
Flurry
Flurry is the only skill in this build that doesn’t come directly from the Falconer Mastery. I found that I still wanted a basic bow skill that deals physical damage, to play off some nodes in the Explosive Trap tree, without draining my mana. Thanks to nodes like Kineticism and Shockwave, Flurry can actually be useful against large packs of enemies, and the Second Wind node also turns Flurry into a utility skill that lets you regain HP. Here are the nodes I focused on:
- Kineticism
- Shockwave
- Second Wind
Falcon Strikes
Falcon Strikes is the first skill you unlock when you take the Falconer Mastery, and you need to have it equipped to have access to your falcon. Luckily, the skill’s active use component is incredibly powerful. The Falconer’s Mark node should be your first priority because it offers a huge damage boost while also making your falcon more interactive as it marks targets for you. Beyond that there are a number of great options here, but I focused on Avian Arsenal as a pure damage buff and Hunter’s Spoils as a way to better manage my mana. I also targeted the Side By Side node early on, so I could use Falcon Strikes more frequently. Make these nodes your top priority:
- Falconer’s Mark
- Hunter’s Spoils
- Avian Arsenal
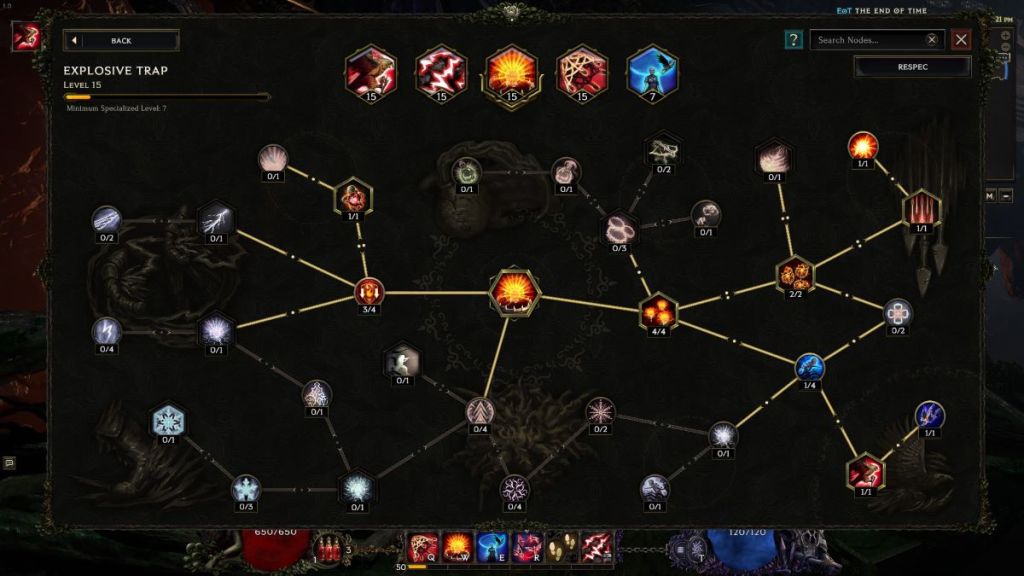
Explosive Trap
Explosive Trap is great at clearing through packs of enemies. For this build, the Blast Rain node is mandatory. It turns Explosive Trap into a bow skill and lets you absolutely cover the field in fire. As an added bonus, on your path to Blast Rain, you’ll have to pick up the other two best nodes on the skill tree: Minefield and Clustered Explosives. Hold This is another great node to grab because it turns all your physical hits with Flurry into potential explosions. This is what you’ll spend most of your mana on, and it will be worth it. Here are the key nodes:
- Minefield
- Clustered Explosives
- Blast Rain
- Hold This
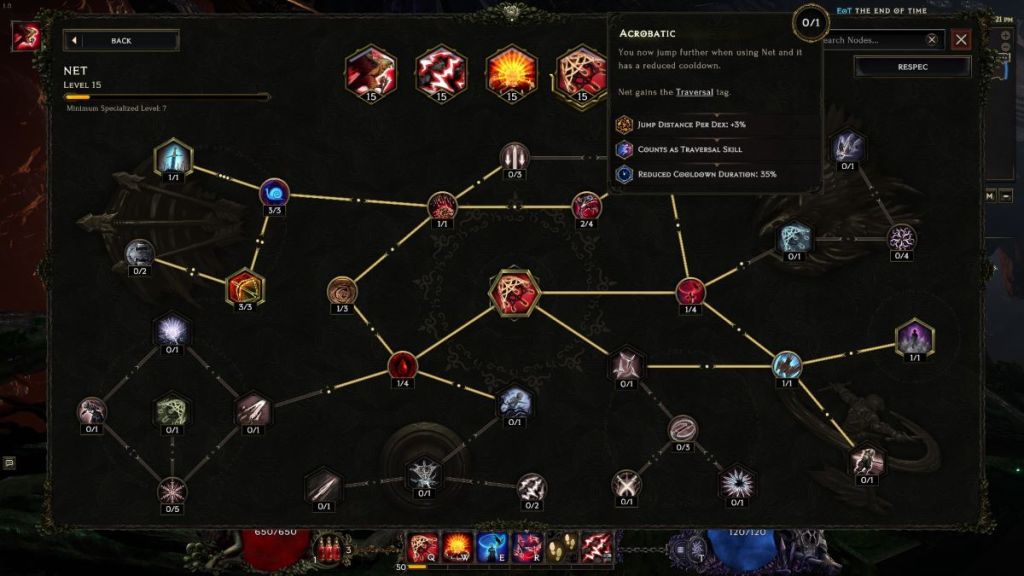
Net
Do you want a fantastic crowd control ability that also gives you increased mobility and damage? Net stops regular mobs in their tracks, and it slows down bosses and rare enemies. The Leading the Hunt node gives you up to 10% more damage on slowed enemies, making this even better. I often run up to crowds, use Net to backflip away from them, and then rain down Explosive Traps to clear the area in front of me. Here’s what you need:
- Into the Shadows
- Tangled and Prone
- Leading the Hunt
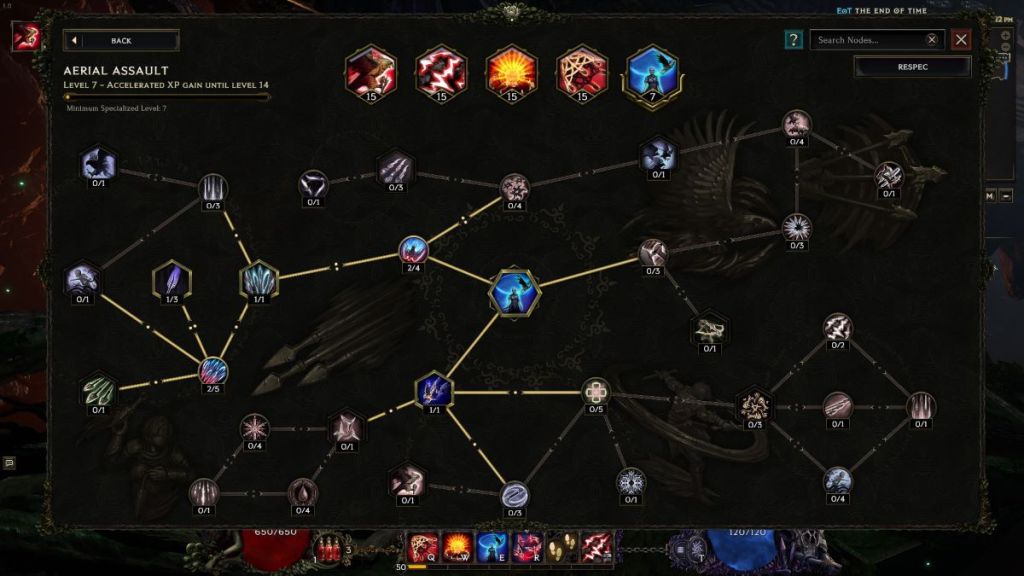
Aerial Assault
In terms of combat effectiveness, Aerial Assault is definitely the weakest part of this build. Maybe you’ll want to respec it for the endgame, but I found the mobility from this one to be way too much fun to pass up. Forget your basic Rogue Shift ability. This skill has your falcon scoop you up and fly you across the screen while tossing out razor sharp wing blades. The Featherstorm and Darkwing Fall nodes increase your damage output here, but I’d prioritize Skyward Swoop because it will let you fly across the map more frequently. Grab these nodes when you can:
- Skyward Swoop
- Featherstorm
- Darkwing Fall


