The Mountain Pass is a bit smaller than areas like the Underdark or Emerald Grove, but still holds its secrets. In fact, you can get a really great weapon for your Baldur’s Gate 3 playthrough if you pay close attention to an ambient puzzle in the Rosymorn Monastery. Here’s how to complete the Rosymorn Monastery puzzle in BG3.
How to Get to the Rosymorn Monastery in Baldur’s Gate 3
You can get to the Rosymorn Monastery by heading through the Mountain Pass at the end of Act 1, leading into Act 2. As you approach, you’ll see a large door leading inside, but you actually want to look to the left for a broken window.
This monastery sits atop the entrance to the Githyanki Creche, and has a few different threats throughout it. You’ll need to tackle all of them, in order to acquire the three main items you’re seeking: a Ceremonial Warhammer, Battleaxe, and Mace. On the middle floor of the Rosymorn Monastery in Baldur’s Gate 3 there’s a puzzle that requires placing these weapons on the right altars, in order to unlock a secret drawer. (You can also pass a Perception check to spot the hidden cabinet and pass a DC 30 lockpick, if you’re a very skilled and lucky Rogue.)
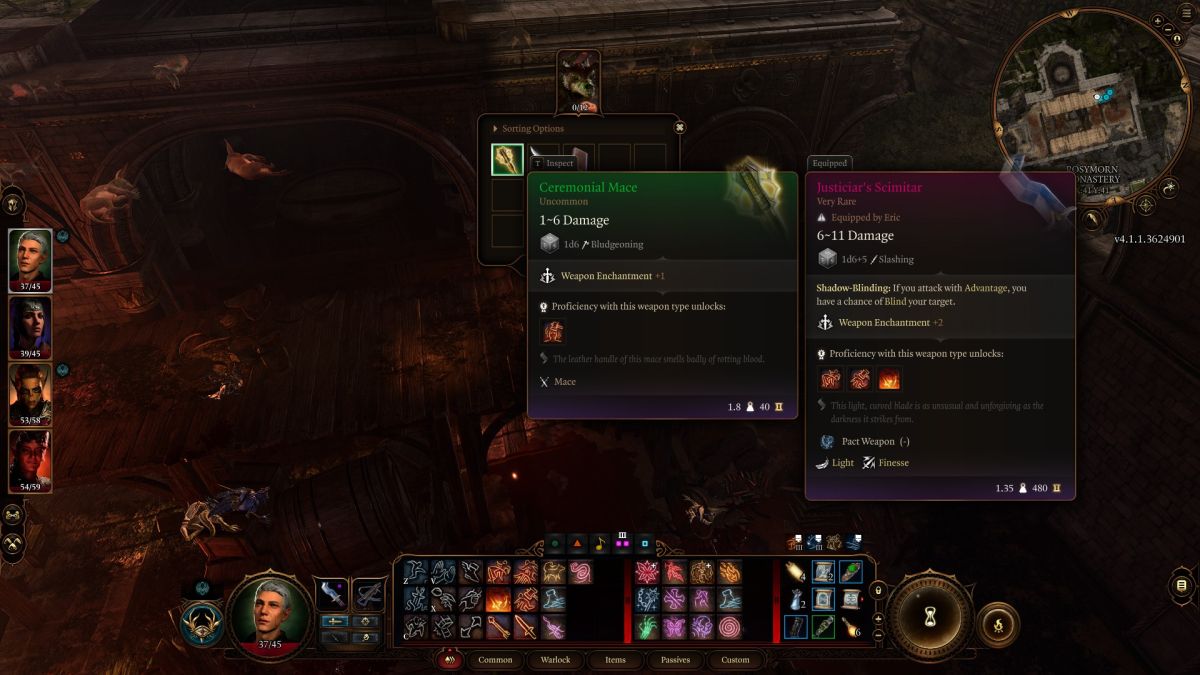
It’s important to note that, according to others who have finished this, you can use either the Ceremonial weapons or a corresponding weapon of the same type, with the potential requirement that it is also magical. I’ve seen some conflicting notes about what works and what doesn’t, so if you want to be 100% sure (and get the XP too), you can use the Ceremonial weapons. It’s really not too much extra work.
Where to find the Ceremonial Mace in Baldur’s Gate 3
Let’s start with the Ceremonial Mace, which is the easiest to get but the hardest to find. Head back downstairs to where all the drunken Kobolds were hosting a rager, and start blasting. Seriously. One of the Kobolds looted the Ceremonial Mace. And more specifically, one of the ones inside the bottles of Firewine that litter the area.
I recommend taking out the big, non-barreled pack first, then knocking out the barrels for individual fights. You’ll find it on one of their bodies. It requires a lot of looting, but thankfully these Kobolds are low-health for your current power level and don’t do much damage, outside of the Inventor in the middle, who’s worth eliminating first. Ceremonial Mace in hand, head outside, up the side of the Monastery, and onto the roof of Rosymorn Monastery for the next step in this Baldur’s Gate 3 puzzle.
Getting the Ceremonial Warhammer in Baldur’s Gate 3
Now it’s time to get the Ceremonial Warhammer by visiting the birds on the roof of the Rosymorn Monastery. Once you see the eagles, stop: it’s hammer time. Specifically, the Ceremonial Warhammer is sitting in the eagles’ nest, and you need it. And I have bad news: even if you use Animal Handling or Speak with Animals to pacify them, they will aggro you if you take the Warhammer.
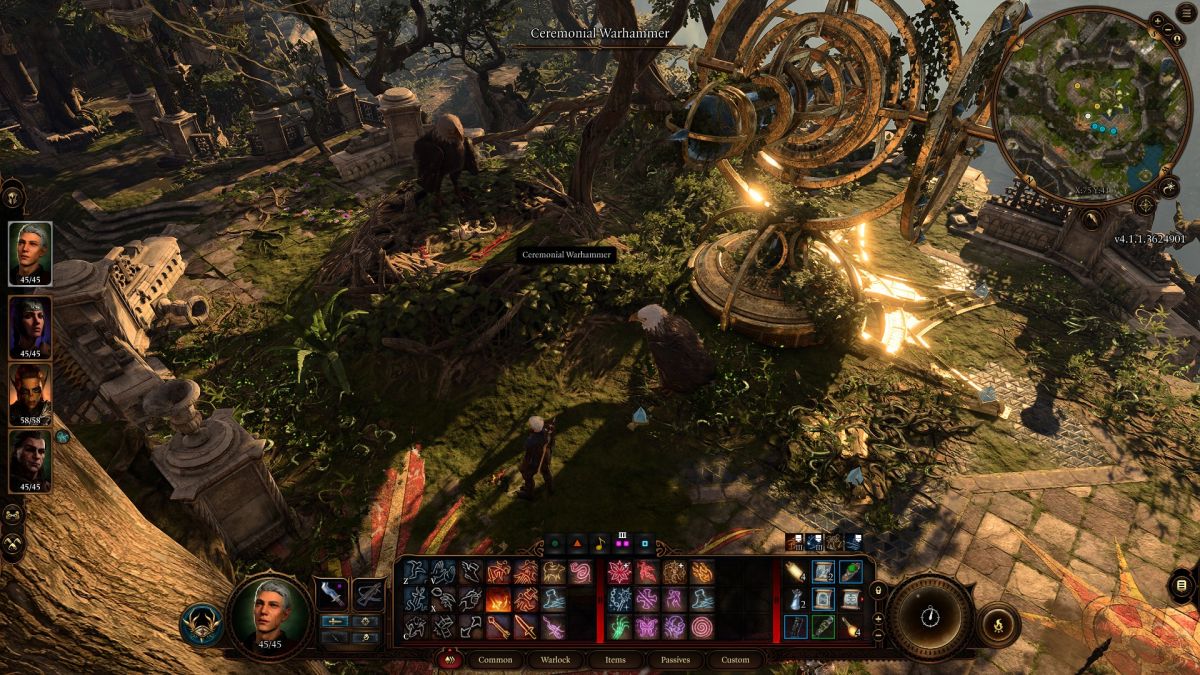
There are still a few options. Some players report that while taking the Ceremonial Warhammer causes a fight to erupt, picking it up and moving it does not. You could theoretically pick it up and move it away, then pocket it. You could also try using a Sleep spell or something (I attempted Hypnotic Pattern, but they still attacked).
And again, you can always put another magic hammer down instead of this one. Or, be like me and decide that after the fourth time accidentally aggravating the eagles, they have exhausted my patience. Pacifist or no, grab the hammer and head across the roof and down towards a magically sealed door, where our third Ceremonial weapon awaits. Just know that if you do decide to engage the eagles in combat, they will attempt to shove you off the rooftop with a Strength check.
Acquiring the Ceremonial Battleaxe in Baldur’s Gate 3
The final piece of the puzzle is the Ceremonial Battleaxe which requires a combat test of sorts. A Guardian of Faith stands watch over the Ceremonial Battleaxe you’ll need.
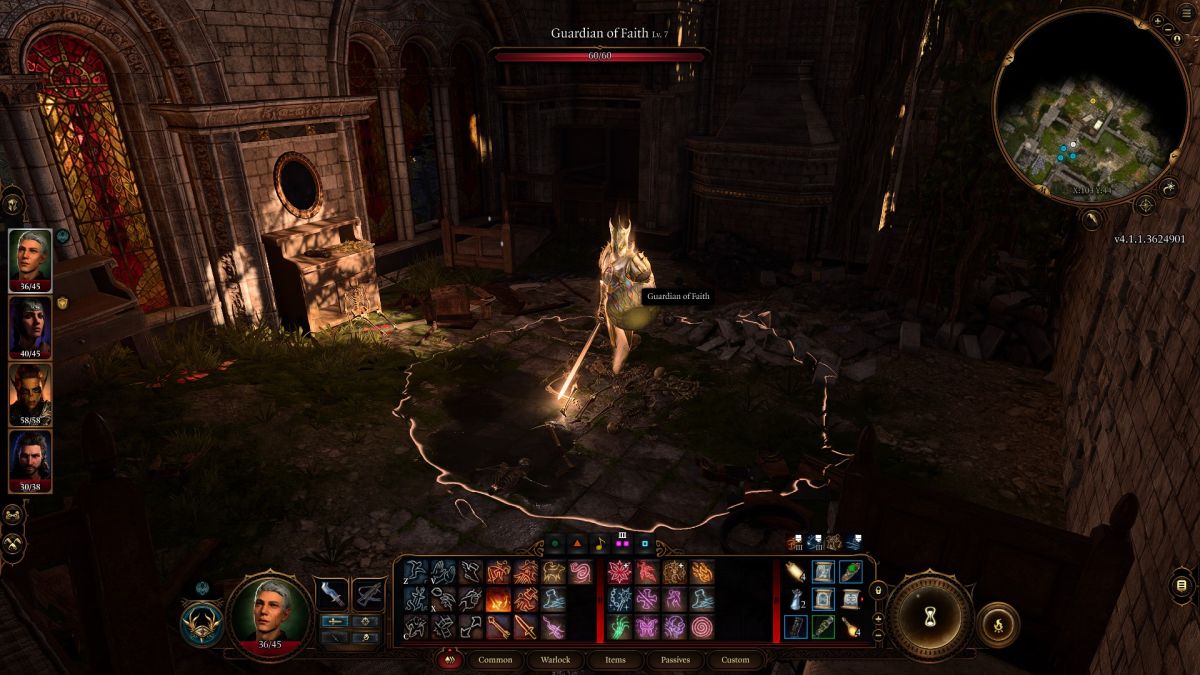
How to beat the Guardian of Faith
The Guardian of Faith in Rosymorn Monastery is a hard-hitting, slightly tanky enemy you must kill to progress through the rest of the area. Its strength comes from dealing retaliation damage to anyone standing in its circle, so focus on inflicting ranged damage through long-range spells.
If you don’t have a Warlock (and why wouldn’t you?) then just make sure to bring some heavy hitters. It’s a single enemy, so debuff it with whatever you’ve got in your arsenal and wallop. Gather up your third weapon, and head back to the stained glass chamber with the altars to complete the puzzle.
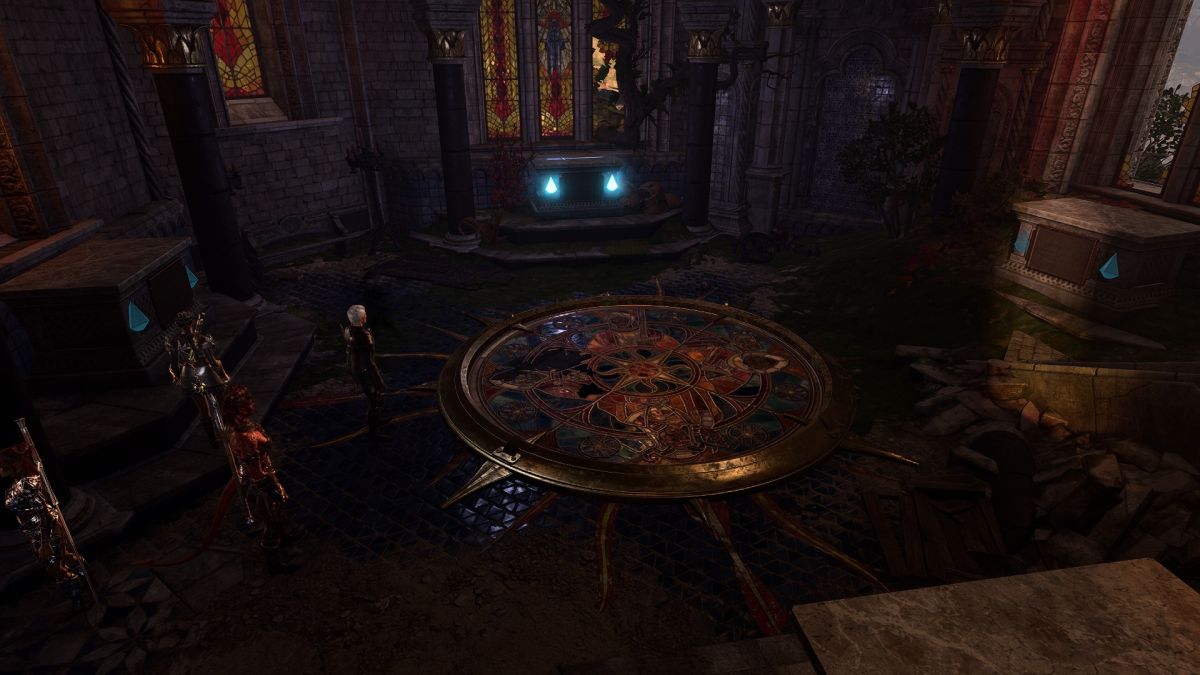
Rosymorn Monastery Puzzle Solution
Once you have all weapons in hand, observe the stained glass in the center of the area for hints about where to place each weapon. There are also ambient hints in text around the monastery, including the floor below—which details the broken section—and the nearby lodgings, which have some text about Dawnseeker Vaseid. (Just be wary of the magic-allergic cats.)
You’ll need to have all the aforementioned Ceremonial Weapons for this puzzle, and will need to take them out of your inventory to place them on the proper pedestal.

Obtaining the Dawnseekers Crest
Here’s where to place the Ceremonial Mace, Ceremonial Warhammer, and Ceremonial Battleaxe to solve the Rosymorn Monastery puzzle:
- Ceremonial Longsword: Dawnseeker Welkinglory (already in place)
- Ceremonial Mace: Dawnmaster Stockhold
- Ceremonial Warhammer: Dawnmaster Seed
- Ceremonial Battleaxe: Dawnmaster Vaseid
Do this, or skip all of it and clear the DC 30 lockpick, and you’ll acquire the Dawnmaster’s Crest. Hold onto this, as you’ll need it later. You can also pick up the Ceremonial Weapons if you want them either for combat use or to sell to a vendor later on. For now, you can get back on the main quest path down into the Githyanki Creche below. After you’ve spoken with a legendary god and made a quick jaunt to the Astral Plane, check back in here for Part 2 of acquiring a legendary weapon.


