I’ll guide you through the basics of Roblox Animal Hospital and then move onto advanced mechanics like breaking down all anomalies, treatments and events. I’ll also go into how to deal with enemies and environmental hazards. Welcome to the full Animal Hospital walkthrough guide.
Table of contents
Roblox Animal Hospital Walkthrough
The goal of the game is to survive as many shifts as possible without letting Sanity drop to 0 (Use Coffee and food from the shop to keep it high). Shifts include rejecting anomalies (Skinwalkers), treating patients and avoiding enemies (Environmental non-patient anomalies). Each shift grants you cash which you can use to buy items from the shop. Here’s how this Animal Hospital walkthrough guide will be structured:
- Patient Anomalies: I’ll first go over how to spot, reject and deal with all anomalies (More info below).
- Patients: Secondly, I’ll go into all the info, guides and tips for treating normal patients (More info below).
- Enemies/Environmental Anomalies: Thirdly, I’ll show you how to deal with all enemies or environemntal anomalies that aren’t patients (More info below).
- Miscellaneous: Lastly, I’ll cover all the secondary mechanics in the game like events, items and special scenarios.
The more anomalies you prevent and the more patients you treat without dying, the more points you’ll get at the end of each shift and the more cash for items in the shop.
How to Spot, Reject and Deal With Anomalies in Animal Hospital
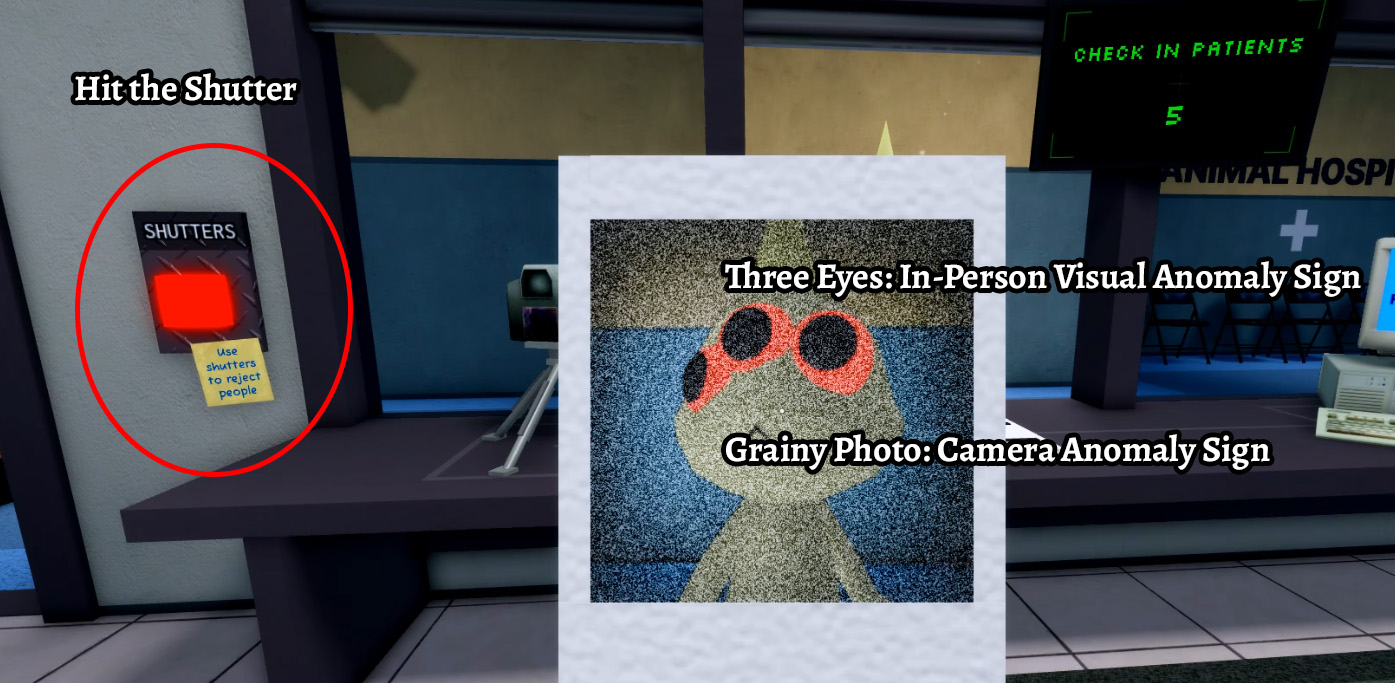
You need to reject all anomalies in this game at the front desk to deal with them by pressing the Shutters button on the left of your desk once you are sure it’s an anomaly (More info below). This lowers the Shutters of the reception desk and the “patient” will leave. If you successfully reject an anomaly, you’ll see the counter for anomalies at the end of the Shift increase giving you a better score and more cash to spend in the shop. Here’s how to spot all anomalies in Animal Hospital:
| Anomaly | Tips |
|---|---|
 In-Person Visual Anomaly Signs In-Person Visual Anomaly SignsAble to be spotted by looking at the patient in person • Three Eyes • Hollow Eyes • Sharp Teeth • Realistic Teeth • Wide Grin • Twitching | • You can spot these right away at the check-in table before you even take a photo of them • As soon as you see any of the listed visual signs, hit the shutter button on the left to reject them • You’ll quickly see a dialogue prompt of them leaving, then you can hit the shutter button to raise and you’re ready for the next patient • Note that Visual Anomalies aren’t always present and you’ll have to look for Camera/Photo Anomaly signs below |
 Camera Anomaly Signs Camera Anomaly SignsAble to be spotted by looking at the patient via any camera • Black box over their eyes • Limbs heavily streched and distorted • Hollow eyes (Same as In-Person Anomaly) • Starting directly at the camera • Body is completely void/blacked out • Twitching • Camera starts zooming toward a dark figure • Sharp teeth/distorted jaw • Different ears, mouth, nose than in-person | • If there are no In-Person Visual Anomaly signs present then check the Lobby/Check-In cameras for the Camera anomaly signs • If you spot any via the Lobby/Check-In cameras, then immediately hit the shutter button when they approach the check-in desk • If you don’t spot In-Person nor Camera Anomaly signs, then your last line is the Photo Anomaly signs • Note that the camera zoom-in to dark figure anomaly damages your Sanity and is fatal if you don’t stop looking at the camera |
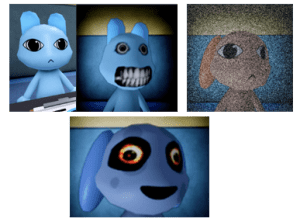 Photo Anomaly Signs Photo Anomaly SignsAble to be spotted by looking at the patient’s photo after taking it at the check-in • Incorrect Photo (Eyes, Ears, Mouth, etc., not matching up with the patient in person) • Static Photo (Static and grainy effect on the photo) • Cursed Photo (Bloodshot eyes and grin) | • If you don’t see any Visual Anomaly signs always look at the photo after you take it • If the patient’s photo exhibits any of the listed signs, hit the shutter button on the left to reject them • Looking at Cursed Photos will damage your Sanity which is unavoidable but if you see any Visual Anomaly signs first then don’t look at the photos anyway |
What If They Get Through?: If you accidentally let some anomalies get through or they enter via an Event, you can deal with them by using the taser next to the cameras or any guns and extra tasers you buy in the shop. Just approach the anomaly and defeat it with a weapon using M1s. If you have no weapons, you can hold E from behind it if it’s attacking a patient or hit E multiple times if it’s on you to defeat it but you’ll take Sanity damage in the latter case.
Animal Hospital Patient Treatment Guide
If you don’t notice any anomaly signs from above, it’s time to treat patients. I recommend checking in all your patients first so you don’t waste time going back and forth (Events will mix this up – more on that later). Once all patients are checked in, it’s time for the treatment. Apart from emergencies, which will pop up on your screen, it doesn’t matter in which order you treat patients nor how long it takes you, so pick your room order however you want. Here’s a full list of all treatments with tips and tricks:
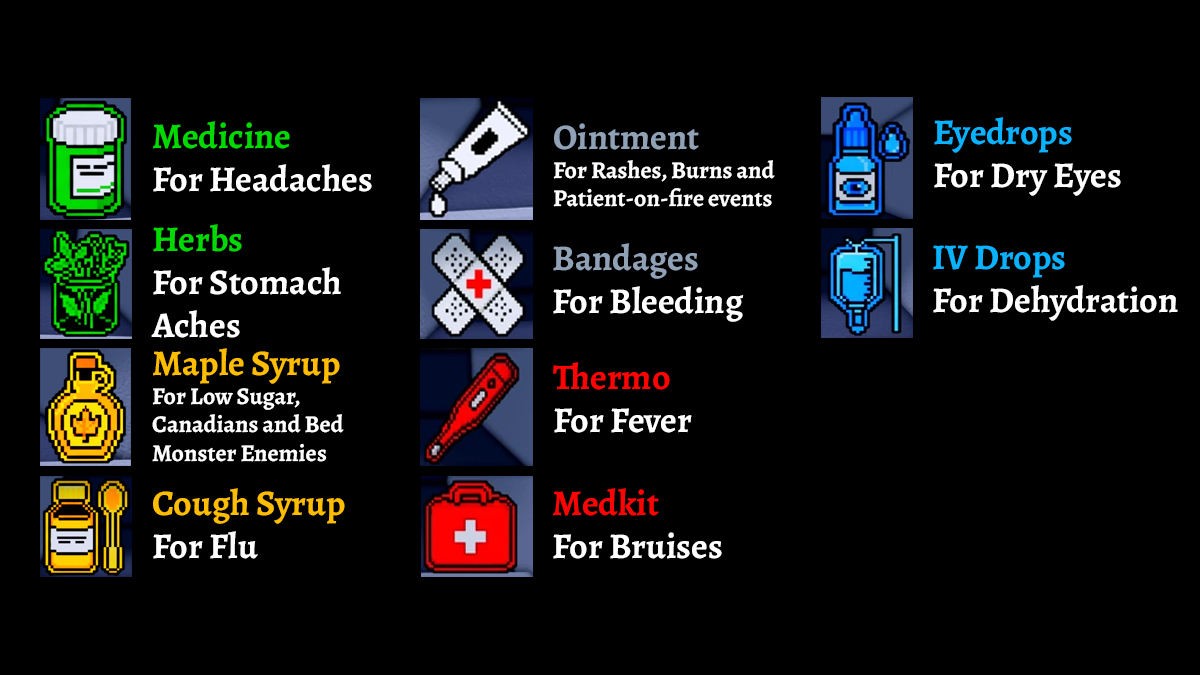
Treatment Item Guide: Treatments from the table below will refer to these items in the picture above. This list is for all treatments except Surgery/Room 8 – Surgery has a few more items like Scissors and Scalpels but they’re in the room with you and you just have to match them with pictures on the screen.
Recovery Period: Unless there’s an emergency event, you don’t need to be present for the recovery period after treatment so just leave and do something else. Non-anomaly patients will recover and leave by themselves.
| Treatment | Description |
|---|---|
| Basic Medical Treatment Rooms 1-5 on the right | • This is the most common treatment scenario where you analyze the patient’s DNA and administer items for treatment from the hallway • I recommend you go and briefly tackle something else nearby during the DNA analysis segment since it takes 10 seconds • You can administer items in any order but if you administer the wrong one the patient will die and you’ll lose points • Anomalies dying won’t lose you points so it’s a quick and neat way to deal with anomalies you missed on check-in |
| X Ray Treatment Room 6 on the left | • X-Ray takes a bit more work than basic Medical treatments • For X-Rays you’ll have to do a “copy-the-sequence” mini-game by hitting M1 on the flashing squares in order that they flashed • If you make a mistake you’ll have to do it again • After X-Rays you have to administer items the same way as with the basic Medical treatment • You can leave during any point to tackle something else but note that administer the wrong item at the end causes the patient to die and you losing progress |
| Heart Monitor Room Room 7 on the left | • Similar to X-Ray, the Heart Monitor room requires you to complete a mini-game where you click on the white icons and avoid the skulls • Clicking on skulls lowers the heart % but it won’t kill the patient • After reaching 100% you’ll do some machine interactions and administer items the same way as with basic Medical treatment • You can leave during any point to tackle something else but note that administer the wrong item at the end causes the patient to die and you losing progress |
| Surgery Room Room 8 on the left | • Unlike other treatments, Surgeries must be completed on the spot within the allotted time or the patient will die so you can’t leave this room once you begin the surgery (Time doesn’t start until you interact with the patient) • The Surgery is a simple mini-game where you take and administer items from the room so just follow the screen • Once you have to administer 3 items at once the order doesn’t as long as you don’t administer the wrong item in which case the patient dies and you lose points • Once you finish surgery, you can leave and do something else while the patient recovers unless there’s an event (See below) |
Animal Hospital All Enemies Guide
Apart from patient anomalies, emergencies and events, you’ll also have to deal with enemies and environmental hazards that will damage your Sanity. Here are tips and tricks on how to deal with all enemies in Animal Hospital:
| Enemy/Environmental Hazard | How to Deal With It |
|---|---|
| Green Sludge/Slime | • This is a terrain hazard that you can clear by holding E |
 Skinwalkers Skinwalkers | • Skinwalkers are what happens when you let an anomaly patient through • They awaken at any random point from when you check them in to when they’re in the medical rooms • They will actively seek out to kill patients or you • You can deal with them by pressing E multiple times if they attack you dealing Sanity damage or hold E from behind them if they’re attacking a patient |
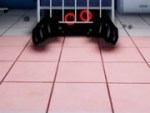 Bed Monster Bed Monster | • These spawn below beds in medical rooms and they disappear if you approach them with Maple Syrup • If you approach them without Maple Syrup they will grab you and deal Sanity damage |
| Wall Bangers | • These appear randomly and bang their heads on your check-in room glass wall • This prevents you from rejecting anomaly patients • To deal with them, approach them with coffee or other foods and interact • If you interact with them with no coffee and hold E to ask them to leave you will take a lot of Sanity damage but it will remove them |
 Don’t Look Up Don’t Look Up | • These randomly spawn on the ceilings of medical rooms and you can just keep your camera down without looking at them while you finish your task and they eventually disappear • If you look up you will take Sanity damage |
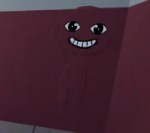 Wall Anomaly Wall Anomaly | • These spawn on walls and will chase you if you’re close, approaching to hit you for Sanity damage or steal items • Deal with them by aggroing them and running away since they disappear after a while |
| Surgery Tentacles | • These spawn in Room 8 during surgery and you can easily deal with them by just finishing the Surgery mini game while avoiding it • Don’t shoot it or taze it since your patient will automatically die, just finish the Surgery |
 Stalker Stalker | • The Stalker spawns randomly around corners • Keep a look out for it from a distance and never look directly at it as you pass by or you’ll take Sanity damage |
Tasers/Guns VS Enemies: You can’t deal with enemies using weapons unless it’s a Skinwalker so you’ll have to employ the strategies above.
All Events and Emergencies in Animal Hospital
Events and emergencies (displayed on the right side of the screen) break the standard gameplay loop of treating patients and looking for and rejecting anomalies. These will pop up from time to time at random intervals with emergencies requiring you to finish them immediately and events having a more forgiving completion time. Here are all events and emergencies in Animal Hospital:
| Event/Emergency | Description |
|---|---|
| Patients Fainting Emergency | • Once a patient checks in, they have a chance to pass out either in the lobby, hallway or their room • Also, a patient may pass out if they walk into a room that is currently on fire (see below) • Once this happens you will have 60 seconds to carry them to their room and place them on the bed thus ending the emergency (failing to do so kills them) • You don’t have to treat them right away, it’s enough to place them on the bed |
| Patient on Fire Emergency | • Patients sometimes run into the hospital on fire requiring you to get rid of the fire by hand or with a fire extinguisher • This ends the timed portion of the emergency and now you need to bring them the Ointment item to help with the burns • Note that Patients on Fire can still be anomalies so make sure to take their photo AFTER you help them since taking pictures of them before Ointment treatment ruins the photo • Patients on fire |
| Death Ritual Emergency | • Any patient, anomaly or not, can sometimes randomly start a death ritual in a medical room prompting you to take care of it • You need to go in while having 60 seconds to extinguish/interact with all the candles in the room losing 1 sanity per candle so have a coffee ready just in case you’re low • Once completed, the patient will continue recovery |
| Critical Patient Emergency | • There’s a chance that a critical condition patient will spawn during check-ins • You’ll have 120 seconds to bring the patient into a recovery state in the required medical room or it dies • This can often occur during an Ambulance Event |
| Fire in Room Event | • Rooms can randomly catch on fire dealing damage to you if you walk into the fire’s space or fainting patients that walk into a burning room • You can put out spaces with fire by holding E or more effectively with a fire extinguisher • Fires don’t have a time limit for completion • Fires deal 1 Sanity damage per second |
| Ambulance Event | • After Shift 4, there’s a chance to trigger the Ambulance event causing multiple patients to rush into the hospital • Some of these will come with the Patient on Fire emergencies requiring you to deal with it right away • Some will be regular patients • Some will be anomalies that automatically go through so be sure to keep a gun or taser once they awaken into the skinwalker forms |
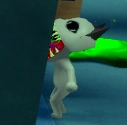
| Barney Event | • Barney the white-rabbit critter with black slit eyes is a multi-stage event that can trigger after Shift 2 • Barney is a serial killer with special choices which you can tackle for a reward or reject him right away if you don’t want to make the choice • He will come into the Hospital requiring coffee, treatment and eventually a place to hide • Once he asks you for a place to hide you have two options • Option 1: You can turn him to the police where he’ll knock out the police officer and run away • Option 2: You can hide him from the police and he’ll give you a second coffee machine in return • Note that Barney can turn into an anomaly which you can take down with Tasers, Guns and Fists as regular |
Now that you know the ins and outs of Animal Hospital, good luck surviving as many Shifts as possible. Stay tuned for an Animal Hospital class tier list and until then, check out our other Roblox Guides.


