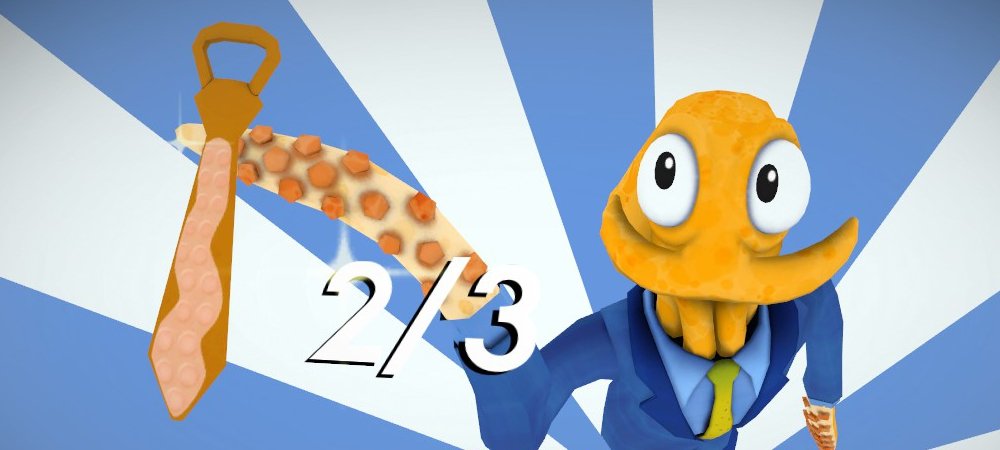
From ‘Anchors Away’ to ‘Zen Tie’
Octodad: Dadliest Catch is a pretty great game for those who take the time to re-learn how to walk. One of the neat extra features are hidden neckties throughout the game. In each level (except for “Shark Naked”), three ties can be found, and once found, Octodad will proudly add the ties to his collection, making them available to wear.
This walkthrough details how to find all 33 ties in the game, including how to gain entry to a secret level. This may be considered full of spoilers for those who would rather find everything without help. If you are one of those people, stop reading now. If you need some help with finding a tie or two, then read on.
Wedding Bells

Name: Classic Red
Description: Octodad’s favorite necktie!
Location: On the doorknob from the dressing room to the reception area.
Required Skill(s): None
Notes: This Classic Red tie is unmissable.

Name: Wedding Cake
Description: Some of these spots are just cake frosting.
Location: Underneath the wedding cake in the reception area.
Required skill(s): Object manipulation
Notes: Pick up the base of the wedding cake and throw it. The Wedding Cake tie is on the table underneath the cake.

Name: Piano Keys
Description: Some day these ties will be playable!
Location: On top of the organ in the wedding ceremony area.
Required skill(s): Climbing
Notes: Don’t worry about people being suspicious of you. Step onto the keys of the organ, reach up, and grab the Piano Keys tie on top.
Home, Sweet Home

Name: Number One Dad
Description: A gift from the kids for Father’s Day! Very official.
Location: In the bottom left dresser drawer in the bedroom.
Required skill(s): Object manipulation
Notes: After getting out of bed, grab the handle of the bottom left dresser drawer and pull it out. The Number One Dad tie is in there along with a shirt.

Name: Flower Print
Description: Stacy tried to plant this to grow a tie tree.
Location: Underneath the garden gnome in the flower garden.
Required skill(s): Object manipulation, precision walking
Notes: Take care to walk along the rock path through the flower garden in the corner of the backyard. Pick up the garden gnome and toss it. The Flower Print tie is on the ground where the gnome was.

Name: Sports Print
Description: Tommy wears this when he’s pretending to be Sports Johnson.
Location: On top of the shed in the backyard.
Required skill(s): Object manipulation, climbing
Notes: Grab the recycle bin from near where the logs need to be cut and bring it to the shed with its open side down. Use the recycle bin as a step ladder to climb on top of the shed, where the Sports Print tie is.
Gervason’s Grocery

Name: Banana
Description: A demonspawn from your darkest nightmare.
Location: In the banana bin in the produce section.
Required skill(s): Keen eyes
Notes: Pick up and throw the banana peels that are on the ground so you don’t slip and knock the entire display over. Pick through the bananas to find the Banana tie.

Name: Hen Tie
Description: I’ve seen enough hen ties to know where this is going.
Location: On the air conditioning duct above the dairy section.
Required skill(s): Climbing
Notes: Climb from the meat counter onto the top of the dairy section and continue toward the air conditioning duct. Using the pipes and the alarm bell, climb on top of the duct. The bell can be used as a grab-able object to aid in the climb. The Hen Tie is on top of the duct.

Name: Tasty Meat
Description: Not actually tasty, believe me.
Location: Behind the meat counter, near the circular saw.
Required skill(s): Object manipulation
Notes: In the back-left area of the meat section, there are three (familiar-looking) cubes of meat and a circular saw. Pick up each cube of meat and grind it into nothing by touching it to the saw blade. After the third meat cube is destroyed, the Tasty Meat tie will appear.
Aquatic Fun Center

Name: Rainbow Dream
Description: Groovy!
Location: On the awning above the gift shop, near the turnstile
Required skill(s): Climbing, precision walking
Notes: Climb the ladder near the entrance to the top of the ticket booth. Either climb or jump to the awning from the top of the ticket booth. Walk along the awning to the bridge that leads to the other side of the hall. Carefully cross the bridge to the other side, then follow the awning toward the turnstile. The Rainbow Dream tie is at the end.

Name: Shark Attack
Description: The only time you’ll want a shark around your neck!
Location: Inside the vending machine near the whale exhibit.
Required skill(s): Object manipulation
Notes: There is a vending machine to the left of the whale exhibit, just underneath the stairs near the entrance to the shark tank area. Pressing the C button will not vend the tie, so you must stick Octodad’s tentacle up into the machine to grab the Shark Attack tie.

Name: Coral
Description: Diploria strigosa?
Location: In a locker in the employee-only area on the way to the top of the shark tank
Required skill(s): None
Notes: This tie can only be collected during a normal playthrough of the game, as the area it is in is locked during free play. After finding Tommy, Stacy, and Scarlet, Scarlet will ask to meet at the top of the shark tank. On the way, Octodad passes through a locker room. The Coral tie is in the top area of the leftmost locker among the group of lockers to the left of the oxygen tanks.
World of Kelp

Name: Green Paisley
Description: Also called Boteh, an ancient pattern from the Sassanid Dynasty!
Location: On an otter standup in the area where Tommy kicks urchins at kelp.
Required skill(s): None
Notes: This tie is located after the second tie chronologically. In the room where Tommy kicks sea urchins at kelp and Octodad must block the urchins using a cardboard cutout otter, a different otter standup, the largest one to the right of the entrance, is wearing the Green Paisley tie.

Name: Sunrise
Description: The wearer of this tie will always wake up on time!
Location: Above the sun wheel in the second area of the World of Kelp.
Required skill(s): Climbing, jumping
Notes: After Octodad completes the sun wheel running activity, Tommy will hit a button that makes the wheel spin quickly. Ride the wheel and use its momentum to launch to the top of it. Sometimes, Tommy will not hit the button, in which case, the fan on the ground can be used to jump to the top of the sun wheel. The Sunrise tie is on the wall above the wheel.

Name: Octopus Pattern
Description: Nobody suspects a thing!
Location: On the giant octopus jungle gym at the end of the World of Kelp
Required skill(s): Climbing
Notes: After the first bridge with breakaway parts, there is a platform filled with kelp. Walk toward the back of that platform and reach up to find the Octopus Pattern tie.
The Deep Sea

Name: The Question
Description: OR IS IT?
Location: On the frame of the leftmost portrait in the first room.
Required skill(s): Keen eyes
Notes: In the first room, manipulate the left spotlight. Shine it toward the leftmost portrait. The Question tie is sitting on the bottom of the frame.

Name: Disco Floor
Description: This tie will never, ever go out of style!
Location: In the box of pink glowsticks, in the utility closet behind the Snugglefish.
Required skill(s): Keen eyes
Notes: In the back-right area of the Snugglefish room is a utility closet filled with boxes of glowsticks as well as the plugs for the lights. In the box of pink glowsticks is the Disco Floor tie.

Name: Pink Plaid
Description: Currently in vogue with cherry blossom lumberjacks
Location: On the Snugglefish’s dorsal fin.
Required skill(s): Climbing
Notes: After plugging in the lights in the closet, shine the numbered lights at the corresponding numbered parts of the Snugglefish. Once the lights come on, use its mouth and fins as stepping stones to climb on top of its head. The Pink Plaid tie is on the front of its dorsal fin.
Amazon Arcade

Name: Fish Pattern
Description: What kind of fish are these supposed to be, anyway?
Location: On the big rock to the right of the Fish Toss game.
Required skill(s): Climbing
Notes: Climb onto the gate leading down to the piranha tank, then climb from there onto the rock to the right of the Fish Toss game. The Fish Pattern tie is sitting on top of the rock.

Name: Green Stripey
Description: A fresh tie with just a hint of mint
Location: Inside the Caiman Jaw Claw game, toward the back right.
Required skill(s): Navigating tight spaces
Notes: The claw doesn’t drop down far enough to grab the tie, so Octodad must squish into the prize hole and physically go inside the game to grab the Green Stripey tie. Don’t spend too much time inside; the other arcade-goers don’t appreciate it.

Name: Heart Pattern
Description: Did you know that octopi have three hearts?
Location: In a prize tree, after completing all ten arcade games.
Required skill(s): Object manipulation
Notes: To progress in the level, Octodad is required to complete seven of the ten arcade games, giving the prizes to Scarlet as he goes. If Octodad completes all ten arcade games, the Heart Pattern tie will drop with the last stuffed animal. Some of the arcade games are difficult, but many of them can be cheated by climbing into them.
Sea Legs

Name: Tentacle
Description: Once you put this tie on, it might never come off!
Location: In the crate on deck of the ship.
Required skill(s): Keen eyes, stealth
Notes: On the area of the ship before the captain’s quarters are a few wooden crates and several engineboatmen. Inside one of the crates is the Tentacle tie. It is much easier to obtain after acquiring the captain’s disguise, which lets Octodad walk freely among the humans without fear of being recognized.

Name: Anchors Away
Description: Don’t let anything drag you down!
Location: On the edge of the port side of the ship, after the control room.
Required skill(s): Keen eyes
Notes: After exiting the helm through the left, go down under the platform and toward the back of the ship. The Anchors Away tie is on the edge of the ship, camouflaged with the grey railing.

Name: Rising Tide
Description: With this tie, you’ll always keep your head above water!
Location: At the top of the crane near the front of the ship.
Required skill(s): Climbing, precision walking
Notes: Before meeting Scarlet, climb up the back of the crane to the top. The Rising Tide tie is waiting near the top. Completing this will sometimes destroy the crane, causing the scripted event at the end of the level to be impossible to complete. Quit out and restart if this happens.
Silent but Dadly

Name: Pi Tie
Description: Behold the power of PI!
Location: On a display case in the gift shop, near the marine biologist.
Required skill(s): Stealth
Notes: Octodad can get fairly close to the marine biologist, as long as he stays out of line of sight. Locate the Pi Tie on one of the displays near the biologist, sneak up using the display as cover, and grab it.

Name: Winter Season
Description: For wearing on the holiday of your choice.
Location: On top of the urinal stall nearest to the door in the men’s room.
Required skill(s): Climbing
Notes: Using the urinals and the stalls, climb up to the top of the urinal nearest to the door in the men’s room to find the Winter Season tie. Alternately, find the tie’s shadow, stand underneath it, then reach up and grab.

Name: Tropical Night
Description: The wearer of this tie will always get a full night’s sleep!
Location: In the kelp crate outside of the World of Kelp.
Required skill(s): Keen eyes, stealth
Notes: Outside of the entrance to the World of Kelp are several crates with marine biologists around them. Ransack the crate with pieces of kelp inside of it to find the Tropical Night tie. This tie is easier to collect after acquiring the shark suit so the biologists don’t recognize Octodad.
Hot Concessions

Name: Sky High
Description: Get your head out of the clouds!
Location: Above the rafters, on the wall to the front-left.
Required skill(s): Precision walking
Notes: After climbing up into the rafters, Stacy calls to Octodad from the back of the room. Before going to Stacy, walk to the front-left corner of the room. The Sky High tie is on the wall. In this area, the rafters do not collapse.

Name: Inferno
Description: Comes with a built-in neckwarmer! Do NOT get this tie wet…
Location: On a table across the room from where Octodad falls from the rafters.
Required skill(s): Stealth
Notes: After Stacy puts the fire out and Octodad is back on the ground floor, walk to the other side of the room, keeping cautious to stay out of the Chef’s line of sight for too long. Every so often, he will get distracted by attacks from Tommy and Stacy, so those are good opportunities to move. The Inferno tie is lying in plain sight on a table at the other end of the room.

Name: Zen Tie
Description: The true tie was within you all along.
Location: On a pillar near the Inferno tie.
Required skill(s): Stealth
Notes: From the Inferno tie, walk to the right to the closest pillar. The Zen Tie is hanging on this pillar. Keep watching out for attacks from the Chef along the way.
Toilet and Trouble

Name: Zebra Stripes
Description: Is it black with white stripes or white with black stripes?
Name: El Tigre
Description: It’s the eye of the tiger!
Name: Pie Tie
Description: It even smells like cherry pie!
Location: At the exit of Toilet and Trouble
Required skill(s): Climbing
Notes: Toilet and Trouble is a secret hidden level that can be bypassed completely. To access it, enter the middle toilet stall in Aquatic Fun Center, step both foot tentacles into the toilet, then flush yourself down the toilet. This only works when playing through the main story; doing it in Free Play mode will just exit the level without unlocking Toilet and Trouble. However, once Toilet and Trouble is unlocked, it is available in Free Play.
Toilet and Trouble flattens gameplay down to just two dimensions, but despite that it features the most difficult platforming in the game. Players must expertly climb, hang, swing, and jump to reach the top of the level. At the top, just in front of the exit are all three ties. The Zebra Stripes tie, El Tigre tie, and Pie Tie are all waiting as the reward for this arduous trial. Good luck!


