Hero Academy is my new digital crack but it currently only has a tutorial consisting of screenshots and text, and no way to try out a game against an AI opponent. This might make some players a bit wary of trying it out for the first time against a random stranger, if you don’t have a friend with whom you can ease into the game.
After suffering a number of defeats in a bunch of games that ranged from half a day to week-long bouts, I’ve learned some of the basics and general strategies the hard way. In order to help you get started and better prepared to jump into a match, here are some tips and tricks for Hero Academy.

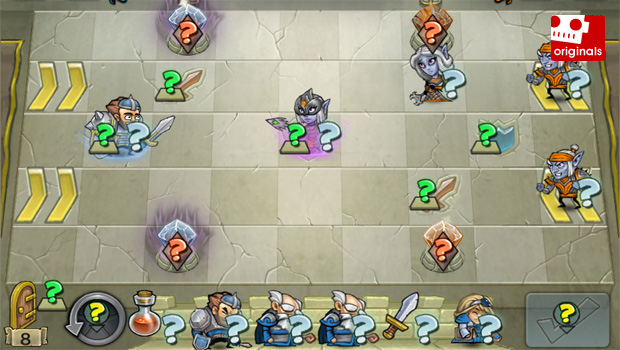
The Basics
First off, how does Hero Academy work? There is a 9×5 field of squares where the goal is to destroy the opponent’s crystal (or crystals) or to destroy all of your foe’s available units, while not suffering the same fate yourself. You can perform five actions per turn, which can consist of moving a unit, summoning a unit, upgrading a unit with an item, using an item, or performing an attack. At any time before you submit your actions for the turn, you can press the Action Point circle in the bottom-left to reset all your actions. There’s no limit to how often you use this feature, so use it as much as you want.
On the game board you’ll see special squares called Premium Squares that are indicated by a red sword, a blue shield, and a purple crystal. As long as a unit is standing on top of one of these tiles, it receives a special bonus. The sword (Offense Boost) adds 100 damage to a unit, the shield (Defense Boost) increases the Physical defense by 20%, and the crystal (Assault Boost) adds 300 damage to any attack on an opponent’s crystal. You need to stay on these squares to get the bonus, so don’t move to one and then move onwards thinking you have gained a buff.
If your unit is knocked out during the opponent’s turn, it will remain on the ground as a corpse until the end of your own turn. Some of the Dark Elves units can use any incapacitated units, regardless of who owned them, to summon minions from their corpses or to eat them for a buff. If that poses a problem, you can simply wipe an incapacitated unit from the field by moving a unit on top of it or by using a special item that destroys corpses in a 3×3 grid — just remember it will cost you another precious Action Point to clear these corpses.
The main idea behind most basic strategies is to use the Premium Squares to your advantage, maneuver your units in a tactically beneficial way, get rid of enemy units before they become too powerful, and deal damage to your opponent’s crystals when you can get away with it. With a turn-based system, no way to look at what your opponent has in store, units with different types of attacks and attack ranges, and only five actions to perform each turn, it can quickly become very challenging to anticipate how the next round will go. After a game or two, however, you’ll get the hang of the basics soon enough.

Managing your “hand”
In the bottom-left of the screen you see a door with a number below it. Consider this to be your “deck” if you were playing a card game. Whenever you summon a unit from your “hand” or use an item, you’ll receive new units and items (called “tiles” in this game) from your deck after you submit your turn. You can’t see what new tiles you’ll receive the next round, so random luck can play a role in how a match progresses.
In the unfortunate event you end up with a hand without units when you are in desperate need of them, you can use an Action Point to move a currently useless item onto the door icon and put it back in your deck. After submitting your turn, you might get a better item or unit in return. Or you might not. If you do swap something, your opponent will get a “Swapped a tile!” message to indicate that you did.
You have to keep in mind that you have a limited amount of units and items in your deck, though. If the door counter reaches zero near the end of a match, and if your hand contains no more units and is no longer full, there’s no point in trading back an item in the hopes of getting a unit in return. You’ll just get that same item back from your deck.
This also means that your opponent might run out of units at some point. This is where you have to be really careful. Just because you ran out of units and your opponent is no longer summoning units to the field, that doesn’t mean he or she has actually run out of units. A good tactic is to keep a unit in reserve to lure your opponent in right at the end, and then summon the unit to destroy his (potentially) last few units in a quick surprise strike.

Damage types, equipment, and information
Some units will deal Physical damage while others deal Magical damage. When you use the ? button in the top-right corner to get information about a unit, you can check out the unit’s health state and resistances. Alternatively, you can take a closer look at the details of some consumable items that deal direct damage, or equipment items that can boost Health Points, Damage output, Physical resistance, and Magical Resistance.
As you might expect, 40% Physical resistance does nothing to make a Magical attack hurt any less. Try to keep this in mind when you use Action Points to move a unit back to a Defense Boost tile in order to keep it safe from harm, because if it is likely to be hit by Magical attacks in the next round it won’t do you any good.
You can also simply tap and hold down a finger on the field to get a direct display of unit health and equipped items on top of all the units. Tapping on your opponent’s portrait will show you how many tiles he has left, both in his hand and in his deck combined, indicated by a “reinforcements” counter. If this counter drops below 7, that means that all remaining tiles are now in the opponent’s hand. If your foe is no longer summoning units at this point, while you have a clear unit advantage, he or she might be out of units. If the game is still pretty even, however, your opponent might be saving up a last-ditched surprise attack.
Chatting, and resigning a game, and doing a rematch
The Chat button in the top-right corner is hard to miss and works like texting. So far I’ve only met friendly and helpful people in games. If you’re wondering about anything or if an enemy move made no sense to you in terms of damage, don’t hesitate to ask your opponent for information or advice — they will probably won’t mind answering your question.
If all is lost, then you can choose to resign instead of dragging the game on for an extra few hopeless turns. The resign option is somewhat hidden away under the gear icon on the top-left of the screen so you don’t accidentally tap it. After resigning a game, it can happen that instead of getting the Rematch button to appear you’ll only see the Submit Turn button. If that happens and you do want a rematch, just back out to your list of games after resigning, load up the resigned game again, then tap the Rematch button that should now be there in the bottom-right. It’s faster than manually inviting the same person to a new game.

Teams: The Council
The typical human fantasy team, The Council is pretty straightforward to use and it’s the one race you get for free. Let’s look at the units and items you’ll use by playing The Council.
Units:
Knight
- Health: 1200
- Movement range: 2
- Attack range: 1
- Damage: 200 Physical
- Physical resistance: 20%
- Magical resistance: 0%
The Knight is your tank. Unless you have to, you’re better off putting him on a purple crystal square to support the attack of other units on the enemy crystal than to use him as an attacker. With 1200 HP and 20% Physical resistance, he’ll easily survive an entire round of standard physical attacks. Because his attacks also knock back an enemy unit by one tile, he is a waste of Action Points when using him on the offensive unless you target an enemy unit that can’t be knocked back any further. When beefed up with a Helmet and a Shield item, the Knight is a pain in the ass to get rid of a crystal Assault Boost square, so by all means put him there.
Archer
- Health: 800
- Movement range: 2
- Attack range: 3
- Damage: 300 Physical
- Physical resistance: 0%
- Magical resistance: 0%
The Archer’s 300 damage and 3-tile attack range make her a very strong and mobile unit to kill enemy units or do hit & run attacks on the enemy crystal — especially when she’s beefed up with a Sword item and you have another unit on a crystal Assault Boost square. It also makes her an easy target if any of your opponents has ever lost a game to a pesky Archer. Her weakness comes from melee, where she only deals 50% damage.
Keeping her in proximity to a sword square can help you dish out a large amount of damage to an opponent who is gradually moving his offensive line forwards, although most people seem to know they shouldn’t end a turn 3 tiles away from your nearest sword square if there is an Archer nearby. If you can lure a stronger unit in range by sacrificing a weaker unit of your own, though, it can be worth doing so.
Wizard
- Health: 800
- Movement range: 2
- Attack range: 2
- Damage: 200 Magical
- Physical resistance: 0%
- Magical resistance: 0%
The Wizard might look like a secondary target if you’re facing him due to his 2-tile attack range and relative weakness — and sometimes he should be — but his chain lightning attack can become devastating if you aren’t careful with your unit placement. The lightning attack jumps to two other targets and the targets it jumps to is random, but it appears to consistently go to the same targets within one turn. Resetting your Action Points to try and reach other targets from the same spot has no effect. The second target will receive 75% damage while the tertiary target only receives 50% damage.
One of the worst scenarios to be in is when you face a Wizard who has been beefed up, and who is supported by a unit holding the ground of a purple crystal square. This allows the Wizard to deal easy damage to your crystal(s) whenever you have units surrounding it. It also forces you to fan out and either kill the wizard, or kill the unit holding the purple Assault Boost square. Being forced to choose isn’t the best position to be in, especially if you have to use one or two Action Points to reach either target and can’t kill any of them in one turn. If there happens to be a beefed up Knight on a crystal square and killing the Wizard doesn’t allow you to wipe him from the field in the same turn, you’re in for a world of pain if your opponent can resurrect the Wizard again the next turn.
Cleric
- Health: 800
- Movement range: 2
- Attack range: 2
- Damage: 200 Magical
- Physical resistance: 0%
- Magical resistance: 0%
The Cleric is your trusty healer who heals damage and resurrected incapacitated units. Her heals and revives are a bit stronger than the Dark Elf equivalent — the Priestess — but she can’t heal from 3 tiles away like her counterpart. Like any unit, you can use her as an attacker if you have to, but she’s better off behind the front line as a support character you can move in quickly to resurrect a unit. If you can, keep her within healing range of a unit who is likely to die the next round. That way you can, for instance, resurrect a powerful unit who wasn’t wiped from the field entirely and give it four Action Points to deal four attacks, or you can heal it for one extra Action Point while leaving three points available to deal damage.

Ninja (Super Unit)
- Health: 800
- Movement range: 3
- Attack range: 2
- Damage: 200 Physical
- Physical resistance: 0%
- Magical resistance: 0%
The Ninja is The Council’s super unit, meaning you won’t see him appear in your hand very often. He acts like a more mobile Knight who also has a ranged attack, but he also has a special ability that lets him trade places with any unit on the field. This doesn’t only allow him to move to other side of the field almost instantly, but also lets you trade a low-health unit to the back so it can heal up in safety.
Another special ability is that he does twice his regular damage when doing a melee attack. At the moment this isn’t in the unit’s description because of a text bug, so if you’ve been playing Hero Academy and wondering why he does so much damage, there is your answer. The Ninja starts out with one sword and gains another one if you give him a Runemetal Sword item. Although the Sword does add 100 Power to his base attacks (and thus +200 damage if you do a melee attack), the Ninja’s dual-wielding on the field is purely an aesthetic effect. He will do double melee damage regardless of the amount of swords he is holding.
This is a unit that you’ll have to try out a couple of times for yourself to get the hang of him, but he makes for an imposing figure on the field and is insanely powerful up close, so expect your opponent to try and take him out as soon as possible.
Items:
Runemetal (Sword)
The Sword item increases a unit’s Power by 50%. That means it increases the unit’s damage output regardless of whether it does Physical or Magical damage. How best to use this can depend on a couple of factors. If you have 3 Action Points left to deal damage, it doesn’t matter if you give a unit a Sword and let it attack twice or if you just let it attack three times in a row. If you do give the unit a Sword in one round that means you don’t have to use an Action Point to equip the unit in the next round. Of course, your opponent will see your unit become more of a threat, and prioritize it for demolition.
Dragonscale (Shield)
The Shield adds 20% Physical resistance to any unit. Stacks well with the Knight if you are facing Physical attackers.
Shining Helm
The Helm adds 20% Magical resistance and 10% max hitpoints to any unit. Easy, isn’t it? The Shield, Sword, and Helm items stack on top of each other, but you can’t give a unit two items of the same type. The individual items don’t stack.
Revive Potion
Heal any unit for 1000 hitpoints, or revives a unit. Save this for when you really need to heal or revive a beefed-up frontline attacker.
Supercharge (scroll)
Using the Supercharge on a unit will triple its damage output for one attack, acting as a temporary item that disappears after an attack — so you can’t stack them. The Supercharged unit will also attack with a flashy animation to rub it in some more. This can be a killer surprise move against an opponent’s unit or super unit that had been gradually beefed up over a number of rounds, or to deal some heavy damage on a crystal. Try to combine it with a unit like the Ninja who can quickly get to an Offense Boost square to do even more damage, but be careful not to leave your attacking unit defenseless at the end of the turn. You should always be wary of an incoming Supercharge attack if your opponent is moving units in a way that doesn’t make much sense when they can’t kill your unit without a Supercharge.
Inferno
Deals 350 Magical damage in a 3×3 area and wipes any incapacitated units from the field that are caught in the blast. Inferno is a good way to get rid of strong units who would otherwise be resurrected during your opponent’s turn, if you can’t or don’t want to risk moving on top of their corpses with a unit.

Teams: Dark Elves
The Dark Elves are an in-app purchase ($0.99 at the time of writing) and have a very different play style than The Council. First and foremost, it’s because of their life leech ability that lets them heal by doing damage, reducing the need to spend Action Points on healing actions. Besides that, their units all have abilities that distinguish them from their human counterparts.
Void Monk
- Health: 800
- Movement range: 2
- Attack range: 1
- Damage: 200 Physical
- Physical resistance: 20%
- Magical resistance: 20%
The Void Monk is basically a weaker Knight with some good default resistance out of the box. He’s not beefy enough to use as a tank, and not strong enough to use as a primary attacker without some upgrades. However, his attacks will also hit units and crystals in the squares next to and behind your target, which makes him a bit of a close range area-of-attack unit. There tends to be a unit next to an enemy crystal most of the time, so the Void Monk can be useful to deal bonus damage to a crystal when you’re on the offensive.
Impaler
- Health: 800
- Movement range: 2
- Attack range: 2
- Damage: 300 Physical
- Physical resistance: 0%
- Magical resistance: 0%
A bit of a weird unit, the Impaler pulls an enemy one tile closer — a bit like a reverse Knight knockback. With 300 Physical damage, she is one of the major damage dealers for the Dark Elves. She’s also good at pulling an enemy from a Premium Square if you need to. For example, if an enemy is trying to hold a Defense Boost square, you can pull it off it and then pummel it with melee hits. Alternatively, you can pull an enemy from an Offense Boost square, move onto it yourself, and use the damage bonus to both kill the enemy unit and heal yourself in the process.
Necromancer
- Health: 800
- Movement range: 2
- Attack range: 3
- Damage: 200 Magical
- Physical resistance: 0%
- Magical resistance: 0%
The Necromancer’s range can become very annoying when he has a sword item power up, because he’ll be able to knock out many units with just three Action Points. Because of his long range, it’s easy to try and stay away from him when you are facing a Necromancer. Doing so also means you’ll have a hard time to kill him in one turn, so you have to wage the pros and cons when trying to deal with him before he gets upgraded too much.
What’s worse, he can summon a Phantom minion out of a corpse to keep the other person from resurrecting that unit. These Phantoms only have 200 hitpoints and deal 100 damage so they aren’t a major threat, but they will always tempt you to waste Action Points on killing them. Sometimes you can get a free kill on one of these Phantoms if you are on the defensive; otherwise they are most often best ignored in favor of more dangerous targets.
Phantom (Summoned minion)
- Health: 200
- Movement range: 3
- Attack range: 1
- Damage: 100 Magical
- Physical resistance: 0%
- Magical resistance: 10%
Like described above, the Phantom is not much of an attacker but more of a distraction support unit. Worth pointing out is that you can’t give him any equipment items, so don’t expect to do any surprise attacks with a Sword-wielding Phantom. What you can do, however, is put him on the crystal Assault Boost squares. It will take a typical Magical damage dealer two Action Points to kill him, thanks to his 10% Magical resistance, and the wastefulness of the act might keep an opponent from actually getting rid of your Phantom. You can use that to your advantage to deal some extra damage to the enemy crystal if your opponent is indecisive.
Priestess
- Health: 800
- Movement range: 2
- Attack range: 2
- Damage: 200 Magical
- Physical resistance: 0%
- Magical resistance: 0%
The Dark Elves healer can heal and resurrect from 3 tiles away so you can keep her a bit further to the back if you want to. When the Priestess attacks, she also weakens the target’s damage output but only for one action. So if one of your units is weakened, only its first attack will do less damage and after that it will clear the effect on your unit. Some players will try to avoid using a weakened unit because they think it is permanently weakened and therefore useless, so try to use that to your advantage until they figure out how to get rid of the effect.

Wraith (Super Unit)
- Health: 650
- Movement range: 3
- Attack range: 1
- Damage: 250 Magical
- Physical resistance: 0%
- Magical resistance: 10%
The Wraith is another really weird unit, but a very powerful one if used correctly (or if you are lucky with circumstances). He starts off weak, but his movement range makes him very mobile for hit and run attacks. The key to using the Wraith is to make him eat corpses which increases his maximum hit points and damage output, and his Magical attacks make him a good Knight and Archer killer. After eating 3 corpses, the Wraith will no longer get benefits from eating corpses but you can still consume them to clear them from the field.
If you are unlucky and the enemy keeps a close formation well away from your Wraith, it can be hard for him to eat corpses. When you keep him away from the enemy, it takes too many Action Points to eat a corpse and get back to safety. You can try to lure the enemy in, but in many cases it’s as much a matter of luck as it is a matter of facing an inexperienced opponent. Another tactic is to summon him on top of any corpse on the field, which is also not listed in the unit’s description. Once you do beef him up with corpses and some equipment, he can become a fearsome powerhouse. Try to kill him while he is weak.
Items:
Soul Harvest
This deals 100 Magical damage of damage to enemies and crystals in a 3×3 grid, but more importantly it increases the maximum health of all your own units and revives your units even if they are outside of the 3×3 area of effect. Basically, it drains health to give it to your own units. Soul Harvest is very useful when you are out of Priestesses and when your opponent thinks you won’t have any way to resurrect your most powerful unit that just got killed. Resurrecting a powerful unit this way allows it to go on a damage rampage for another turn, and heal itself in the process through the Dark Elves life leech effect.
I couldn’t figure out the exact formula for the amount of hitpoints it adds to your units in return for the damage it deals, because I haven’t been able to test out all the variations yet. However, 80 damage gives you 10 extra hitpoints and 780 damage gives you 45 hitpoints. You’re not likely to deal a lot more damage than 800 (400 on a crystal if you have a unit on an Assault Square and 4×100 to 4 units in the area), so don’t expect this item to give you a huge amount of extra hitpoints. The extra bit does help a lot, as it may now cost an opponent one extra Action Point to kill one of your units.
Soulstone
Adds 10% max health and double the life leech effect, making a strong unit more self-reliant as long as it keeps doing damage. It also makes your opponent’s life a little more difficult when he or she has to do the math for the possible amount of life leech health restoration in a next round or two.
Mana Vial
Heals a unit for 1000 hitpoints, like The Council’s Revive Potion, but instead of reviving a unit it adds 50 hitpoints to a unit’s maximum health. That doesn’t sound like a whole lot, but it can add up as you beef up units and it makes a 800 hitpoint unit survive four 200 damage attacks. It’s easy to forget about the Mana Vial because it shows up to the left of a unit when you tap and hold the screen. Try to use that to your advantage if your opponent is doing a lot of attacks that never actually wipe your units from the field. He or she might not be using the ? button to check on the actual health of units.
Runemetal (Sword)
The sword item increases a unit’s Power by 50%. It’s the same item The Council has access to.
Shining Helm
The helm adds 20% Magical resistance and 10% max hitpoints to any unit. The same one as The Council’s item. The Dark Elves don’t have a Dragonscale shield for Physical resistance, but instead they use the Soulstone and Mana Vial for extra hitpoints, plus the life leech effect to keep their health up. A Dark Elf unit can have all four of these items as equipment at the same time.
Supercharge (scroll)
Using the Supercharge on a unit will triple its damage output for one attack, and is once again the same item The Council has access to. Try it out with a Wraith to free up an Action Point to eat a corpse in one turn, or pull an enemy off an Offense Boost square with your Impaler and move on top of it yourself before using the Supercharge and moving to safety again. It hurts.

General strategies
I wish I could give you some advanced strategies, but the truth is I’m not very good at Hero Academy. In fact I’m pretty awful. The best advice I can give you at the moment is to check the above details for a better idea on how to use any one unit, and then use that knowledge when combining units in a tactical encounter. There are still some general things to keep in mind that might help you get started, though.
If you end up with a field that only has one crystal, it is worth sacrificing a unit to deal as much damage to that crystal as you can. In these maps, it can become a fight for the Assault Squares (the purple crystal tiles) while long-range damage dealers harass the enemy crystal.
When you are nearing a counter of 10 or below in your “deck,” start thinking ahead towards the last couple of turns. You might run out of units to summon pretty soon, so don’t sacrifice them unless you can trade a weaker unit for a stronger enemy unit in one turn. If you only have one unit on the field and five items in your hand, just keep that unit to the back, beef it up, and trade useless items in the hope you’ll get some more units. When both players have seemingly run out of units, it can also be very helpful to have a surprise Ninja to pull out of your hat. Because the Ninja is also a very powerful melee damage dealer, you might instead want to use him in the mid-game to tip the balance in your favor and clear the field of enemy units. Alternatively, use him to deal heavy damage to a crystal and then teleport the hell out of there.
After a couple of rounds — especially if you lose them — you will have had a lot of “if only I had done this” moments. Remember those moments and learn from them. It sounds like the most basic of advice, but you’d be surprised how easy it is to be tempted to try something else when you know you shouldn’t. One of the main reasons why I’m still terrible at the game is that I keep trying out different tactics instead of learning from my mistakes. Sometimes you learn something new from it. Sometimes you don’t. Try to stick with the lessons you learned when you were beaten in the harshest possible way.
You also have to get a feel for the early, mid, and end-game sections of a match. In the early game, you and your opponent are still trying to set up and position their forces. If you are lucky, your opponent will get only a few units in his hand at first, and tries to attack you. In that case you might be able to get a few easy kills and use the momentum in the mid-game.

The mid-game is more about beefed up units that can singlehandedly win the game if you aren’t careful. It can be hard to anticipate which unit is going to be your downfall, and even harder to know how much distance you should keep. Distance means safety, but it also means it becomes hard to knock out one unit and remove its corpse. The mid-game almost always features some healers, so removing those corpses becomes important. If you don’t, you might spend 5 Action Points on a knock-out only to have your opponent resurrect and heal that unit in the next round. What’s worse, it leaves you with 5 wasted Action Points and a unit in a potentially more vulnerable position. This is also the stage in the game where you can use your Ninja to teleport and clear out a lot of enemy units, as both players will likely each have 3-4 units on the field.
The end-game is all about planning ahead and positioning. You’ll want to kill as many units as possible while incurring as little damage as possible, even if that means doing one attack and backing off to a Defense Boost tile. Another tactic is to go straight for the crystals throughout the entire game, but the investment of Action Points in crystal damage means you can’t use those points to deal damage to units.
In the end it all depends on the type of player you are facing, and a good amount of luck. Luck doesn’t make or break the game, however, so if you think the enemy is having a few turns of bad luck in his hand then go for the kill before he pulls out the big guns.
Finally, always keep the Action Points in mind at all time. Calculate if an enemy can kill you, while accounting for possible damage boosts from items, in the amount of Action Points available. You can’t anticipate every possible move, but simply doing the math for the most likely moves can save you from losing a unit that would’ve survived it if it was just one tile further to the back.


