Oh, and without a horse, or running even
Beating Elden Ring without rolling is impressive. Beating it without jumping is impressive too. And same for running. Or using a horse. How about we add all that together into one run? That’s just what Iron Pineapple did.
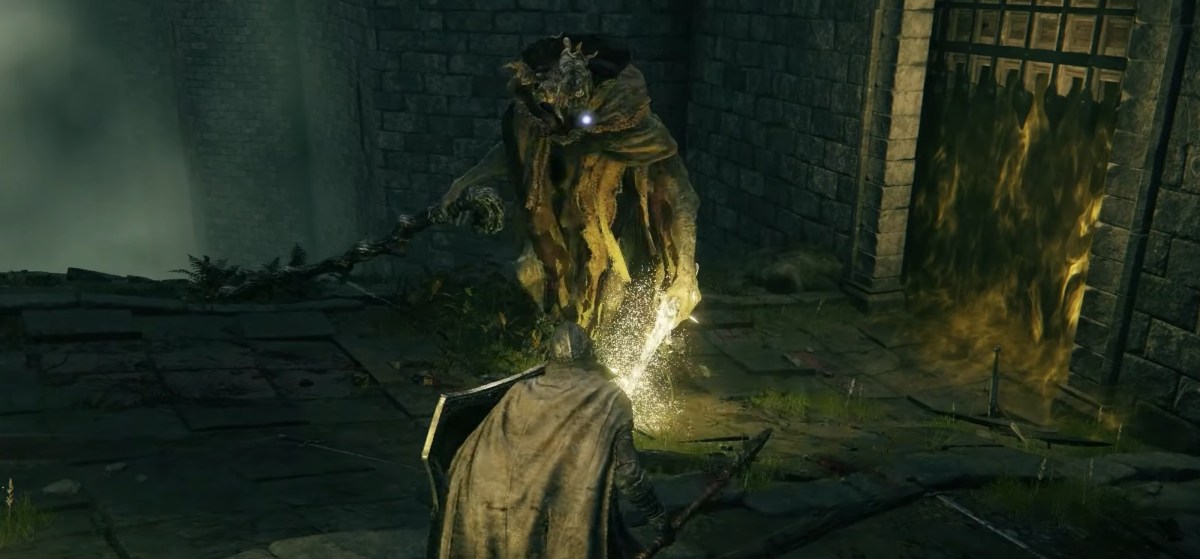
Assisted by the “max equipment load” mechanic, they were thankfully able to curb any accidental rolls, jumps, or runs. So as most players know, there’s three “weight states” in most Souls games. But you can actually go beyond that with “overloaded,” which prevents running, dodging, and jumping: on top of a stamina penalty. I’m got massive Dark Souls III without walking vibes from this run.
I’ll break down this particular challenge below, but note some minor spoilers (mainly names):

Here’s how the Elden Ring without rolling run went:
- They chose the Vagabond class as they had a great starting stat spread for the run.
- To instantly push themselves past the equipment load (which isn’t possible immediately), they edited two heavy weapons into their save, but didn’t use them.
- Iron Pineapple decided early to not use the horse at all as an extra challenge (unless it was “necessary to progress”), despite it “not breaking the rules” of the original intent of the run.
- It took them five tries to clear the first boss, mainly due to a stage two snag.
- They took the side entrance around the castle, then found out they needed to jump to use it, so they ended up using the tough main entrance.
- After downing the second boss, they got the Green Turtle Talisman to help with the stamina issue.
- They picked up both sides of this medallion to sleaze into the Caelid castle, which had a ton of enemy fire at the front gate that was hard to avoid without running or rolling.
- Then they grabbed the gold needle and finished that questline by cheesing the sideboss with poison arrows.
- To beat the main Caelid region boss, they used the “quickstep” ability from a dagger, then cheesed the boss.
- The Greatshield Talisman helped their run greatly, which they picked up by walking up the back of a carriage on the side of it.
- They walked up the dragon wing and were able to reach the next set of bosses in the capital without issue (and without having to jump), surprisingly: then used scarlet rot arrows to seal the deal.
- Afterward, they went beneath the capital to try and secure the Fingerprint Stone Shield, but weren’t able to get it without jumping; and needed to use the horse one time to briefly jump to enter the next zone (both of which were later neutralized by using the ground slam ability, more on that in a moment).
- To beat the big snow boss (of which phase two was “pure pain”), they went on a detour to get the Bull-Goat armor, and used scarlet rot arrows to assist in the kill, as well as summoning Alexander when phase two started.
- Taking on the dual boss fight, they used the classic sleep arrow strategy.
- Following that, they used to used the ground slam ability to slightly jump off the ground to reach a required critical path ledge [and went back to get the Fingerprint Stone Shield].
- From there, the Fingerprint shield made the run much easier, given how powerful it is: they beat the next boss with warming stones to counteract the blood health drain.
- The last four bosses were finished in quick succession, using the Fingerprint shield, the Great Stars great hammer, and the Prayerful Strike ash of war [Quickstep was used on the final boss].
- To show off, they cleared the infamous optional boss.
As usual, Iron Pineapple’s commentary adds a new layer to the challenge itself. They point out that there’s actually a soft “recovery roll” when you’re knocked down (by tapping dodge), which isn’t technically a roll roll. Blocking is absolutely key in this run. Note that without those sweet dodge roll iFrames you literally cannot avoid some attacks, and in many cases, you can’t even backtrack/retreat to drink a potion: so you have to chug-tank and basically pray. Using a bow to pick off enemies was also crucial in swarm situations.
If you want to check out the entire video below, it’s only 35 minutes: most of the fluff/walking is edited out!